
iOS Remote Pushnotification
1. Điều kiện tiên quyết
- Tài khoản apple developer
- Được assign vào repo
- Xcode
- Ruby 2.7.6
- Macos
2. Đối tượng đọc
- Stage Owner
- Customer Success Engineer
- Customer Success Specialist
3. Nội dung chi tiết
Bài viết hướng dẫn test Remote Pusnotification để hiển thị màn hình Incoming call, và cho Alert
3.1. Lưu ý:
Có 2 loại token cho Pushnotification
- Loại 1 : Device Token cho Voip
- Loại 2 : Device Token cho Alert
Chức năng call hiện tại đang dùng Callkeep, Callkeep sử dụng pushkit để handle incoming call, bám sát doc của callkeep để setup "Pushkit"
- https://github.com/react-native-webrtc/react-native-callkeep
Đối với iOs chúng ta phải build bằng thiết bị của Apple (Mac chip m1,m2 ....v.v hoặc tìm giải pháp để build và cicd sử dụng cloud)
Đối với Token cho Voip không thể sử dụng qua đường Firebase Sdk mà sử dụng API
Đối với Token cho Alert chúng ta có thể config thông qua cả Firebase Sdk và API
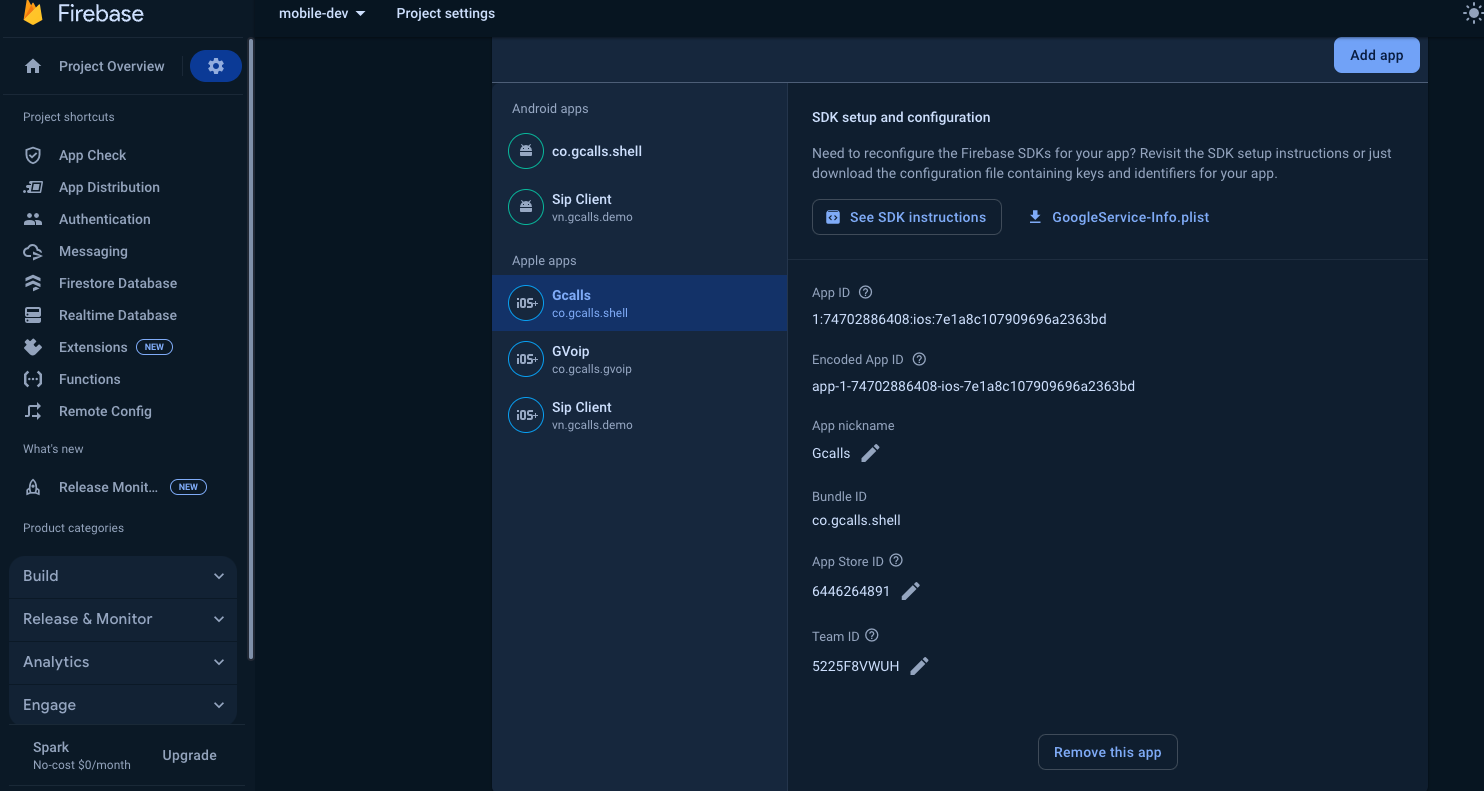
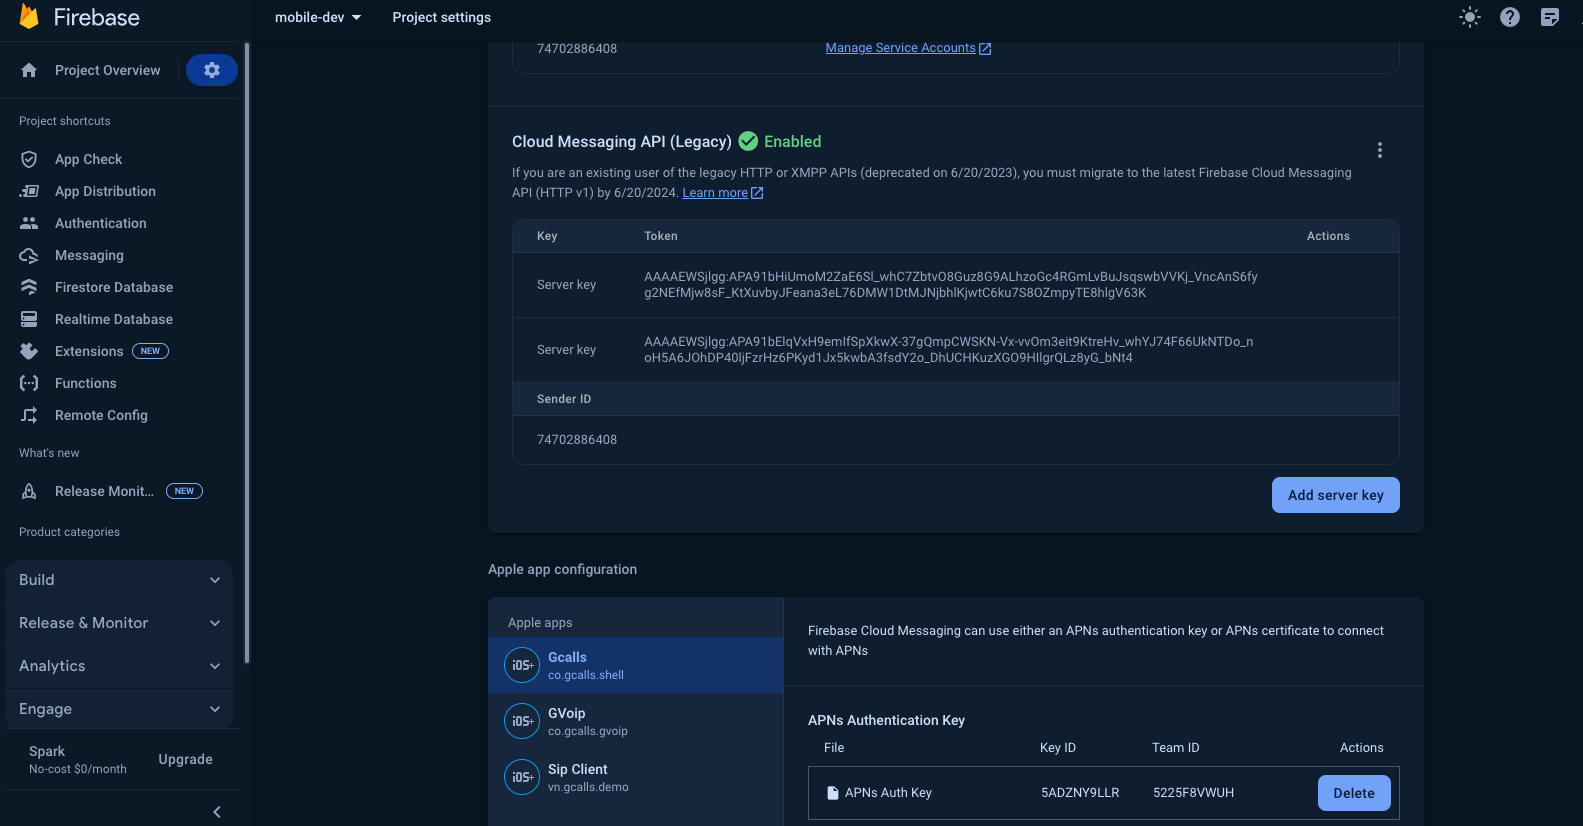
Nếu dùng Token cho Alert thông qua Firebase nhớ Upload APNS Cer lên Firebase trong Project settings -> Cloud Messaging, và tải GoogleService-Info.Plist từ Firebase trong Project settings -> General và add vào Xcode
- APNS Cer sẽ lấy được từ bước 3
- GoogleService-Info.Plist sẽ lấy được sau khi tạo 1 iOs app để sử dụng Remote Pushnotification Service trên Firebase
3.2. Tạo Certification và chuẩn bị môi trường Test
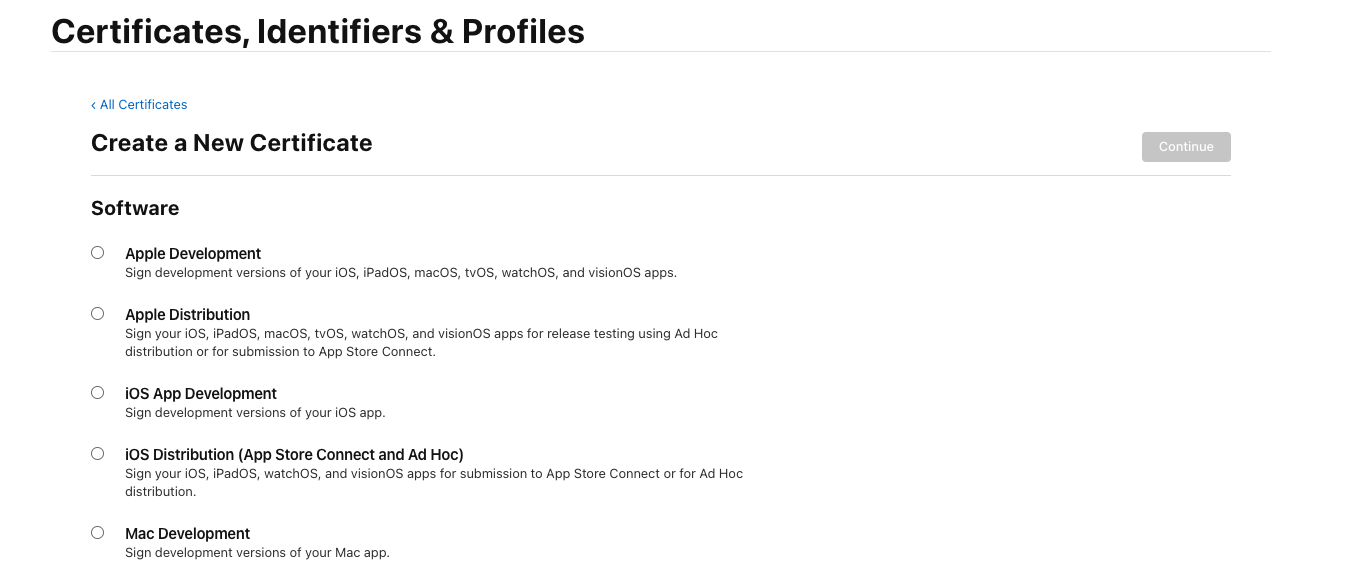
Bước 1: Vào tài khoản Apple, ở mục Certificates https://developer.apple.com/account/resources/certificates/list

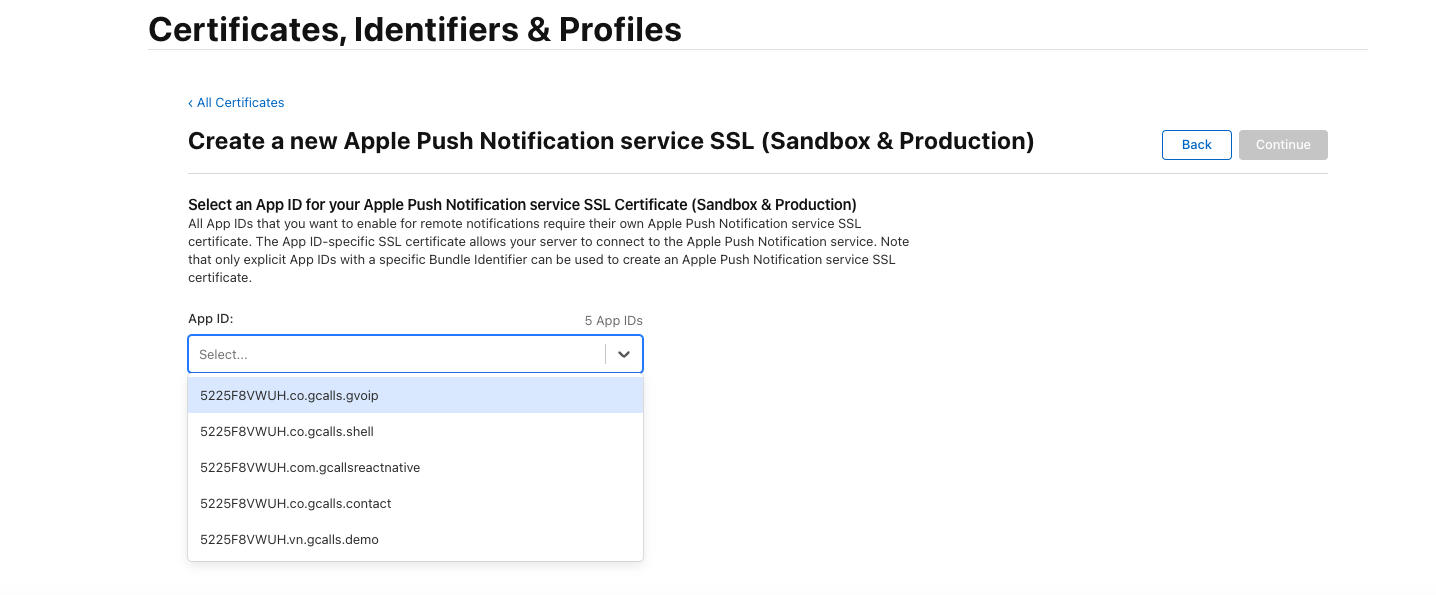
Bước 2: Tạo certificate mới và chọn Apple Push Notification service SSL (Sandbox & Production)
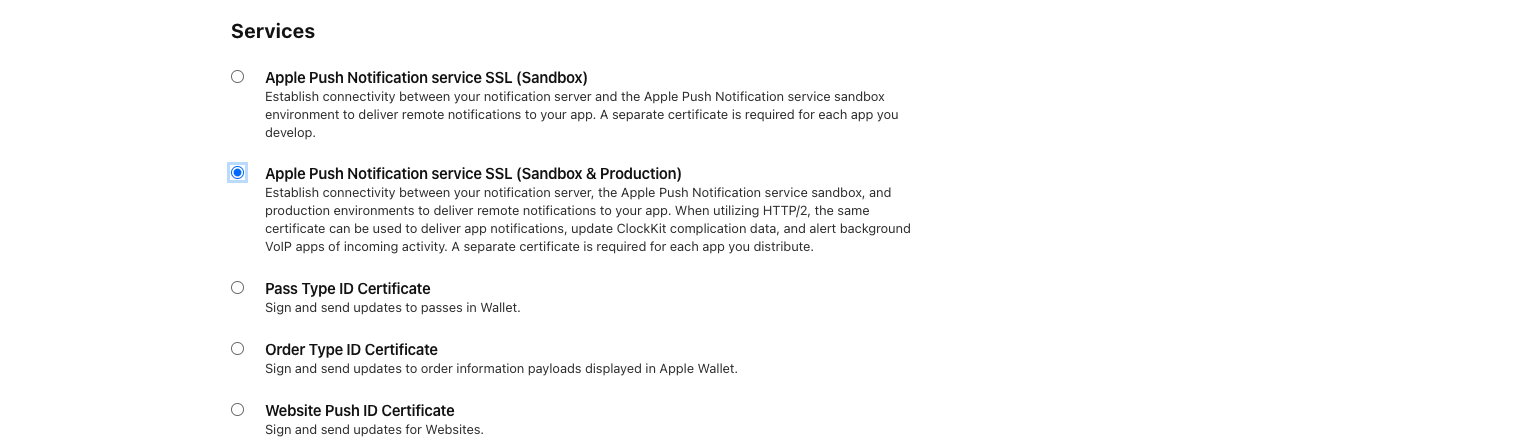
Bước 3: Chọn App Id
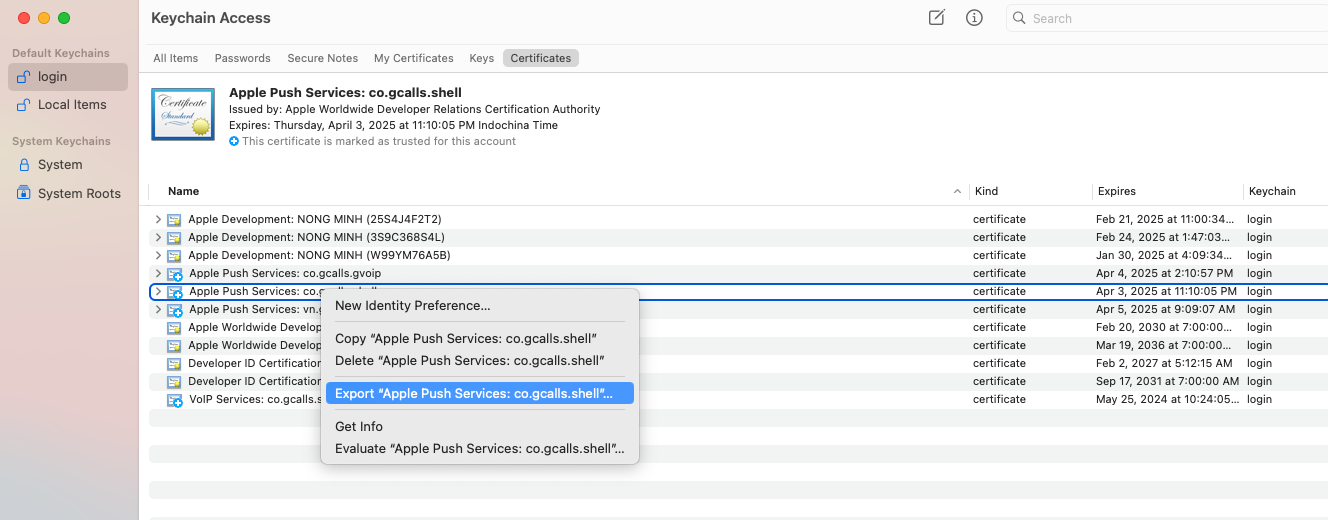
Bước 4: Sau khi tải về, click vào Cer sau đó vào keychain để export ra certificate .p12

Bước 5: Sau khi đã setup Pushkit, dùng curl để Test hoặc Push Notification Tester APP và test với certificate .p12
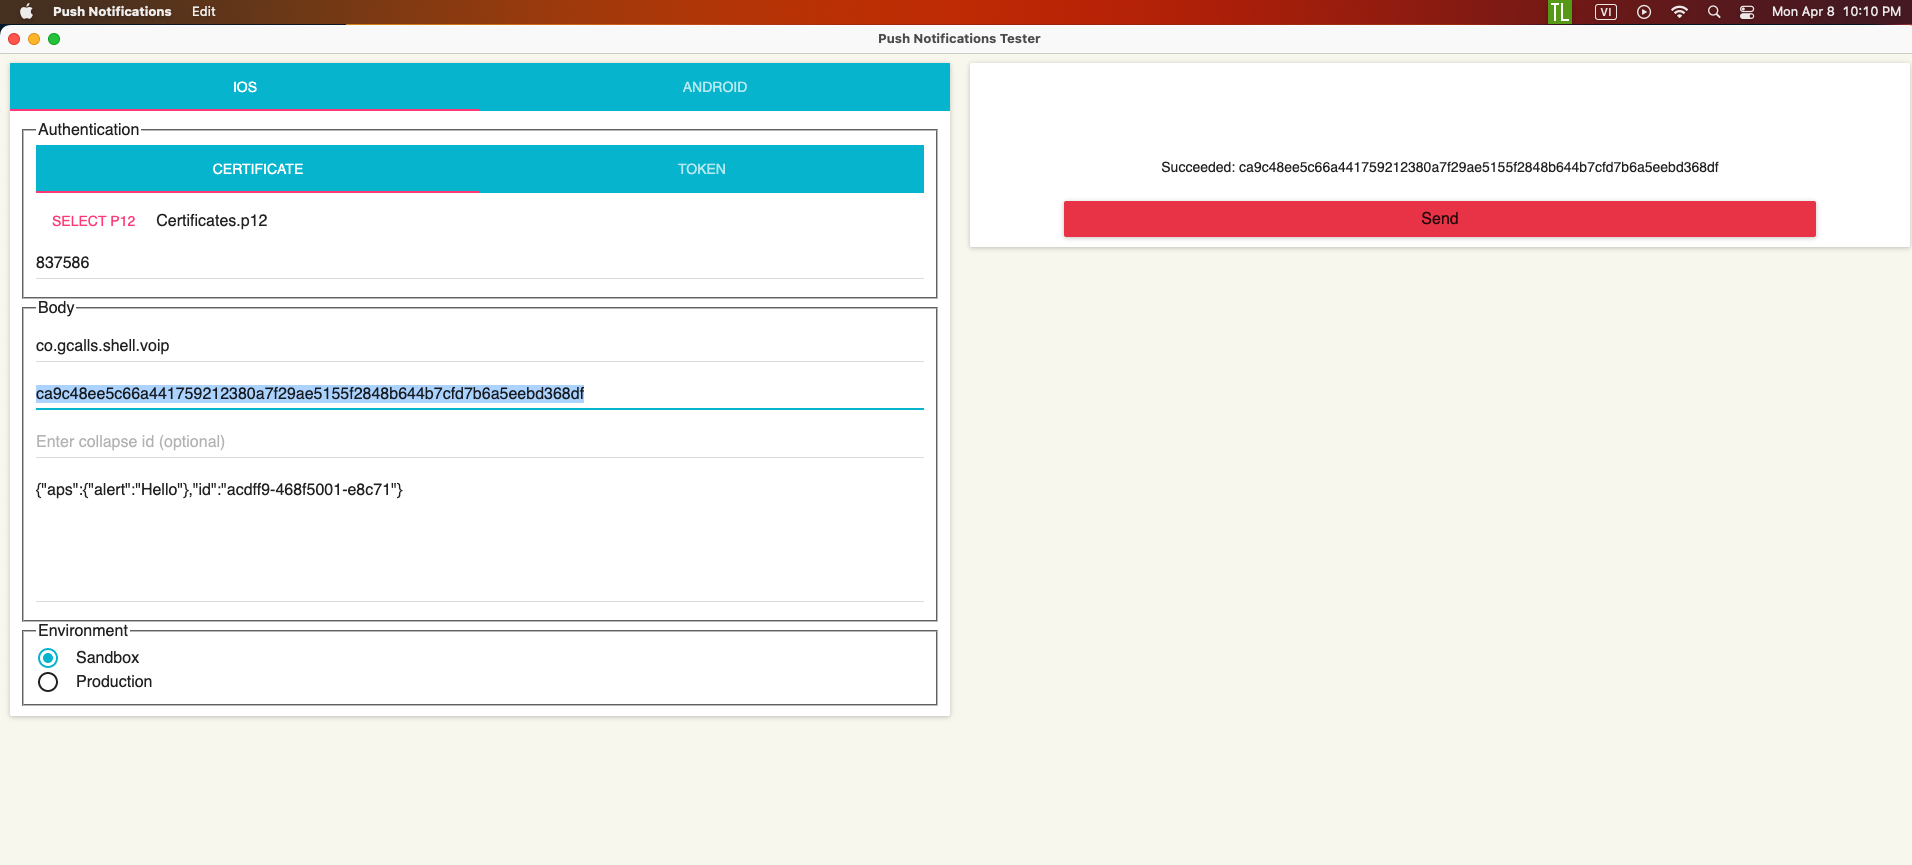
- App Id : co.gcalls.shell ( Còn được gọi là APNS topic)
Test với voip device Token : co.gcalls.shell.voip
Test với device Token ( Alert ) : co.gcalls.shell
Có thể tham khảo ReactNative Project
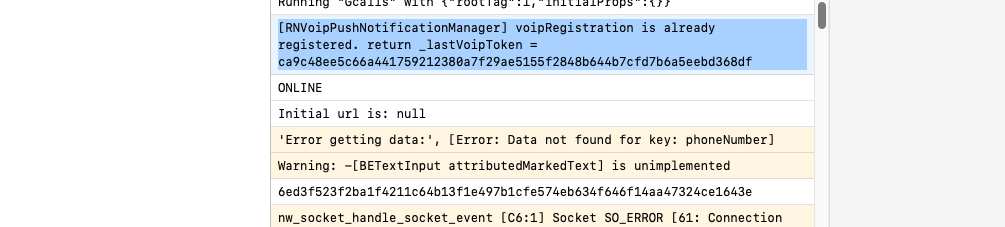
Voip deviceToken : _lastVoipToken = ca9c48ee5c66a441759212380a7f29ae5155f2848b644b7cfd7b6a5eebd368df
Device Token : 6ed3f523f2ba1f4211c64b13f1e497b1cfe574eb634f646f14aa47324ce1643e
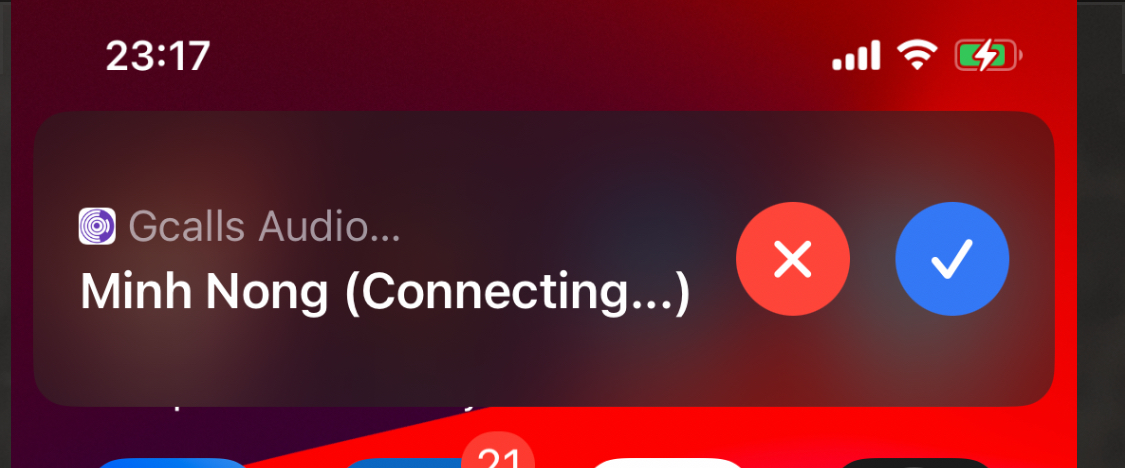
- Test với curl dùng Voip Device Token
    curl -v \
    -d '{
      "aps": {
        "alert": {
          "title": "Gcalls",
          "body": "Alert"
        },
        "badge": 42
      },
      "uuid": "68753A44-4D6F-1226-9C60-0050E4C00068",
      "callerName": "Minh Nong",
      "handle": "Gcalls"
    }' \
    -H "apns-topic: co.gcalls.shell.voip" \
    -H "apns-priority: 5" \
    -H "content-available: 1" \
    -H "apns-push-type: voip" \
    --http2 \
    --cert-type P12 --cert Certificates.p12:837586 \
    https://api.development.push.apple.com/3/device/ca9c48ee5c66a441759212380a7f29ae5155f2848b644b7cfd7b6a5eebd368df (your voip device token)
- Test với curl dùng Device Token
  curl -v \
      -d '{
        "aps": {
          "alert": {
            "title": "Gcalls",
            "body": "Alert"
          },
          "badge": 42
        },
      }' \
      -H "apns-topic: co.gcalls.shell" \
      -H "apns-priority: 5" \
      -H "content-available: 1" \
      --http2 \
      --cert-type P12 --cert Certificates.p12:837586 \
      https://api.development.push.apple.com/3/device/25e23f73d3b21c2181a9510ecb3d0a519c61bd9a5cd62e885354777665aabb0d (your device token)

4. Kết Luận
Chúng ta có thể sử dụng Pushnotification thông qua SDK (Nodejs) hoặc API. Bài viết này tập trung hướng dẫn remote pushnotification thông qua API
1 Số lợi ích Api mang lại : Nếu sử dụng Cloud Worker như Cloudflare hoặc 1 số worker không cho phếp cài SDK của nodejs chúng ta có thể dùng API ( Serverless ) , đỡ tốn thời gian cài sdk và sử dụng được ở Nodejs Server hoặc Cloud Worker .
Idea cho incoming call: PBX -> setting Webhook cho incoming call từ PBX -> Cloudflare Worker API ( get device token từ Cloudflare KV ) / Nodejs Server -> Trigger Voip Pushnotification API
Tài liệu này hướng dẫn cách cài đặt iOS Pushnotification, nếu có góp ý xin vui lòng điền vào form bên dưới.