
How To Use
I. Introduction
This document provides a comprehensive guide on how to use Qranty Admin, covering the essential features and functionalities of the application. By following these instructions, users can effectively navigate the system, manage data, and leverage the tools provided by Qranty for their business needs.
II. Features
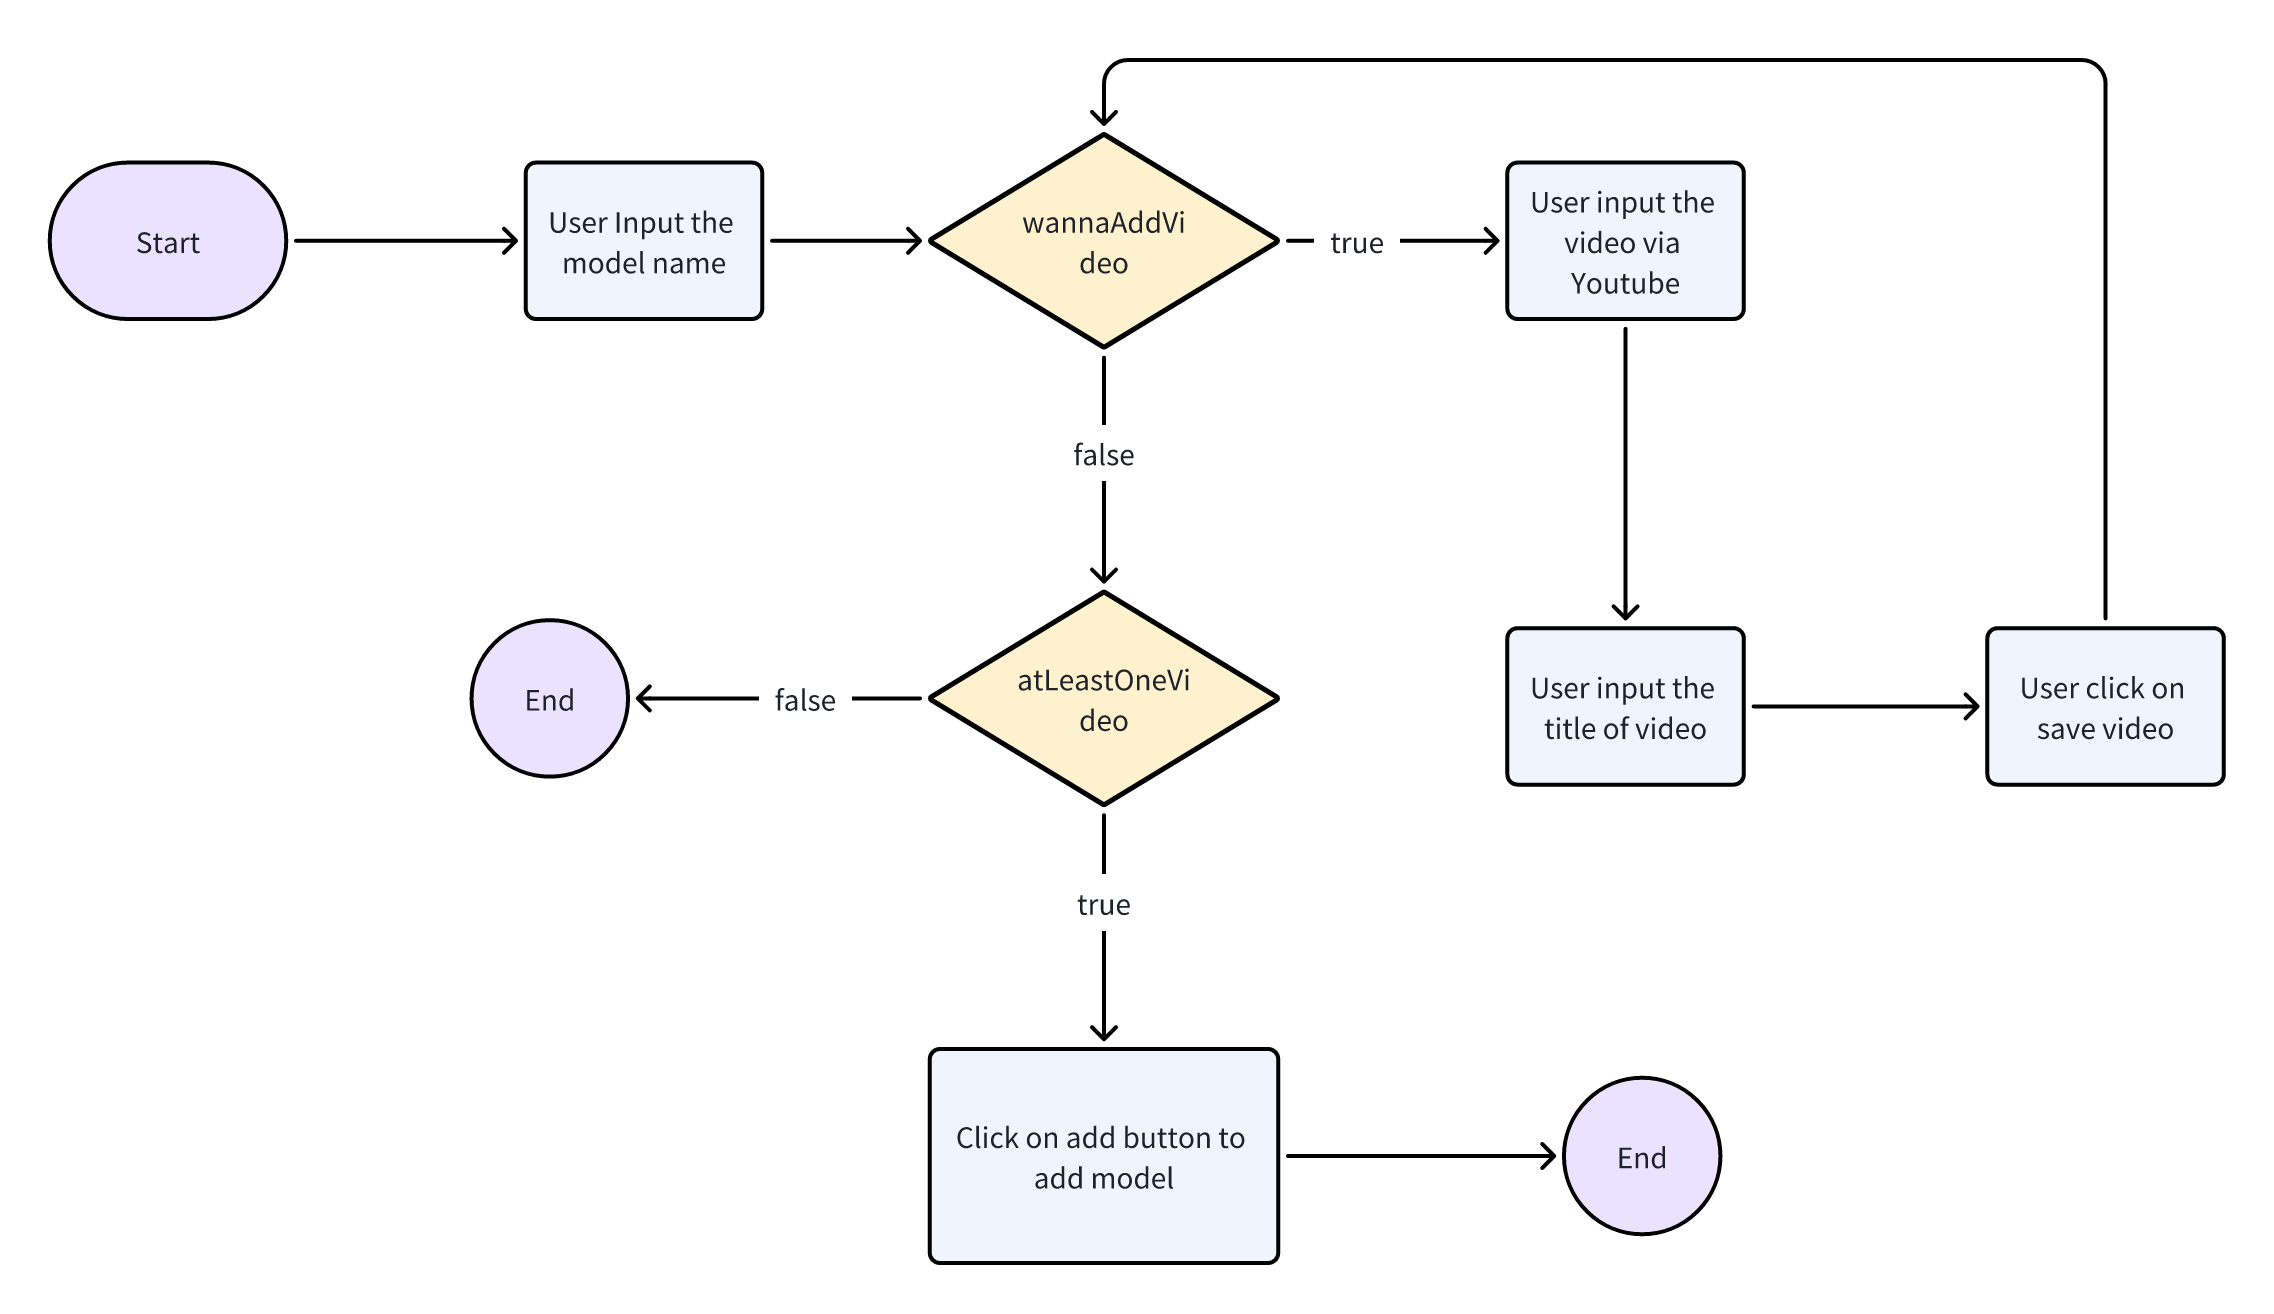
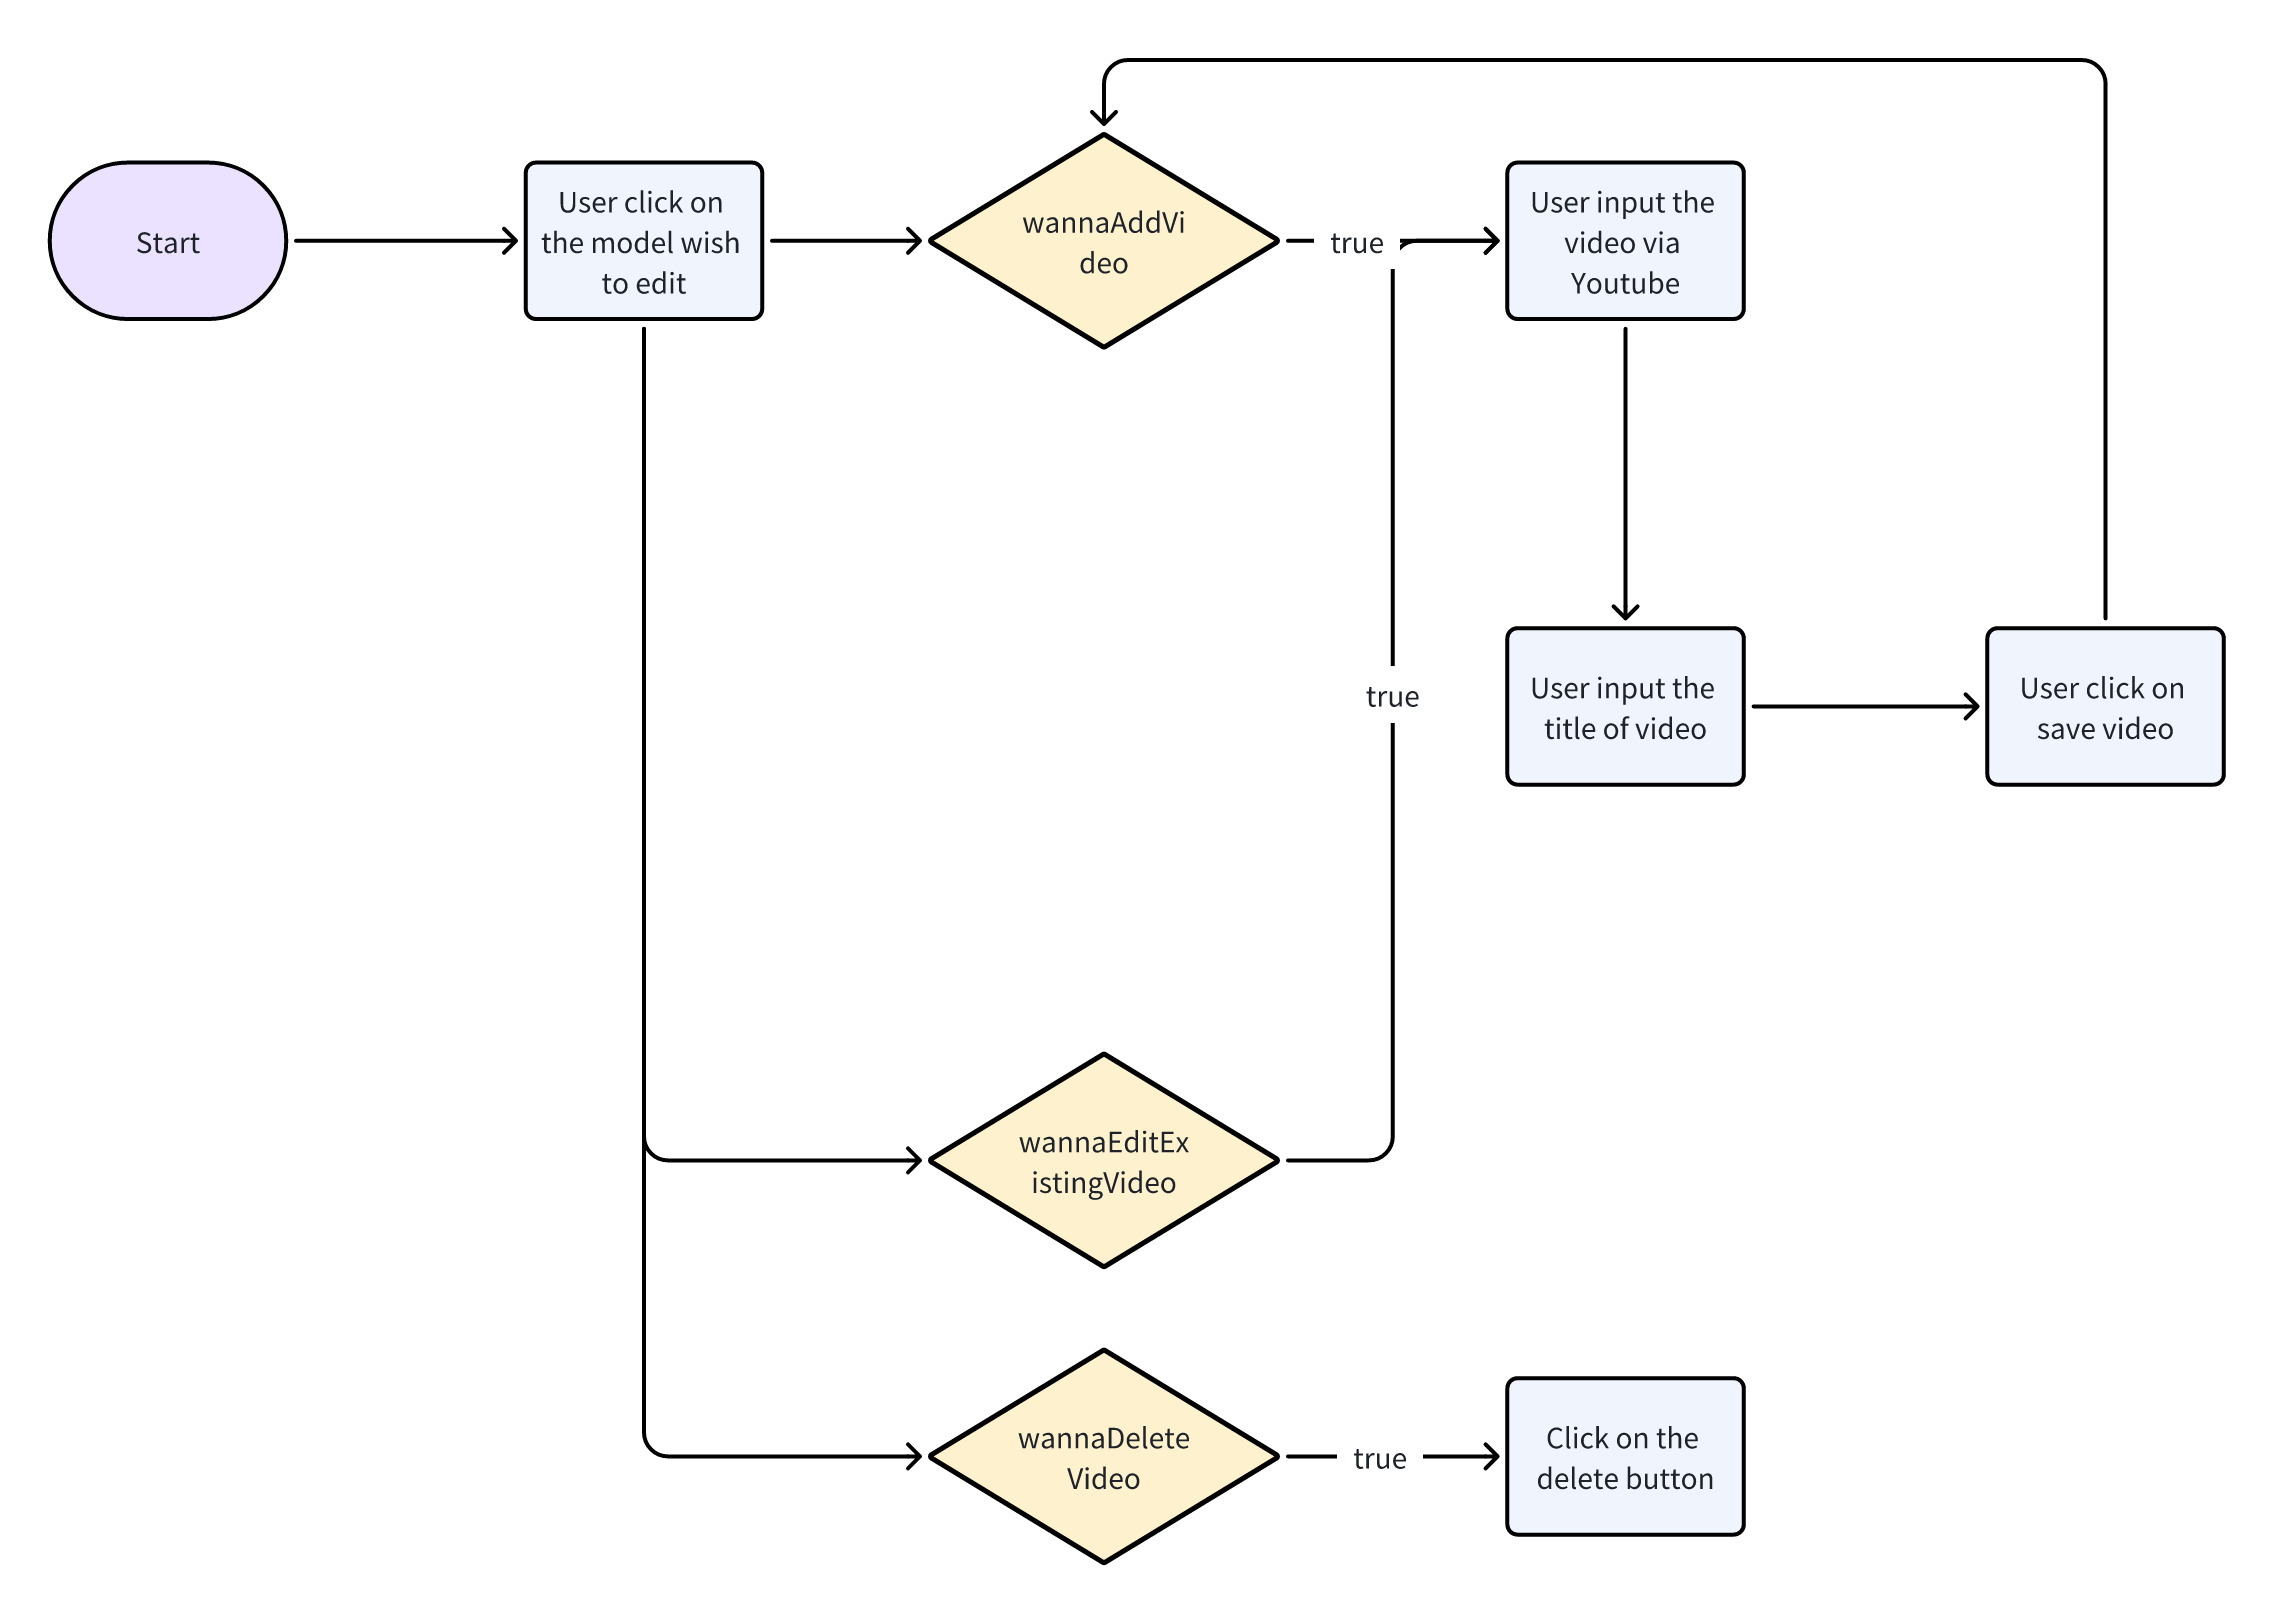
1. Add Model
Description: Users can add new models to the system, providing detailed information about the products.
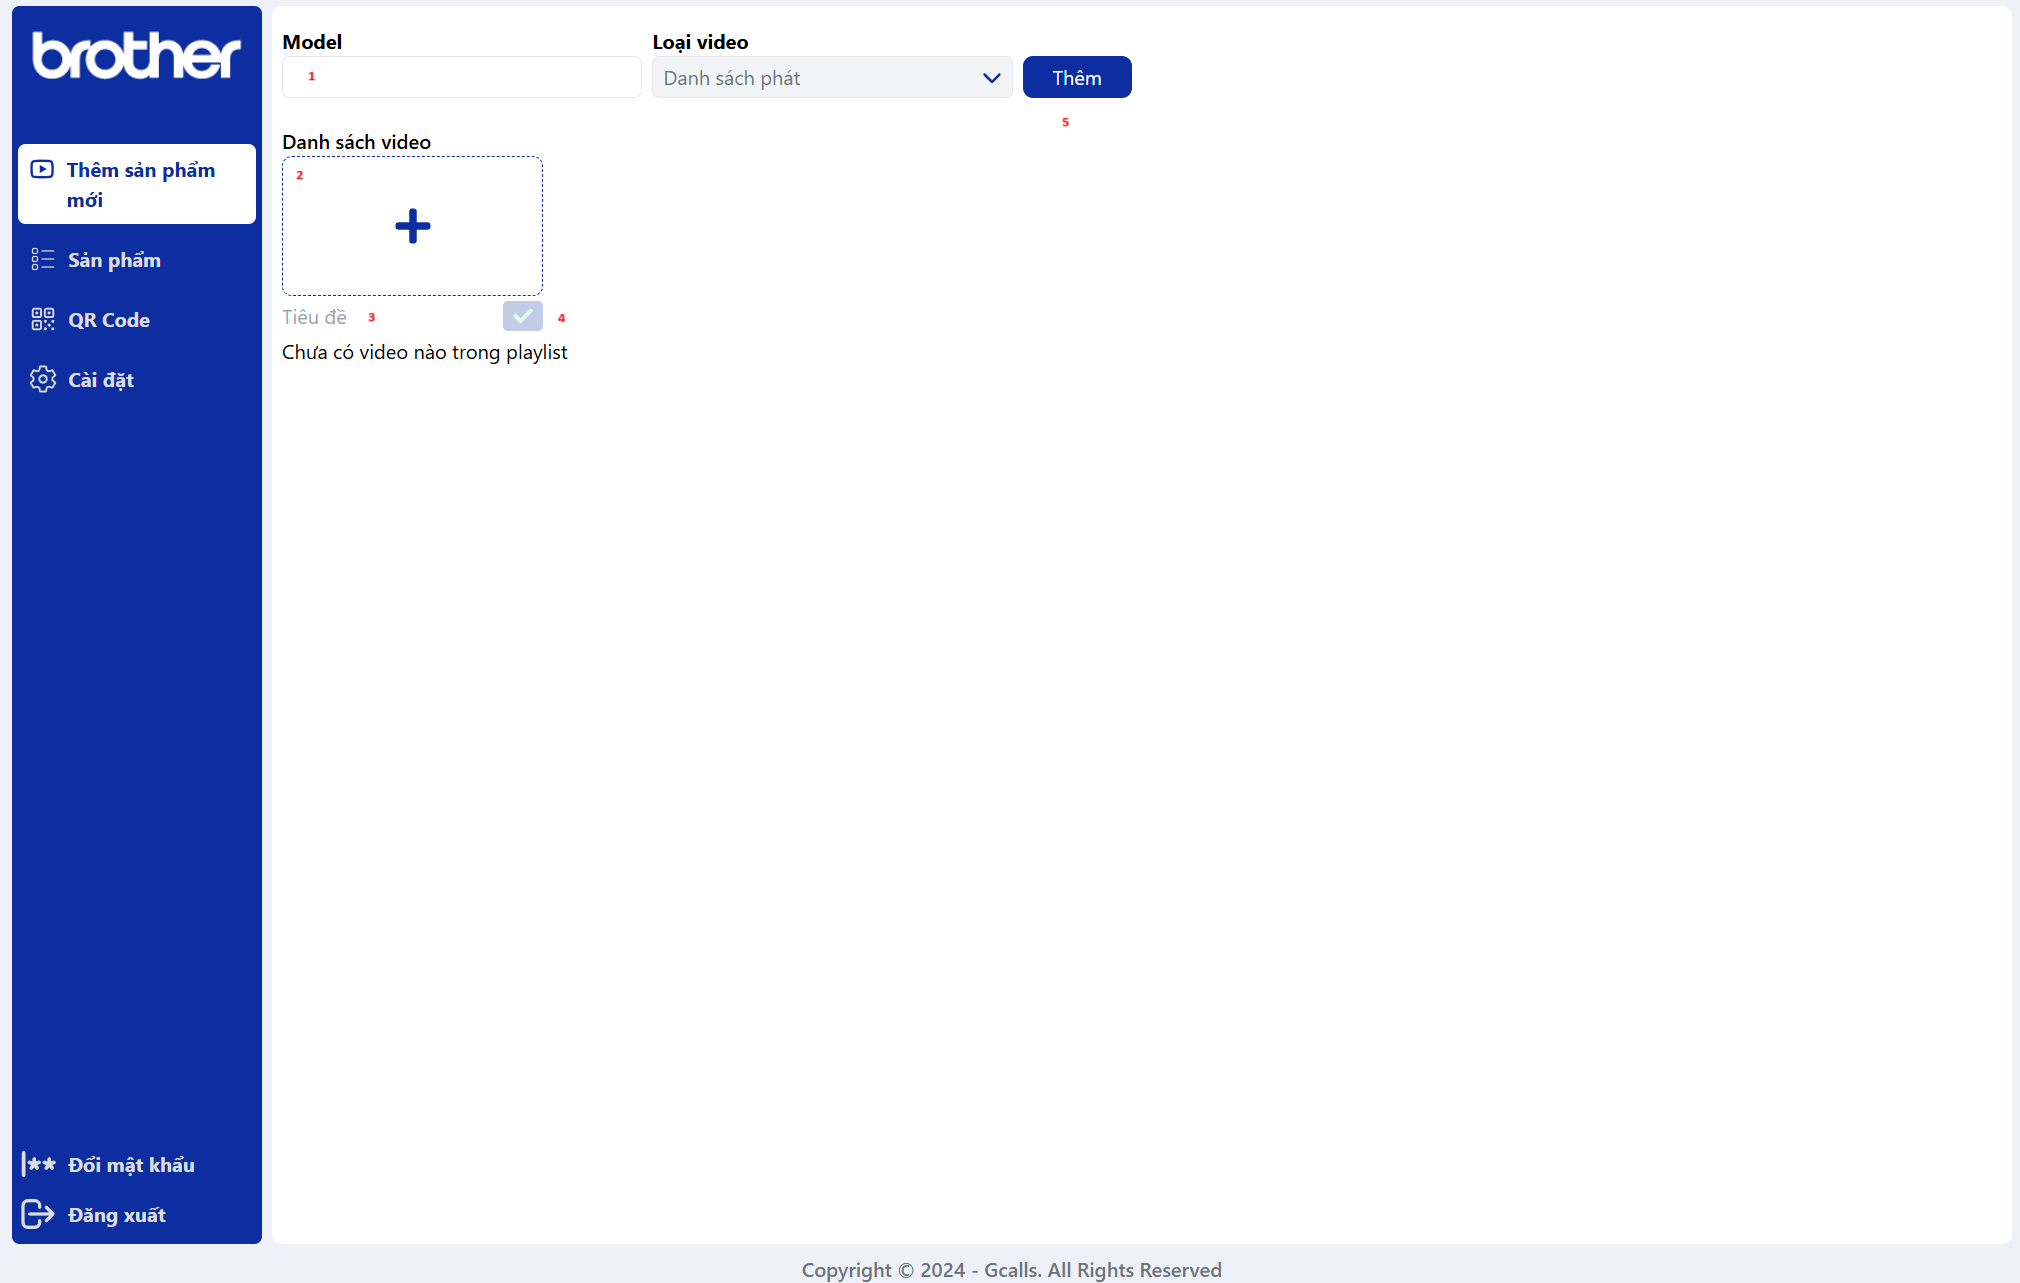
Explain:
- Input model name
- Attach the video link via Youtube
- Input title video
- Add Video to list
- Save the model
Workflow:
2. Edit Model
Description: Users can edit existing models in the system, updating product information as needed.
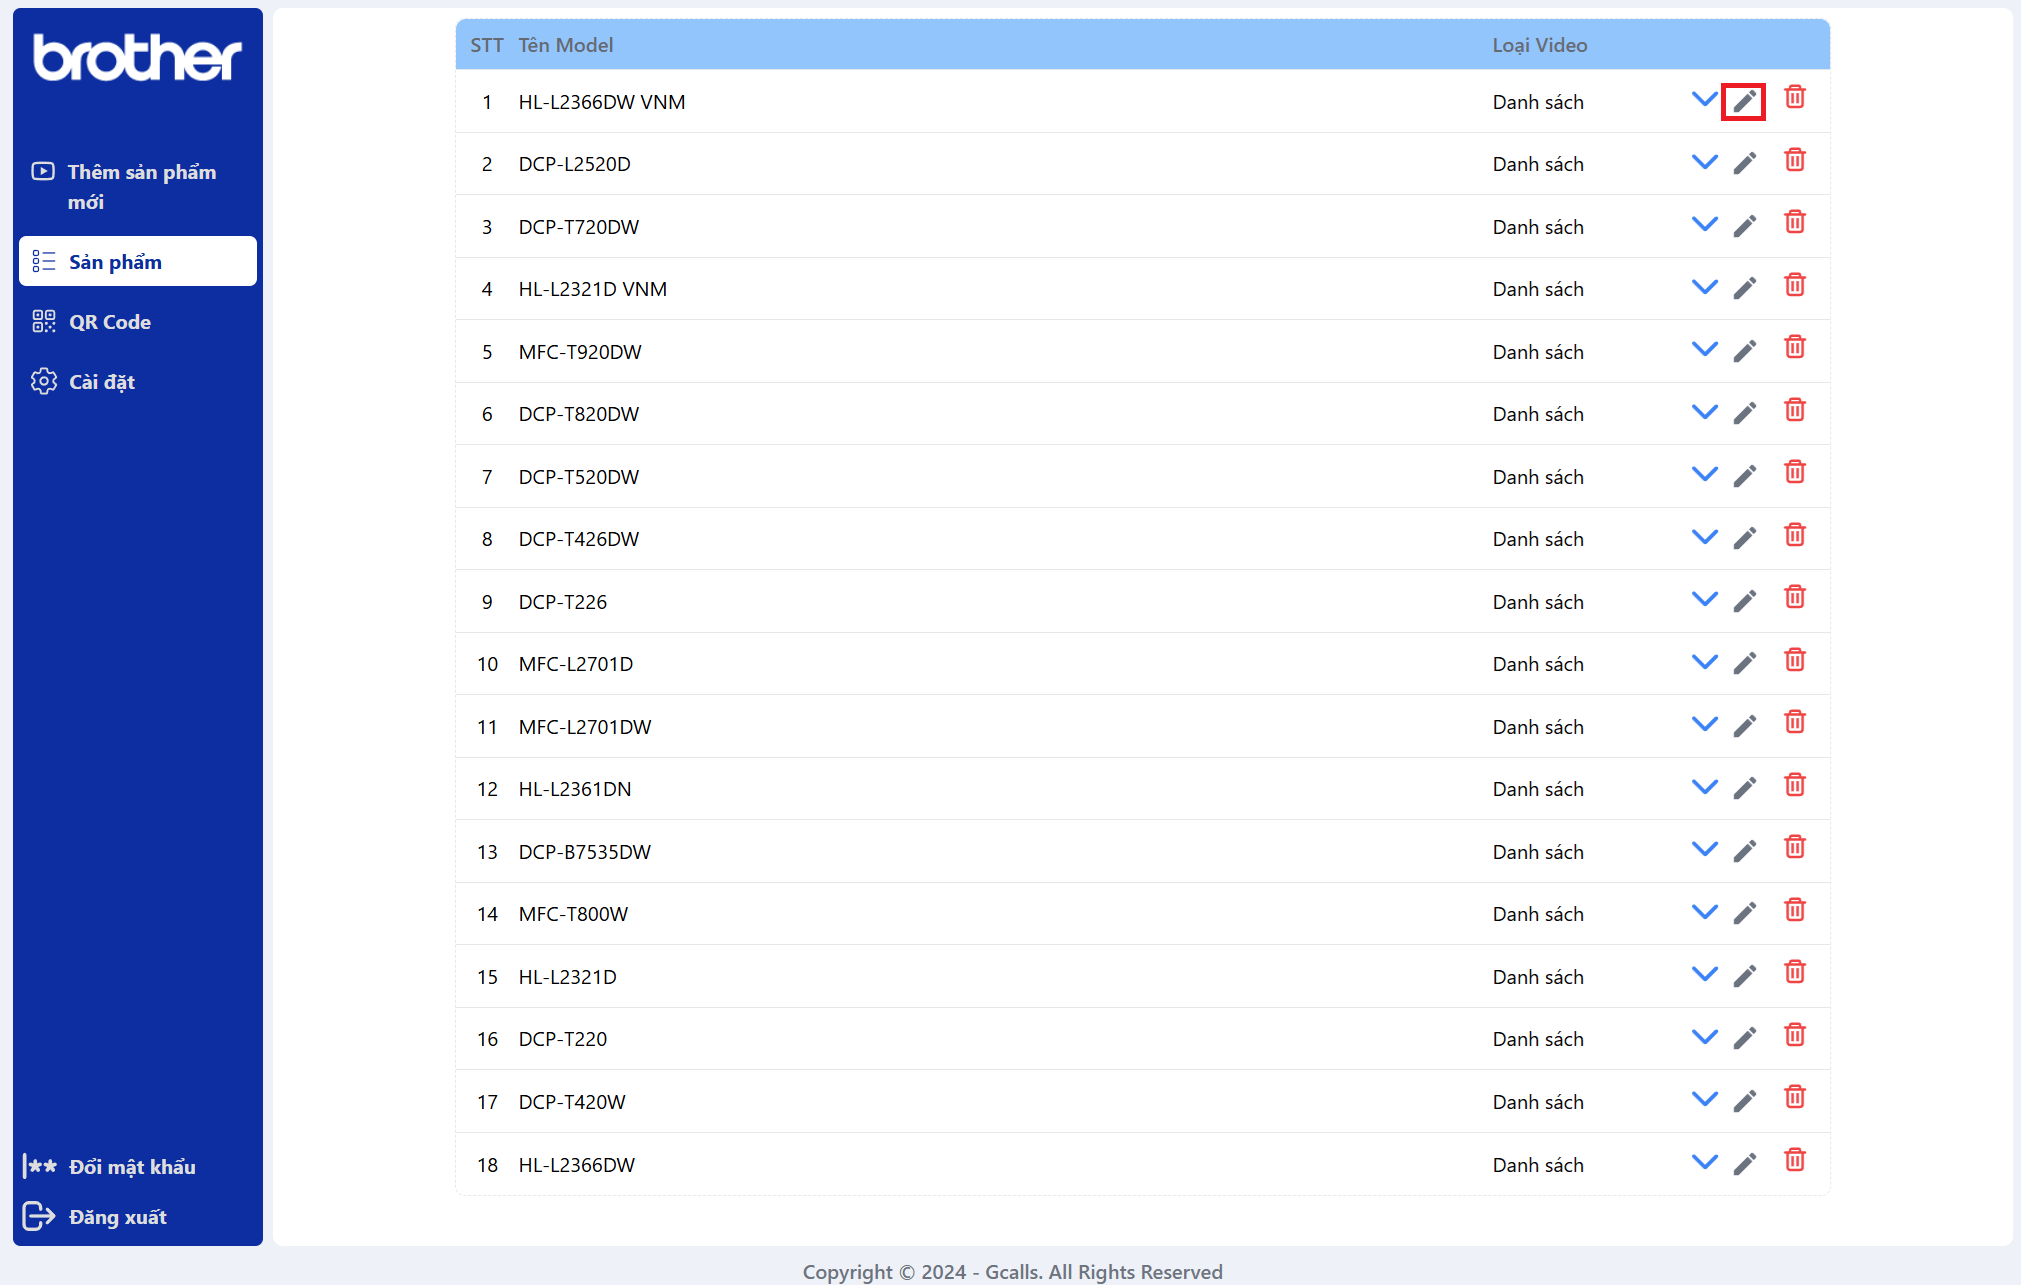
Explain:
- Click on the Pen icon next to the model you want to edit
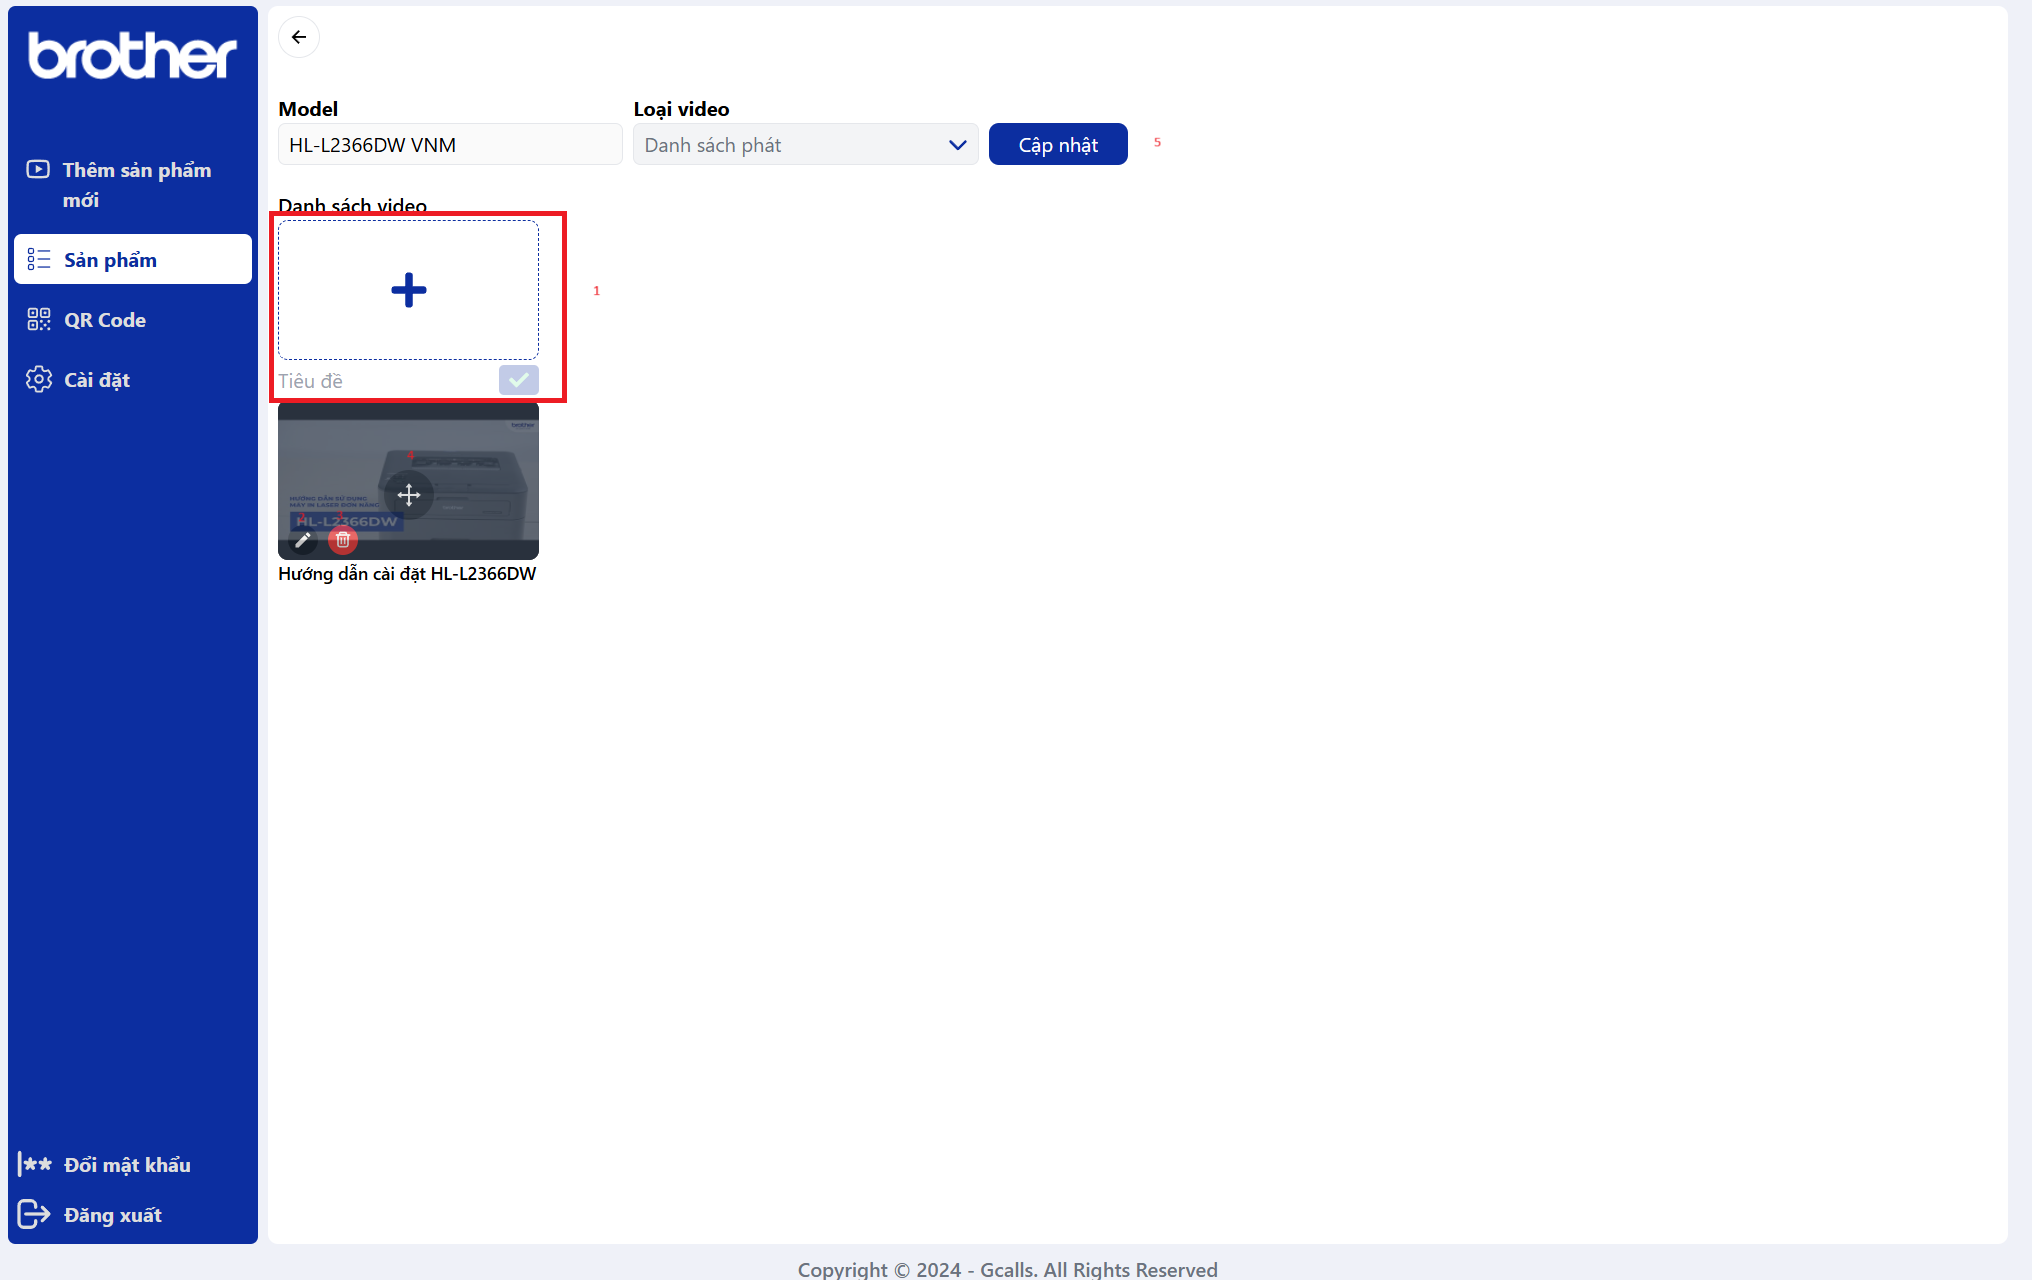
Explain:
- You can add new video
- You can edit the video
- You can delete the video
- You can change the video order
- Update the model
Workflow:
3. Generate QR Code
Description: Users can generate QR codes for products by uploading an Excel file containing product details.
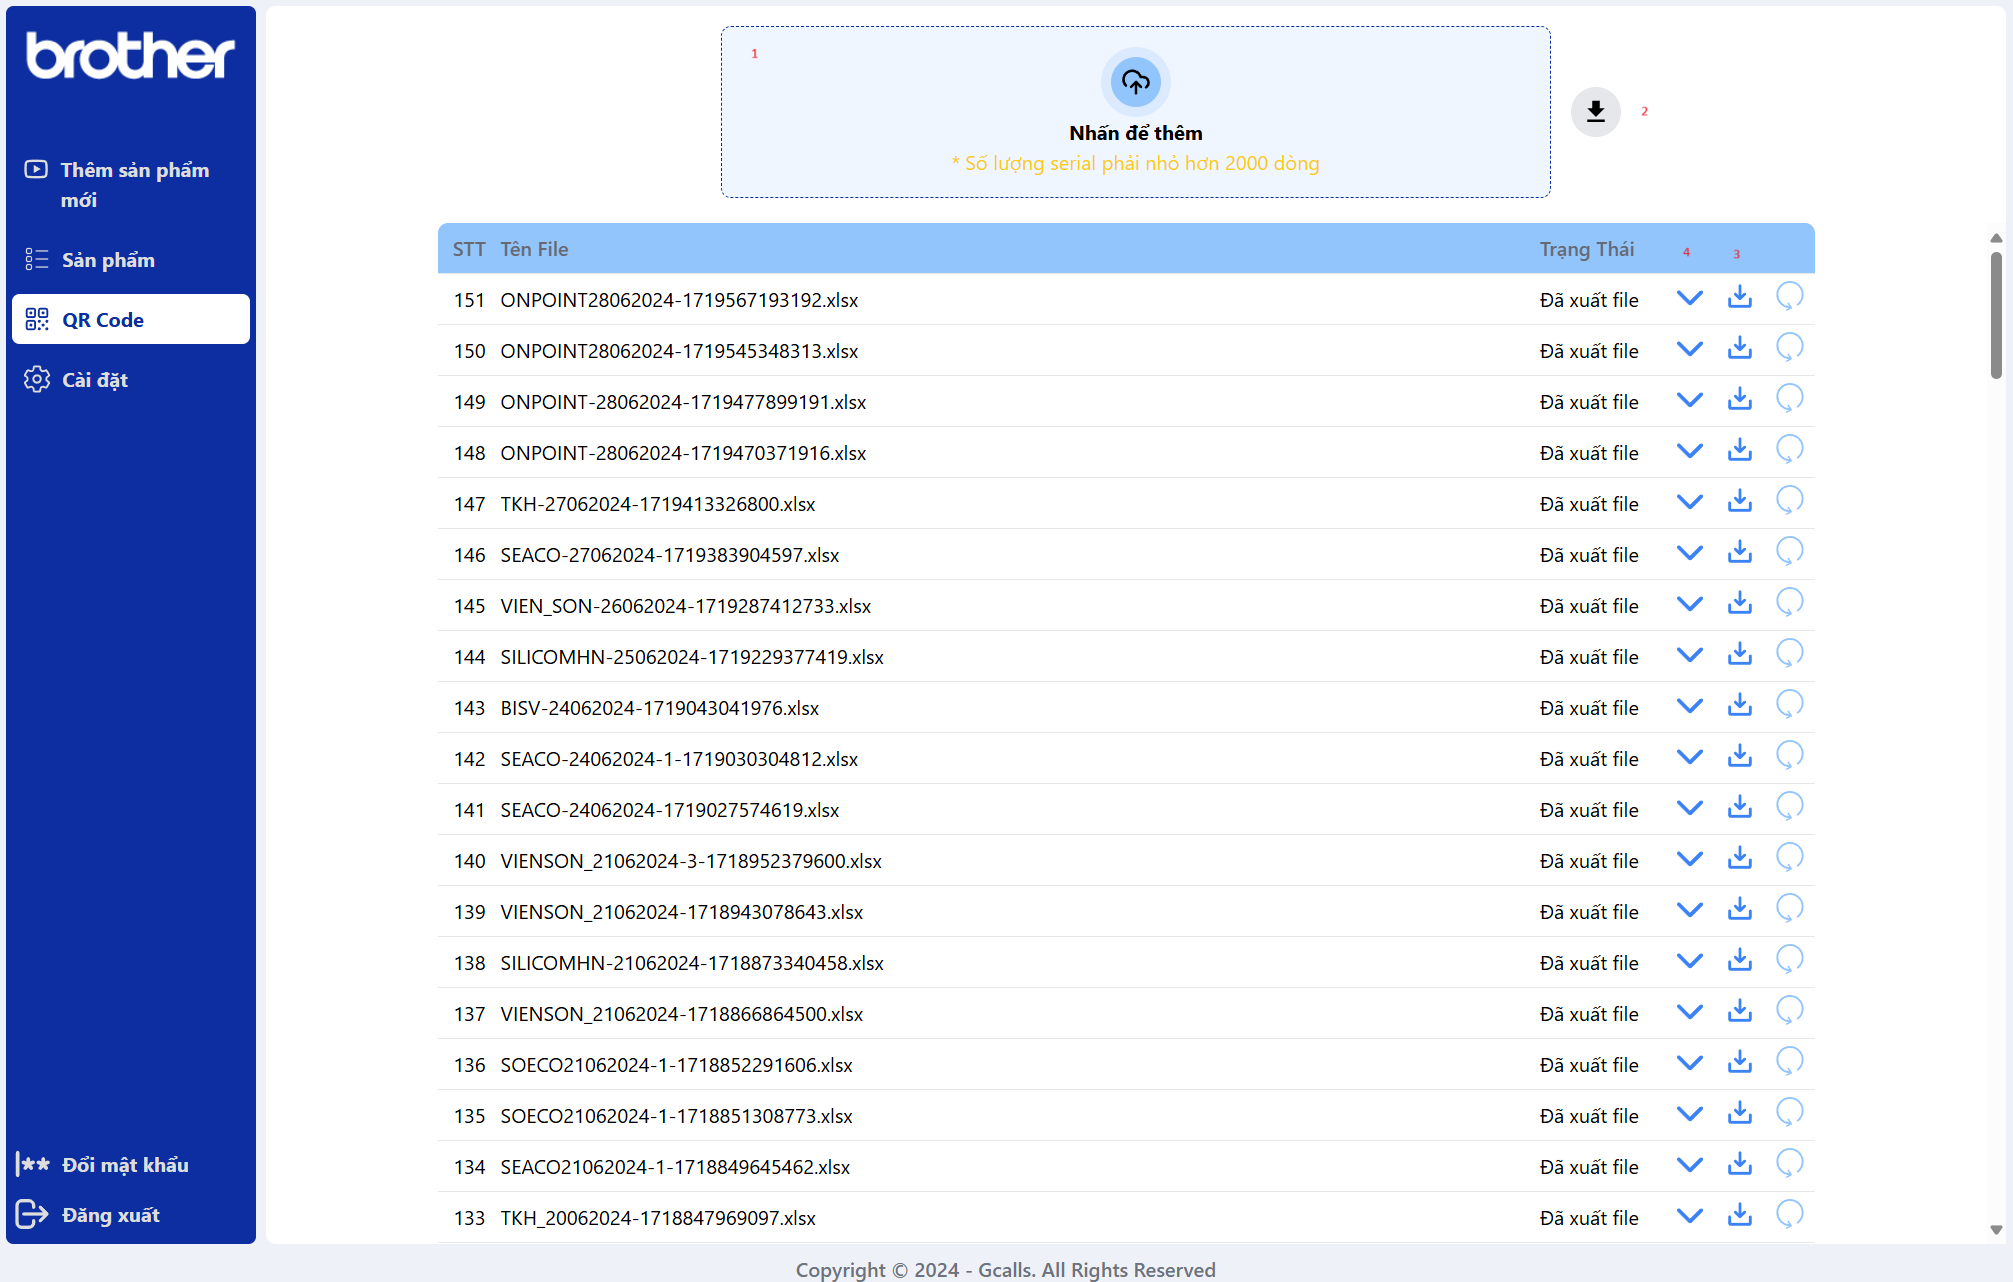
Explain:
- Click to upload the Excel file
- Click to download the Excel template
- Click to download the QR Code file
- Click to view the cause of the error
4. Manage Registration Fields
Description: Users can customize the fields required for warranty registration, tailoring the registration process to their specific needs.
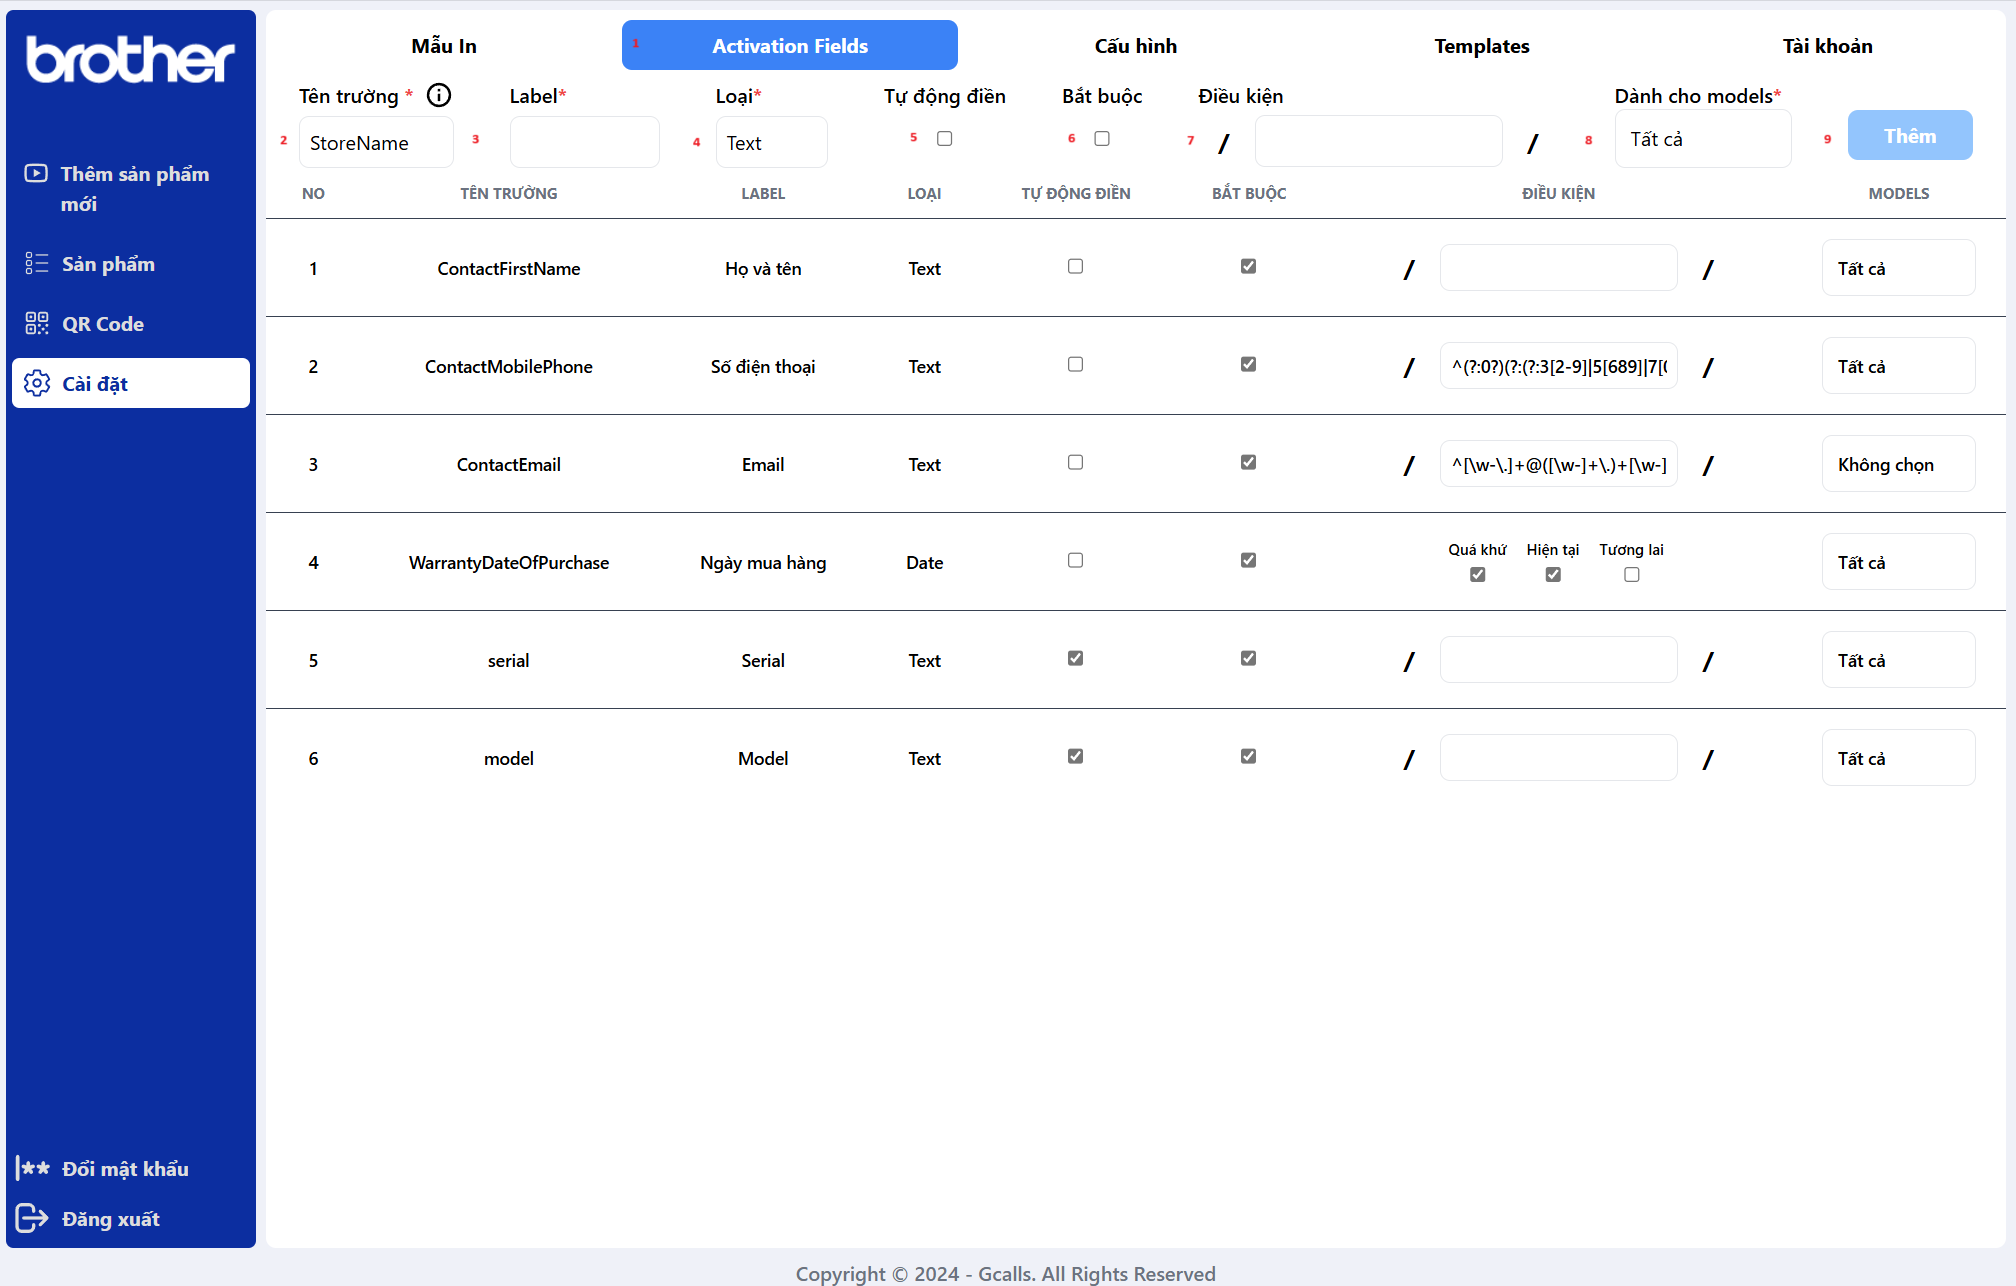
Explain:
- Click to navigate to the custom data field tab
- Select the field name (Add by use configs route api, it unique, now it can't be changed, must valid to the CRM)
- Input the field label
- Select the field type
- Check if the field is auto fill by scan QR code
- Check if the field is required
- Type the regex to validate the field (optional)
- Select the model that the field belongs to
- Save the field
5. Manage User
Description: The admin with role manage to add new user with roles.
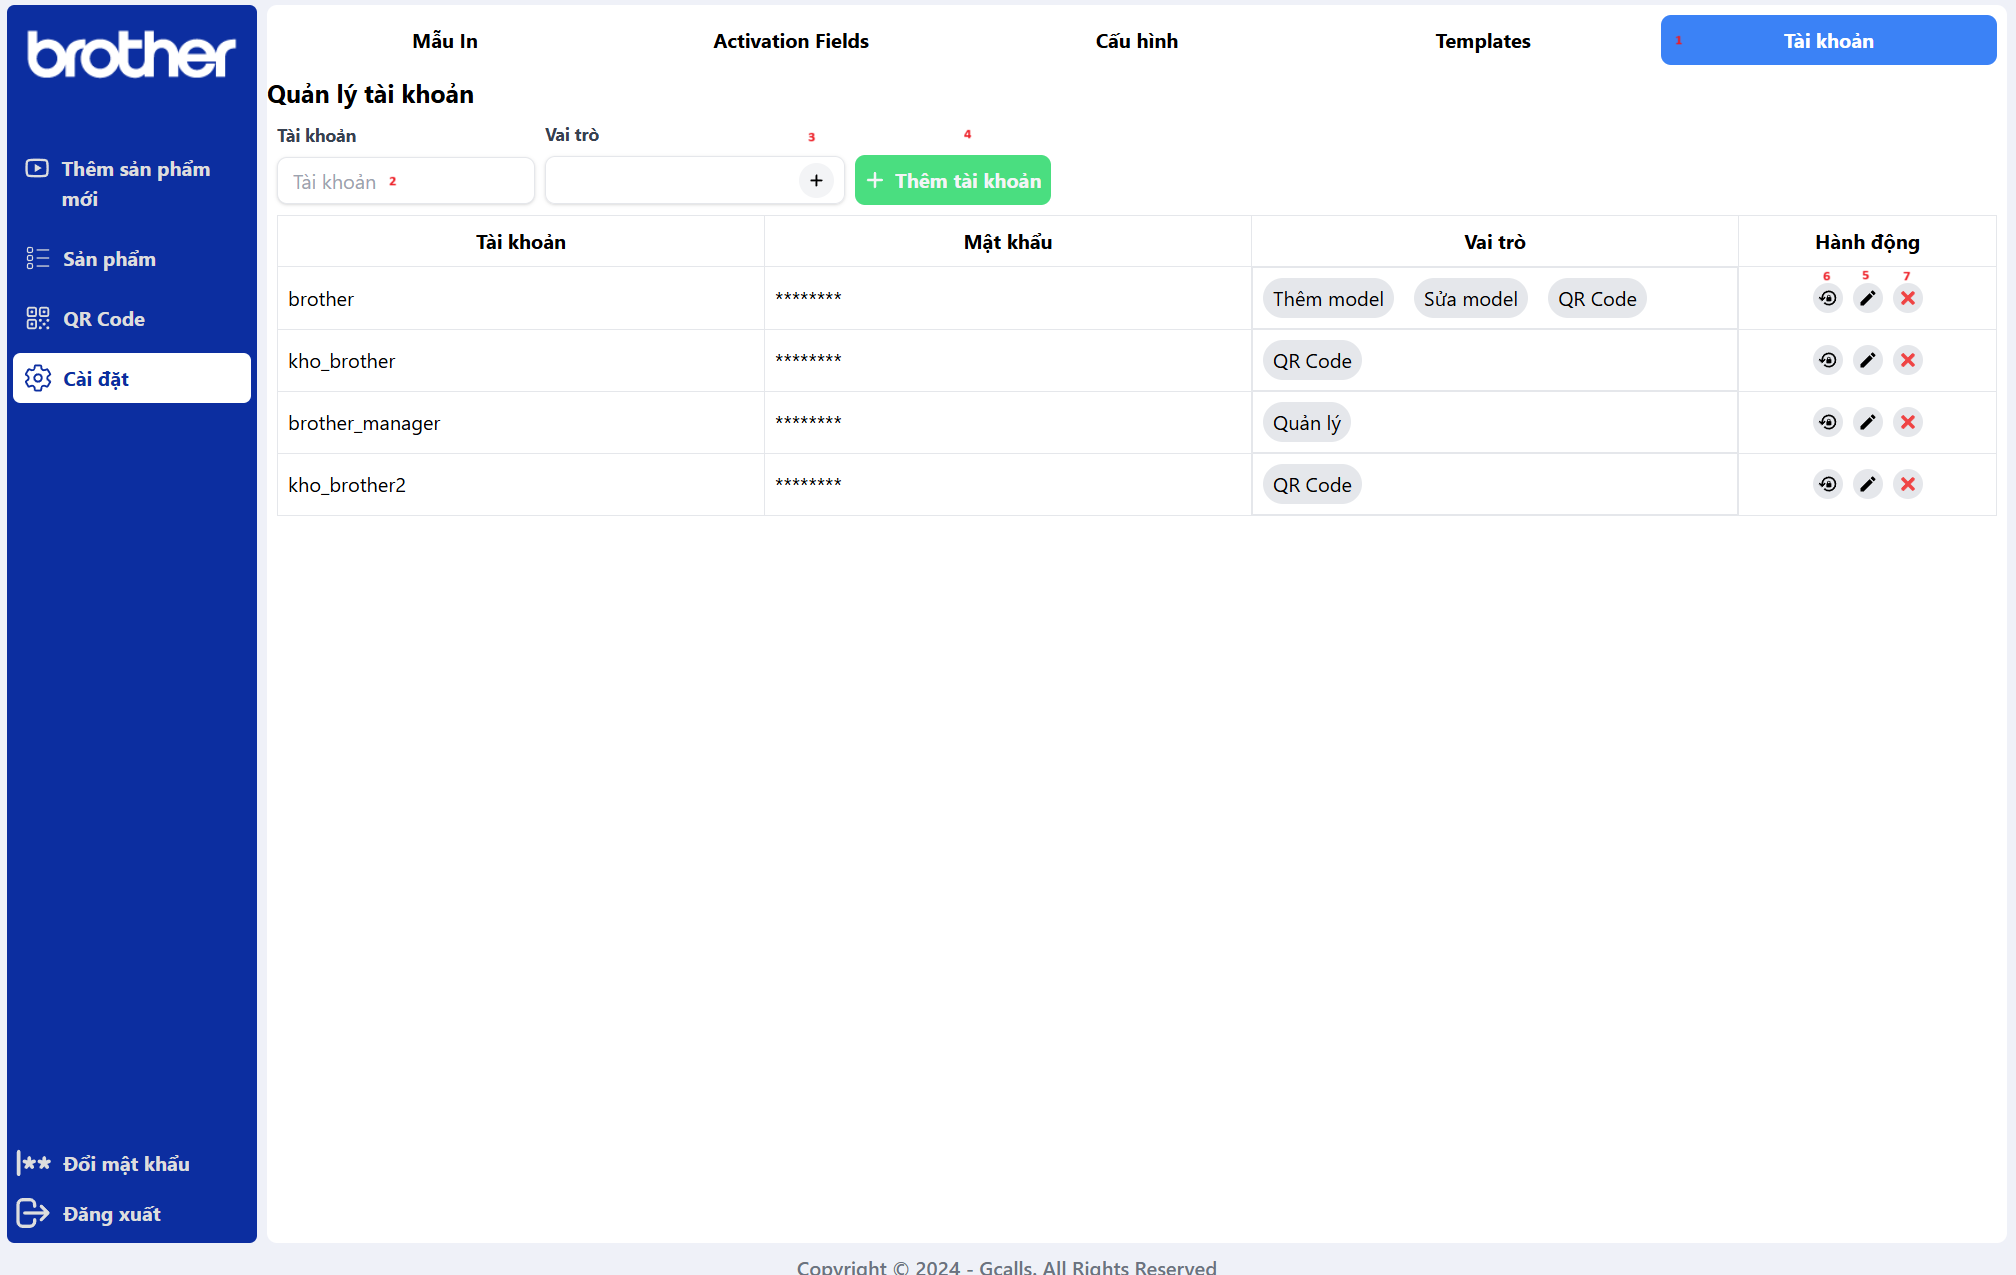
Explain:
- Click to navigate to the manage user tab
- Type the username
- Select the user role (Admin, QRCode, Add Model, Edit Model, Manage)
- Add user (When add user, the system will generate a random password and show it to the password field, the user can change it later)
- Click to edit user role
- Click to re-generate password
- Click to delete user
6. Config account (only for admin role)
Description: The admin with role admin to config the account.
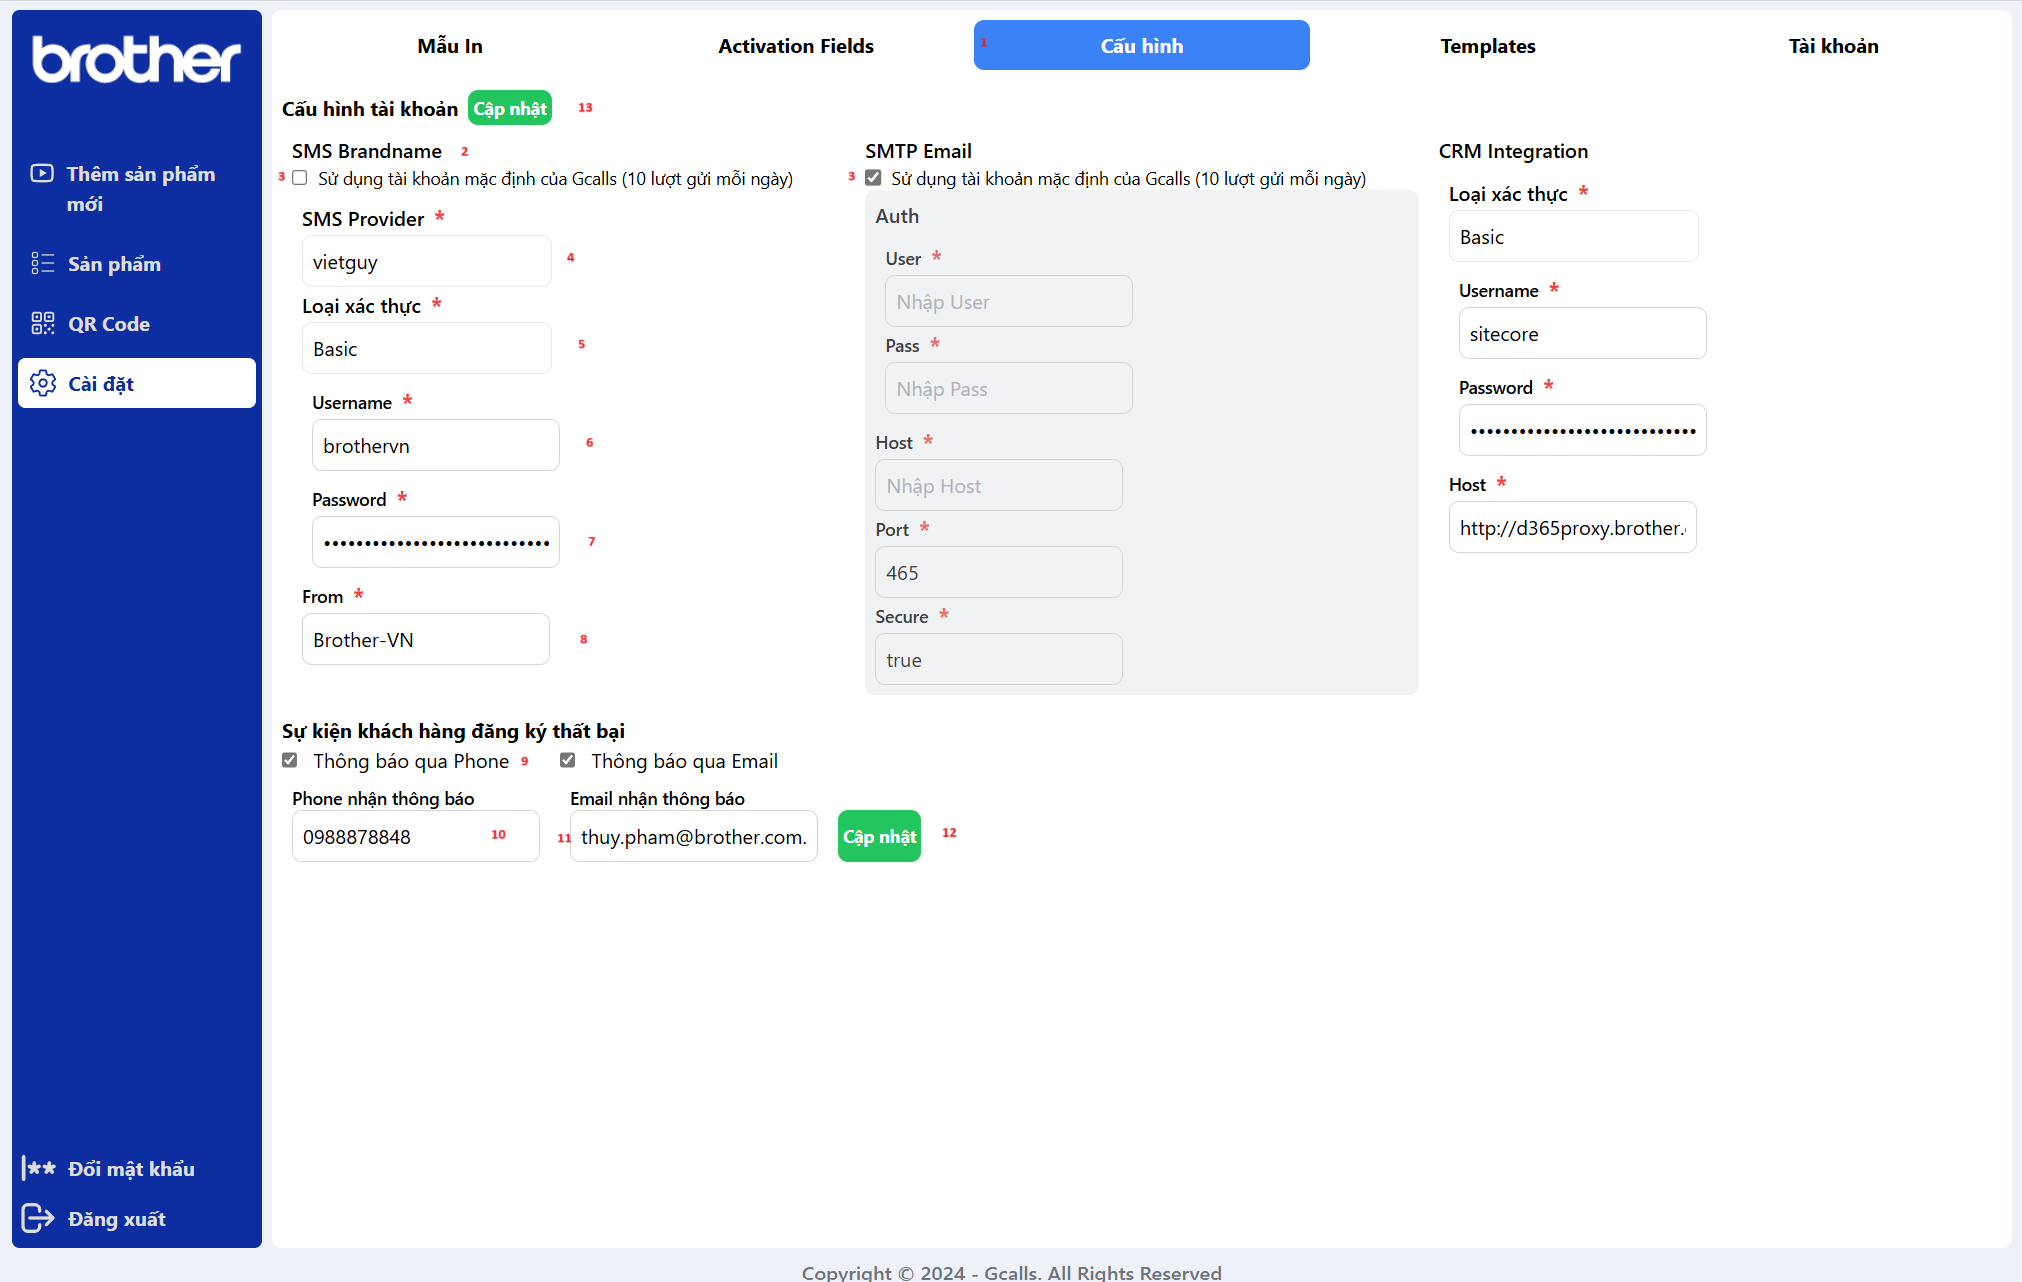
Explain:
- Click to navigate to the account configuration tab
- Title of the account
- Check if use the Gcalls account
- Select SMS provider (now only Vietguys)
- Select the authentication type (basic, bearer, api key)
- Input the usernrame if use basic, input key if use api key, input the token if use bearer
- Input the password if use basic, input the value if use api key
- Input the from value if is SMS, input the add to (body, header) if use api key, input the hostserver if is the CRM integration
- Check if notify to the phone number via SMS
- Input the phone number to notify
- Input the email to notify
- Save the configuration for notification
- Save the configuration for the account
7. Config notification template
Description: The admin with role admin to config the notification template.
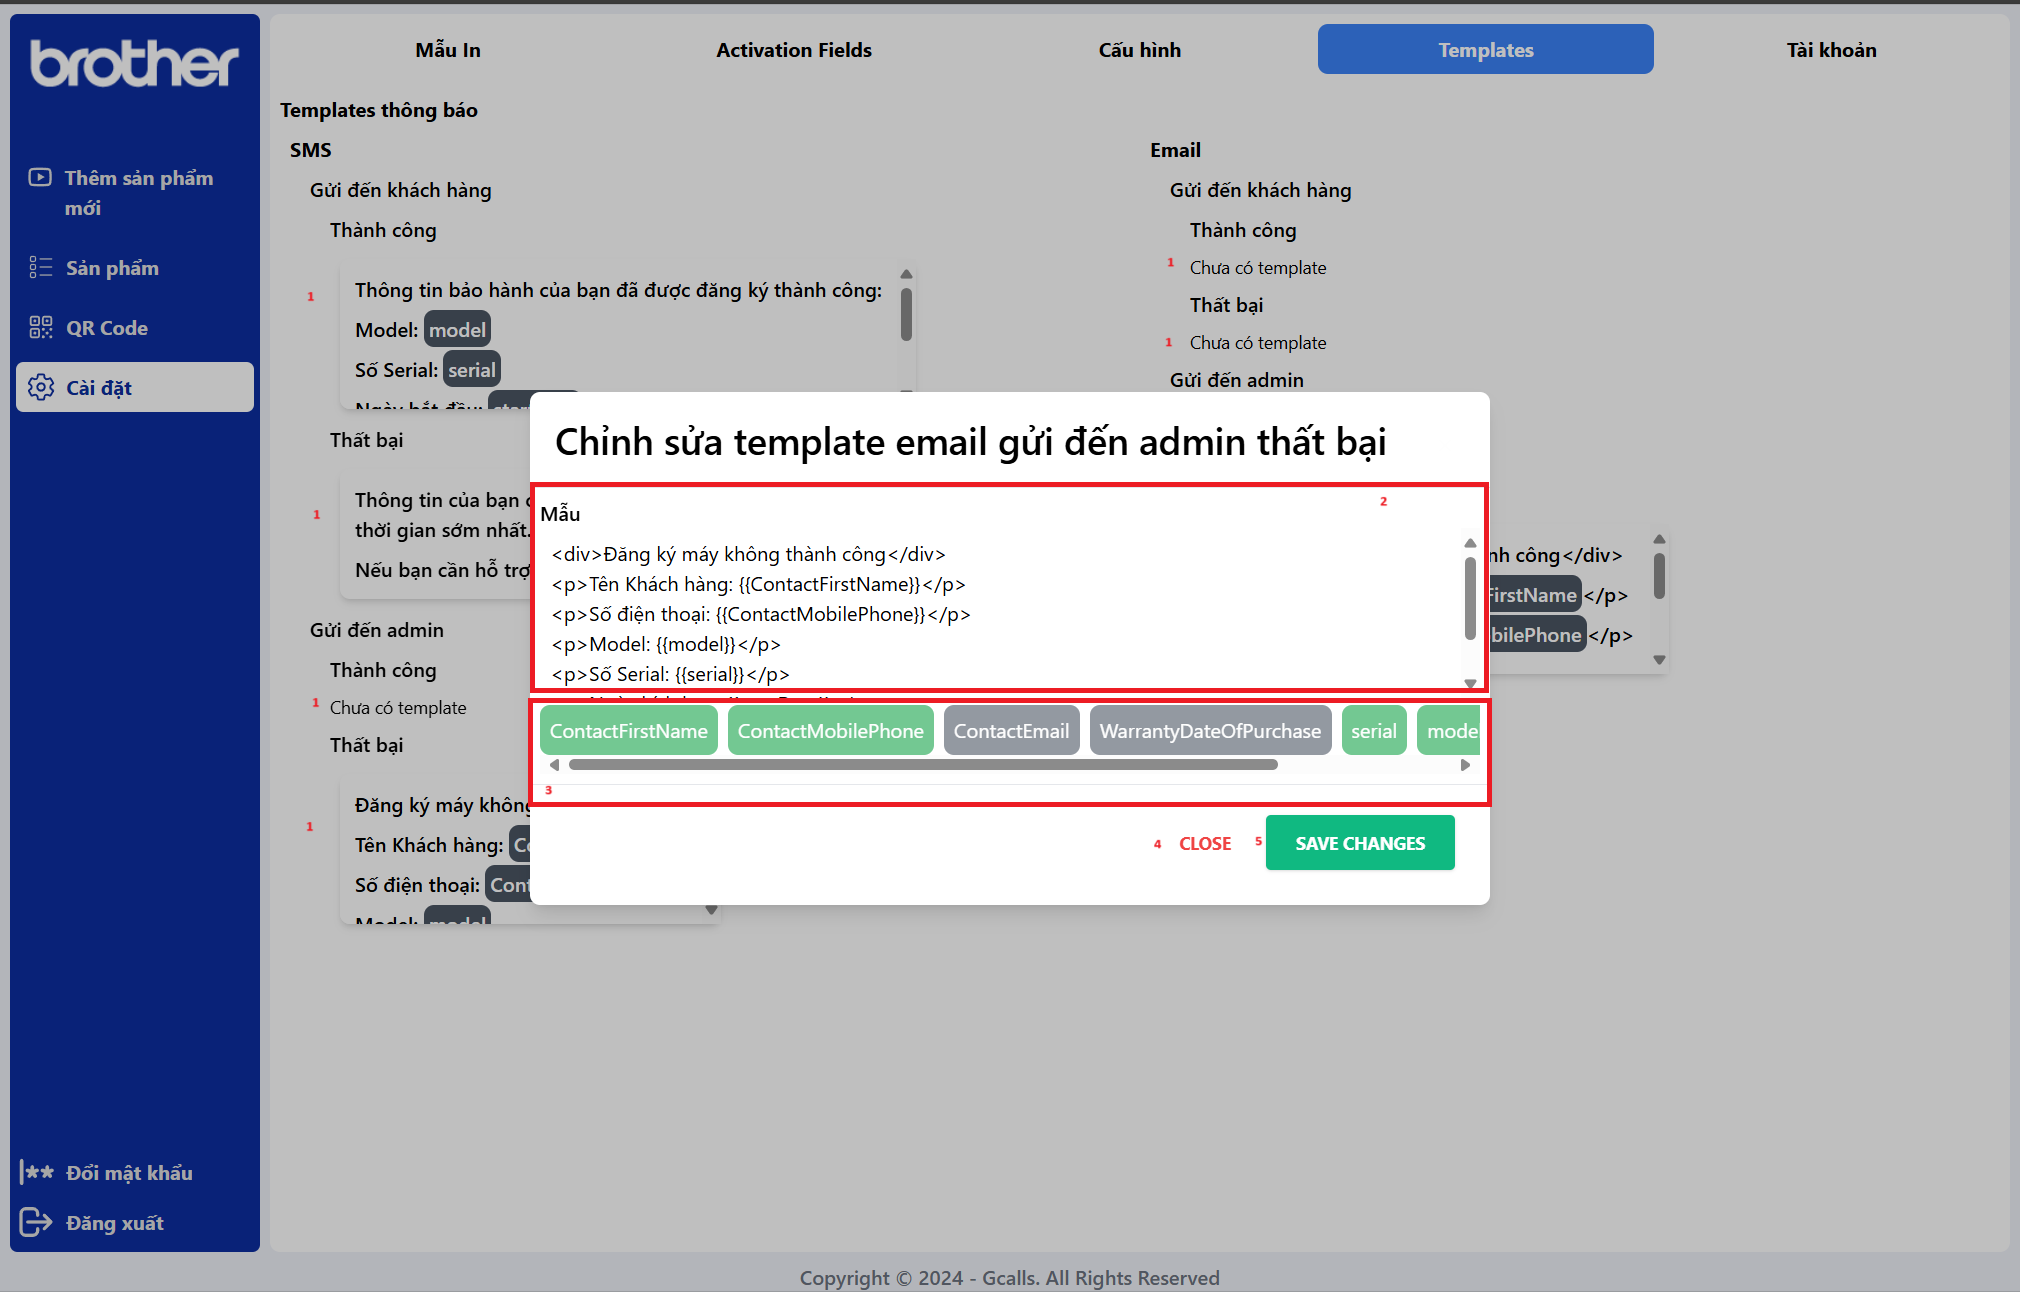
Explain:
- Click to add or edit the notification template
- Type the template content (normal text for sms, html for email)
- Select the field to replace in the template (The field got from the data register)
- Close the modal without save
- Save the template