Integrate Sentry with Project and Gitlab
I. Before get started (If sentry project doesnt exist on your project)
- Log in to cloud_sentry or seft-hosted sentry url. Then click the “Create Project” button in the top-right corner. Select your platform under the “Choose a platform” heading. (ex : React)
- Choose when to receive alerts using the options beneath “Set your default alert settings.” Select “Alert me on every new issue” to get an email each time an error is logged. The “When there are more than” option filters out noise created by duplicate events in a given time window.
- Give your project a name in the “Project name” field. Click “Create Project” to finish your setup.
II. Setup Sentry
- Adding Sentry to Your Codebase
- Now, you need to integrate Sentry with your React code. Add the Sentry library to your project’s dependencies using npm:
npm install --save @sentry/react @sentry/tracing
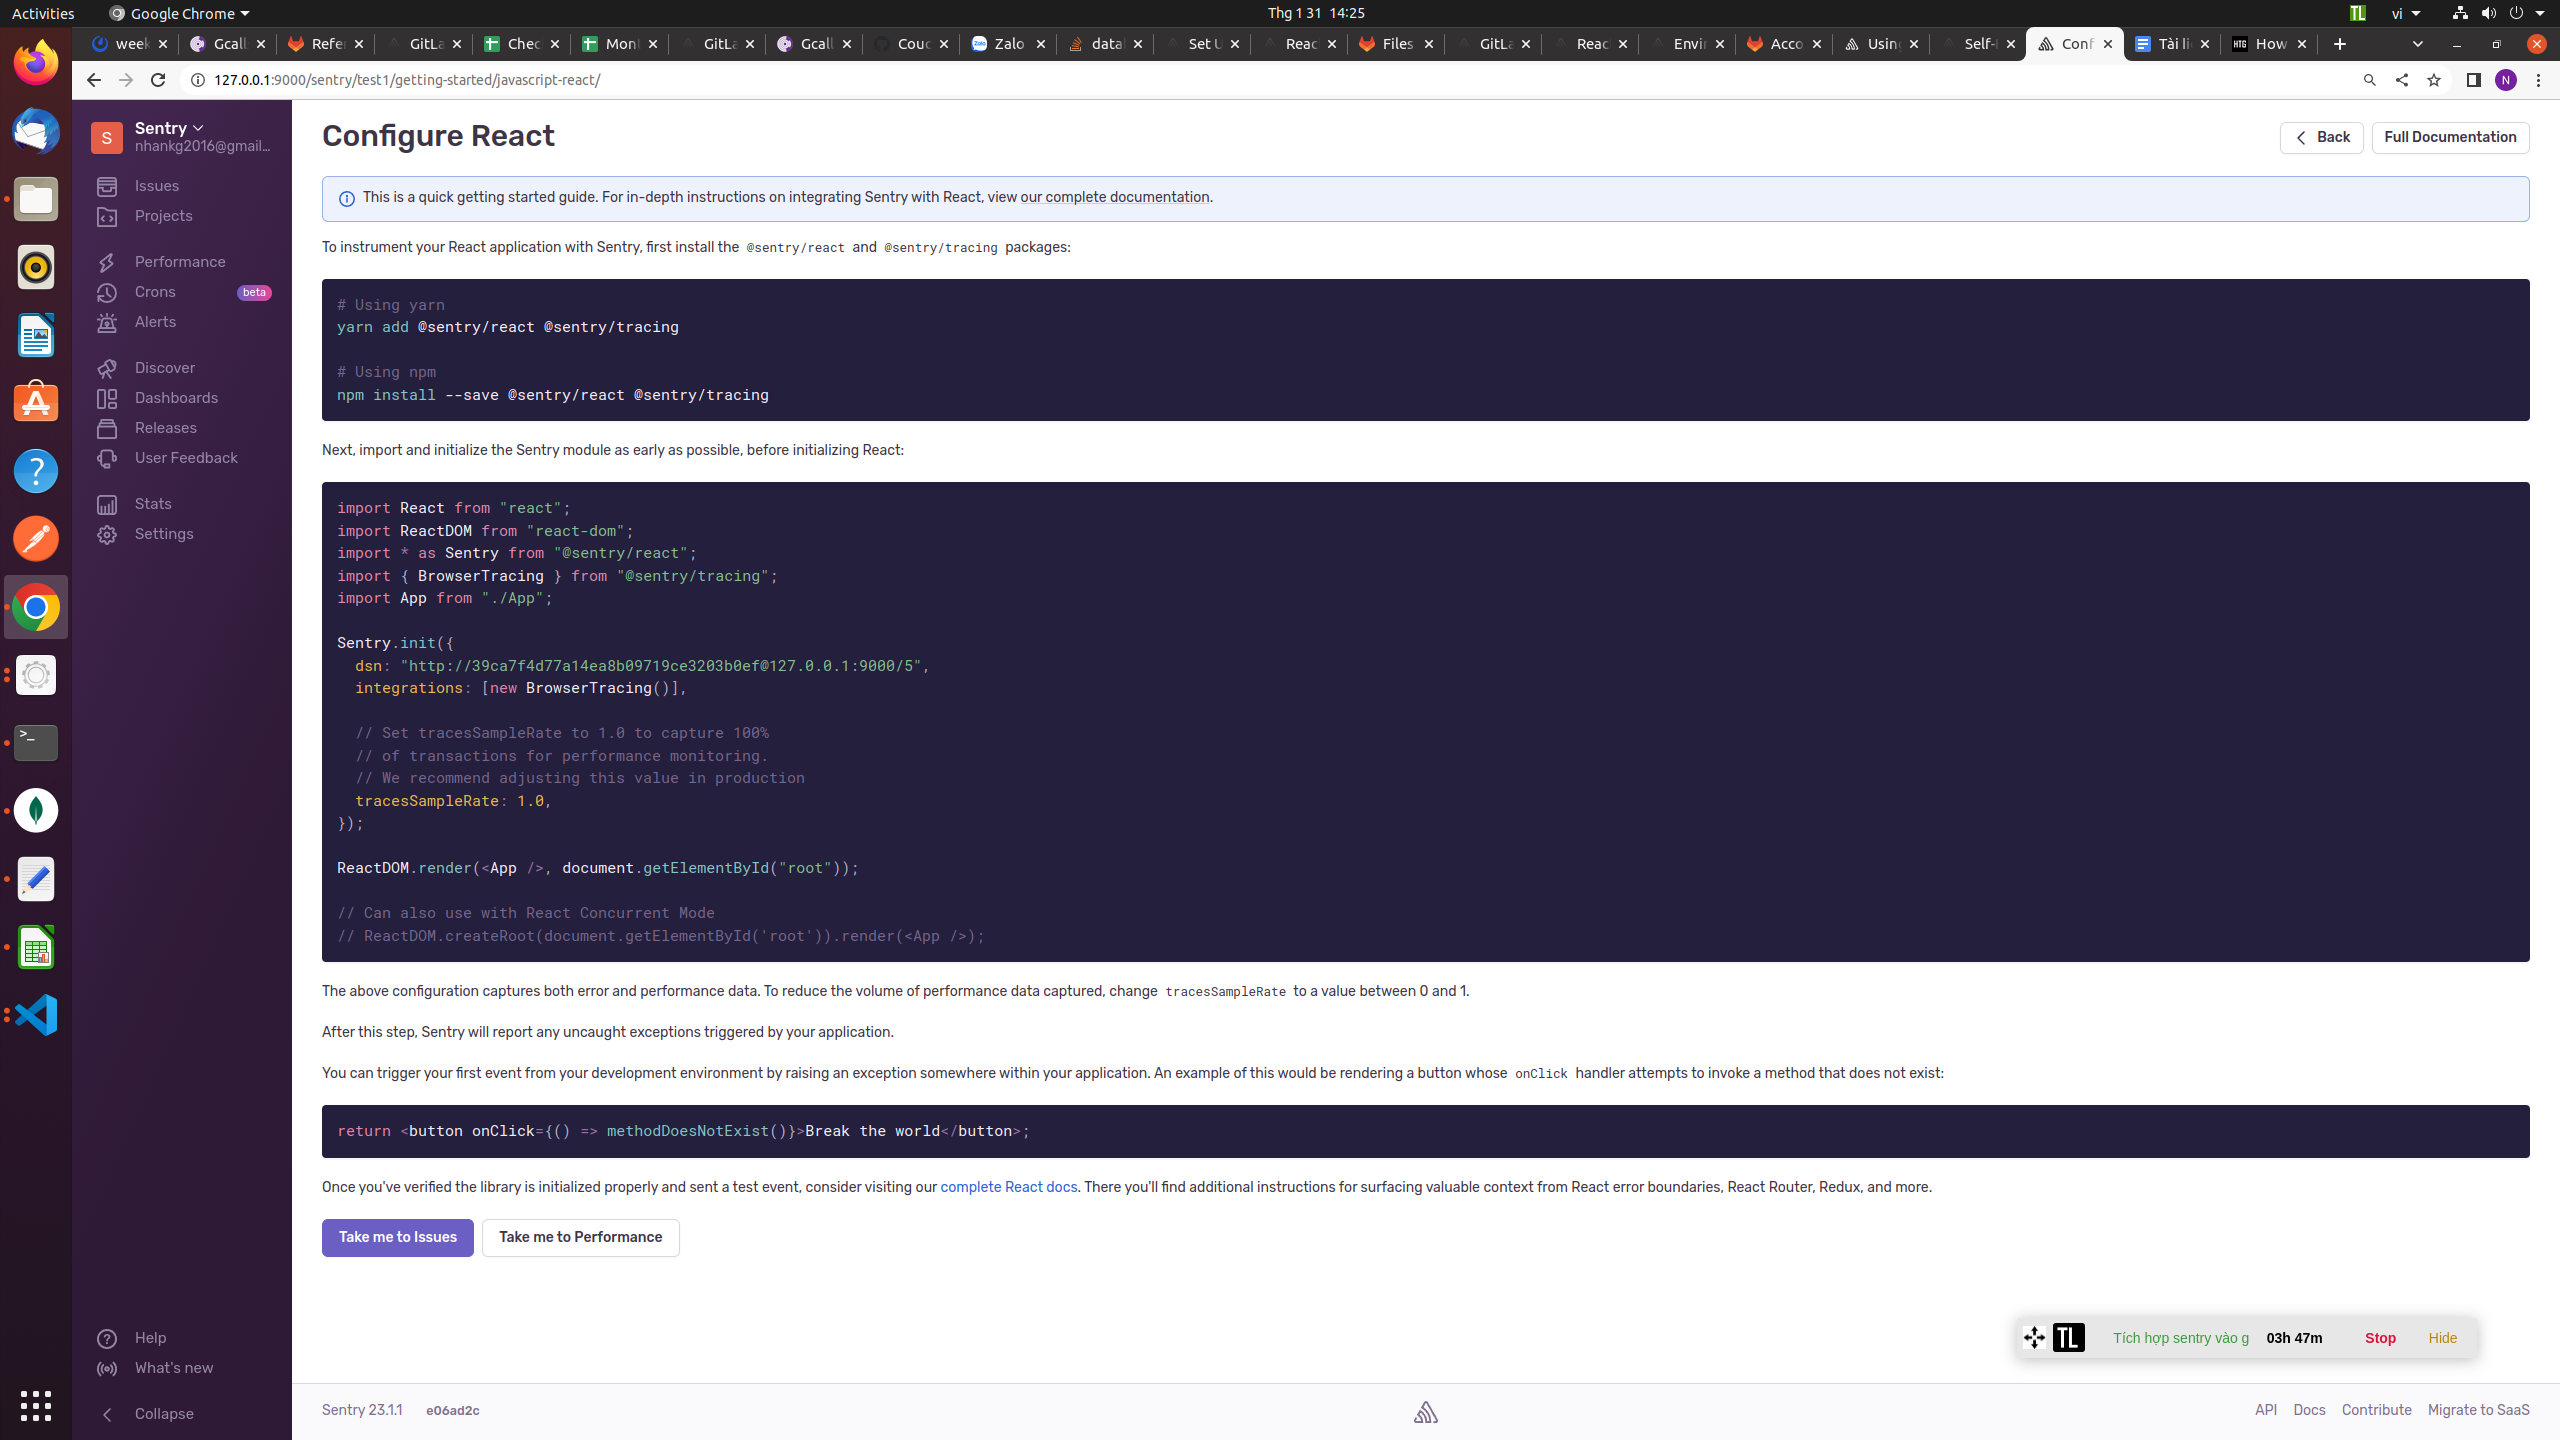
- You’ll need to initialize Sentry as soon as possible in your app’s JavaScript. This gives Sentry visibility into errors that occur early in the React lifecycle. Add Sentry’s bootstrap script before your first ReactDOM.render() call. This is typically in index.js
- Please refer Sentry docx for more details sentry_docx
- Adding GitLab Integration
- There are two sides to integrating GitLab and Sentry. First, GitLab projects have an “Error Tracking” feature that displays your Sentry error list. You can mark errors as Resolved or Ignored from within GitLab. The second part involves connecting Sentry to GitLab. This lets Sentry automatically create GitLab issues when a new error is logged.
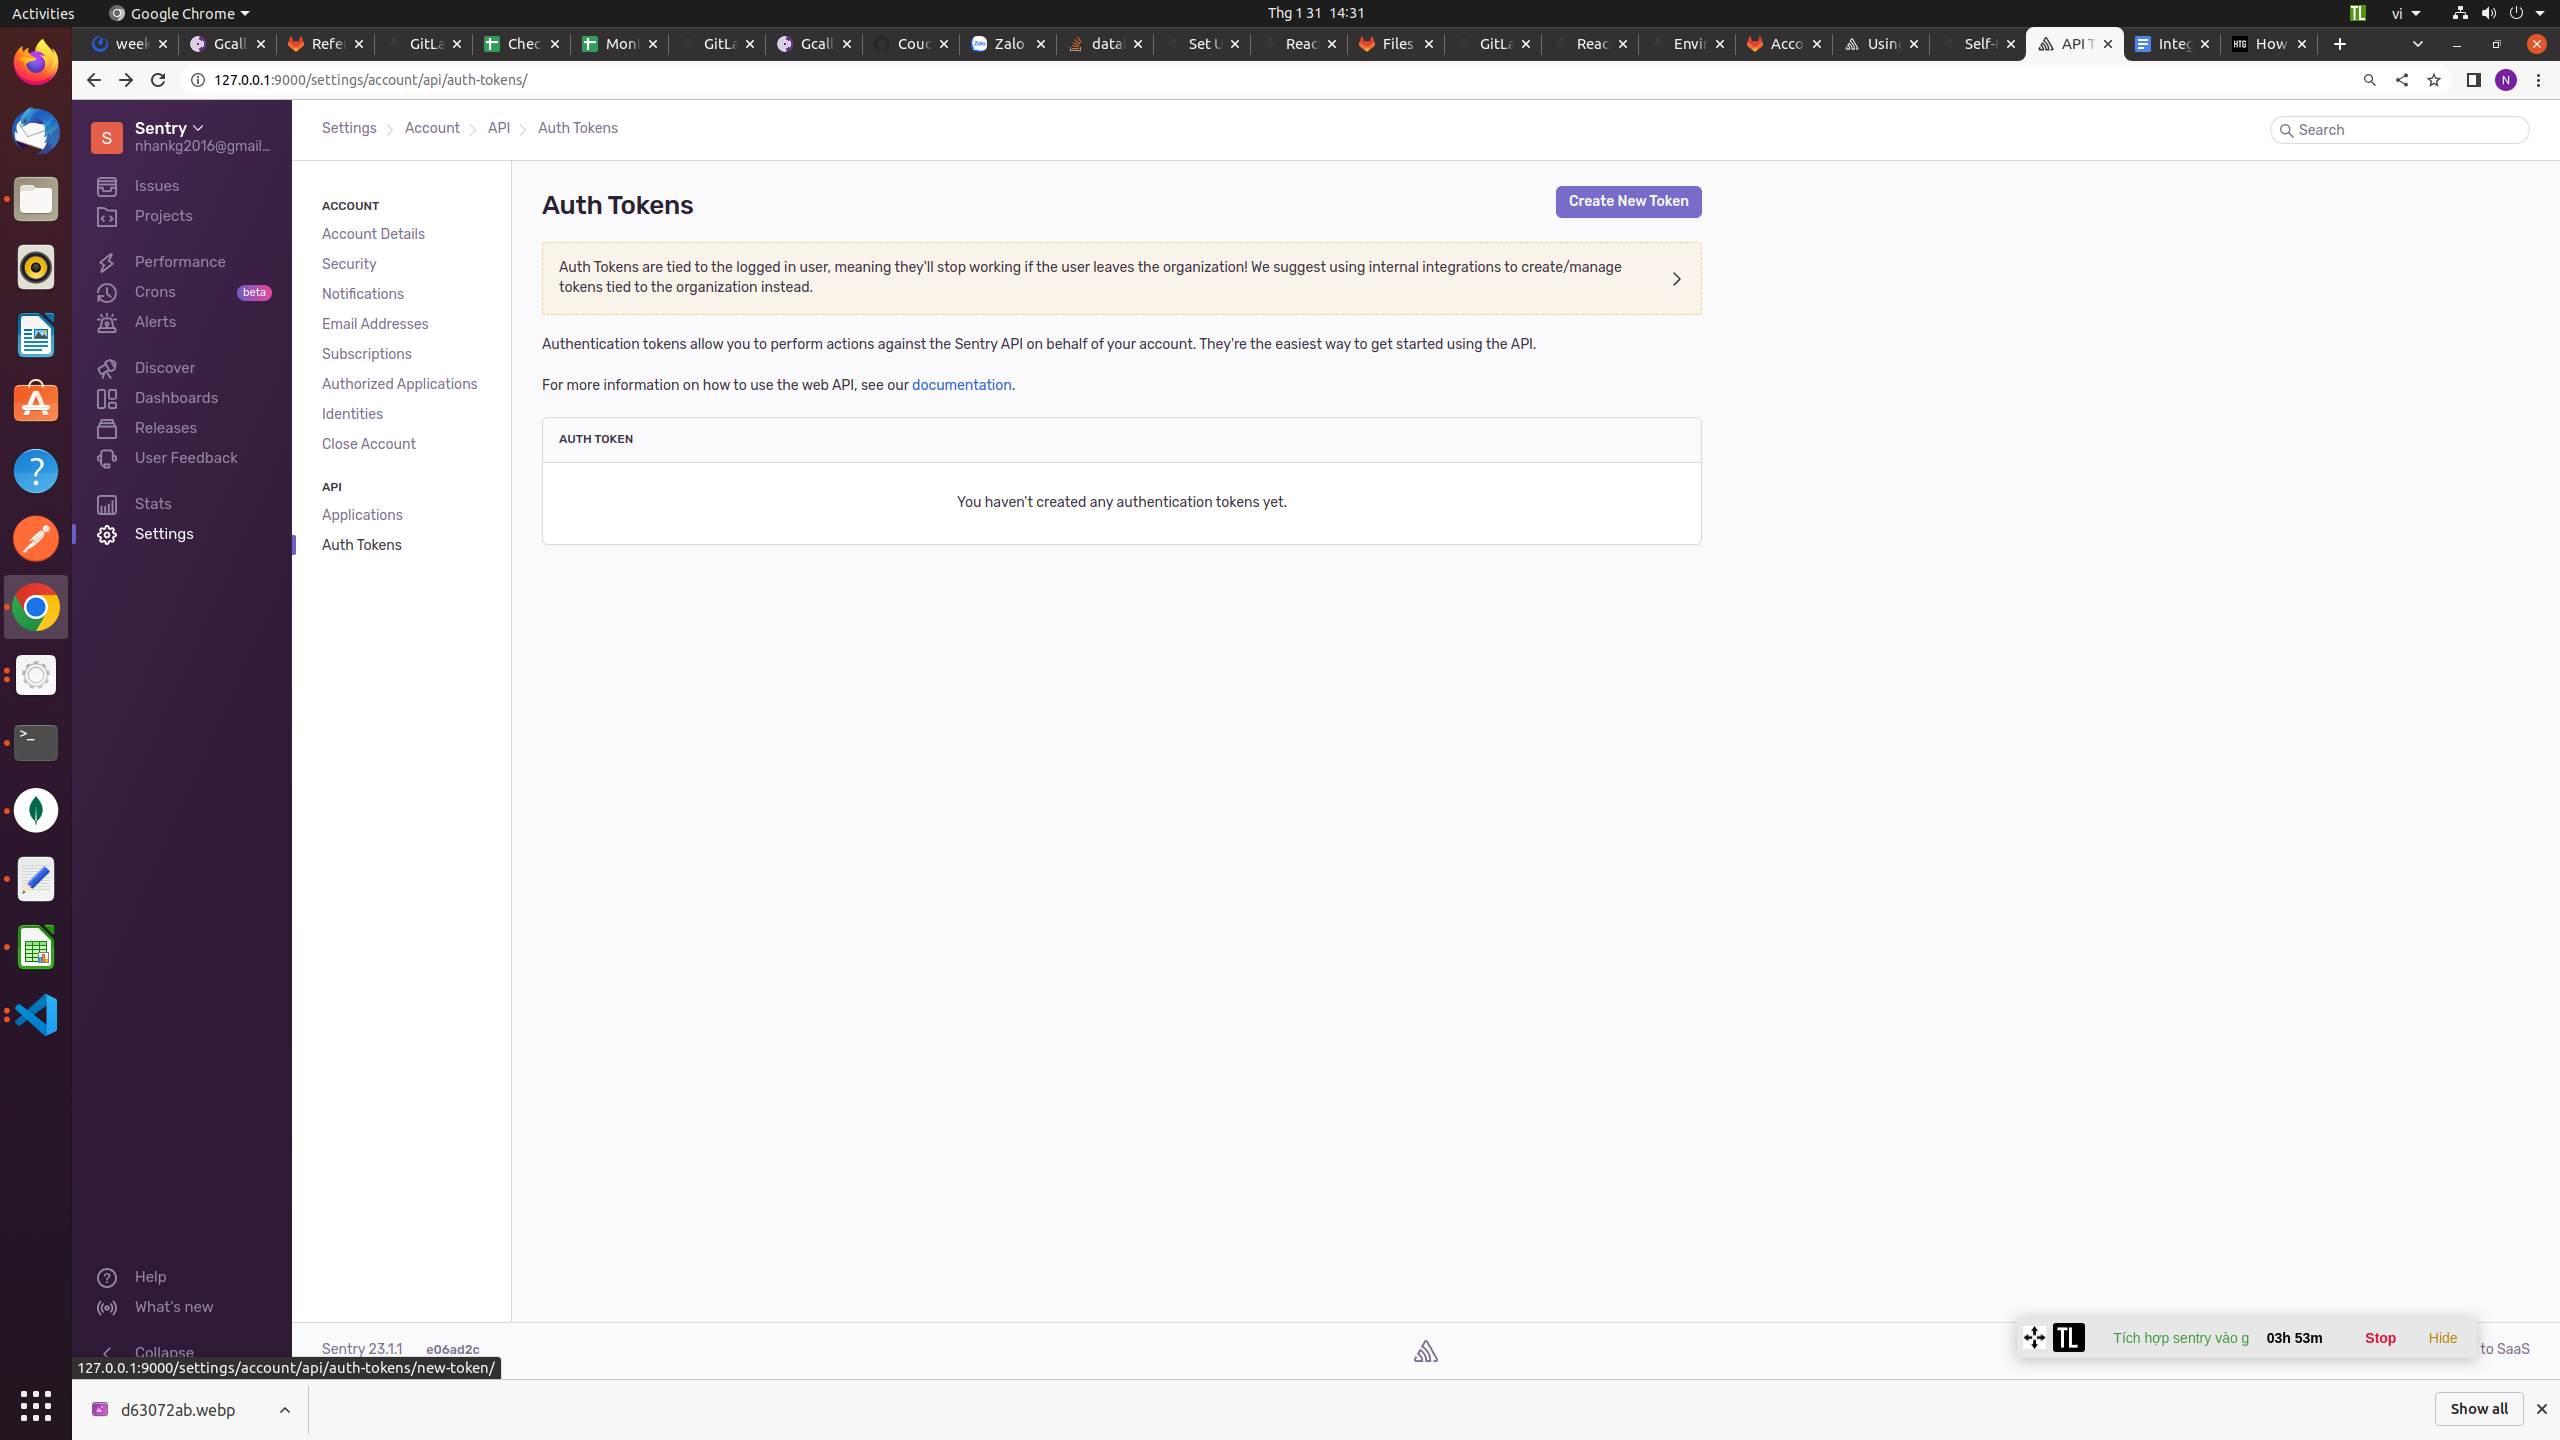
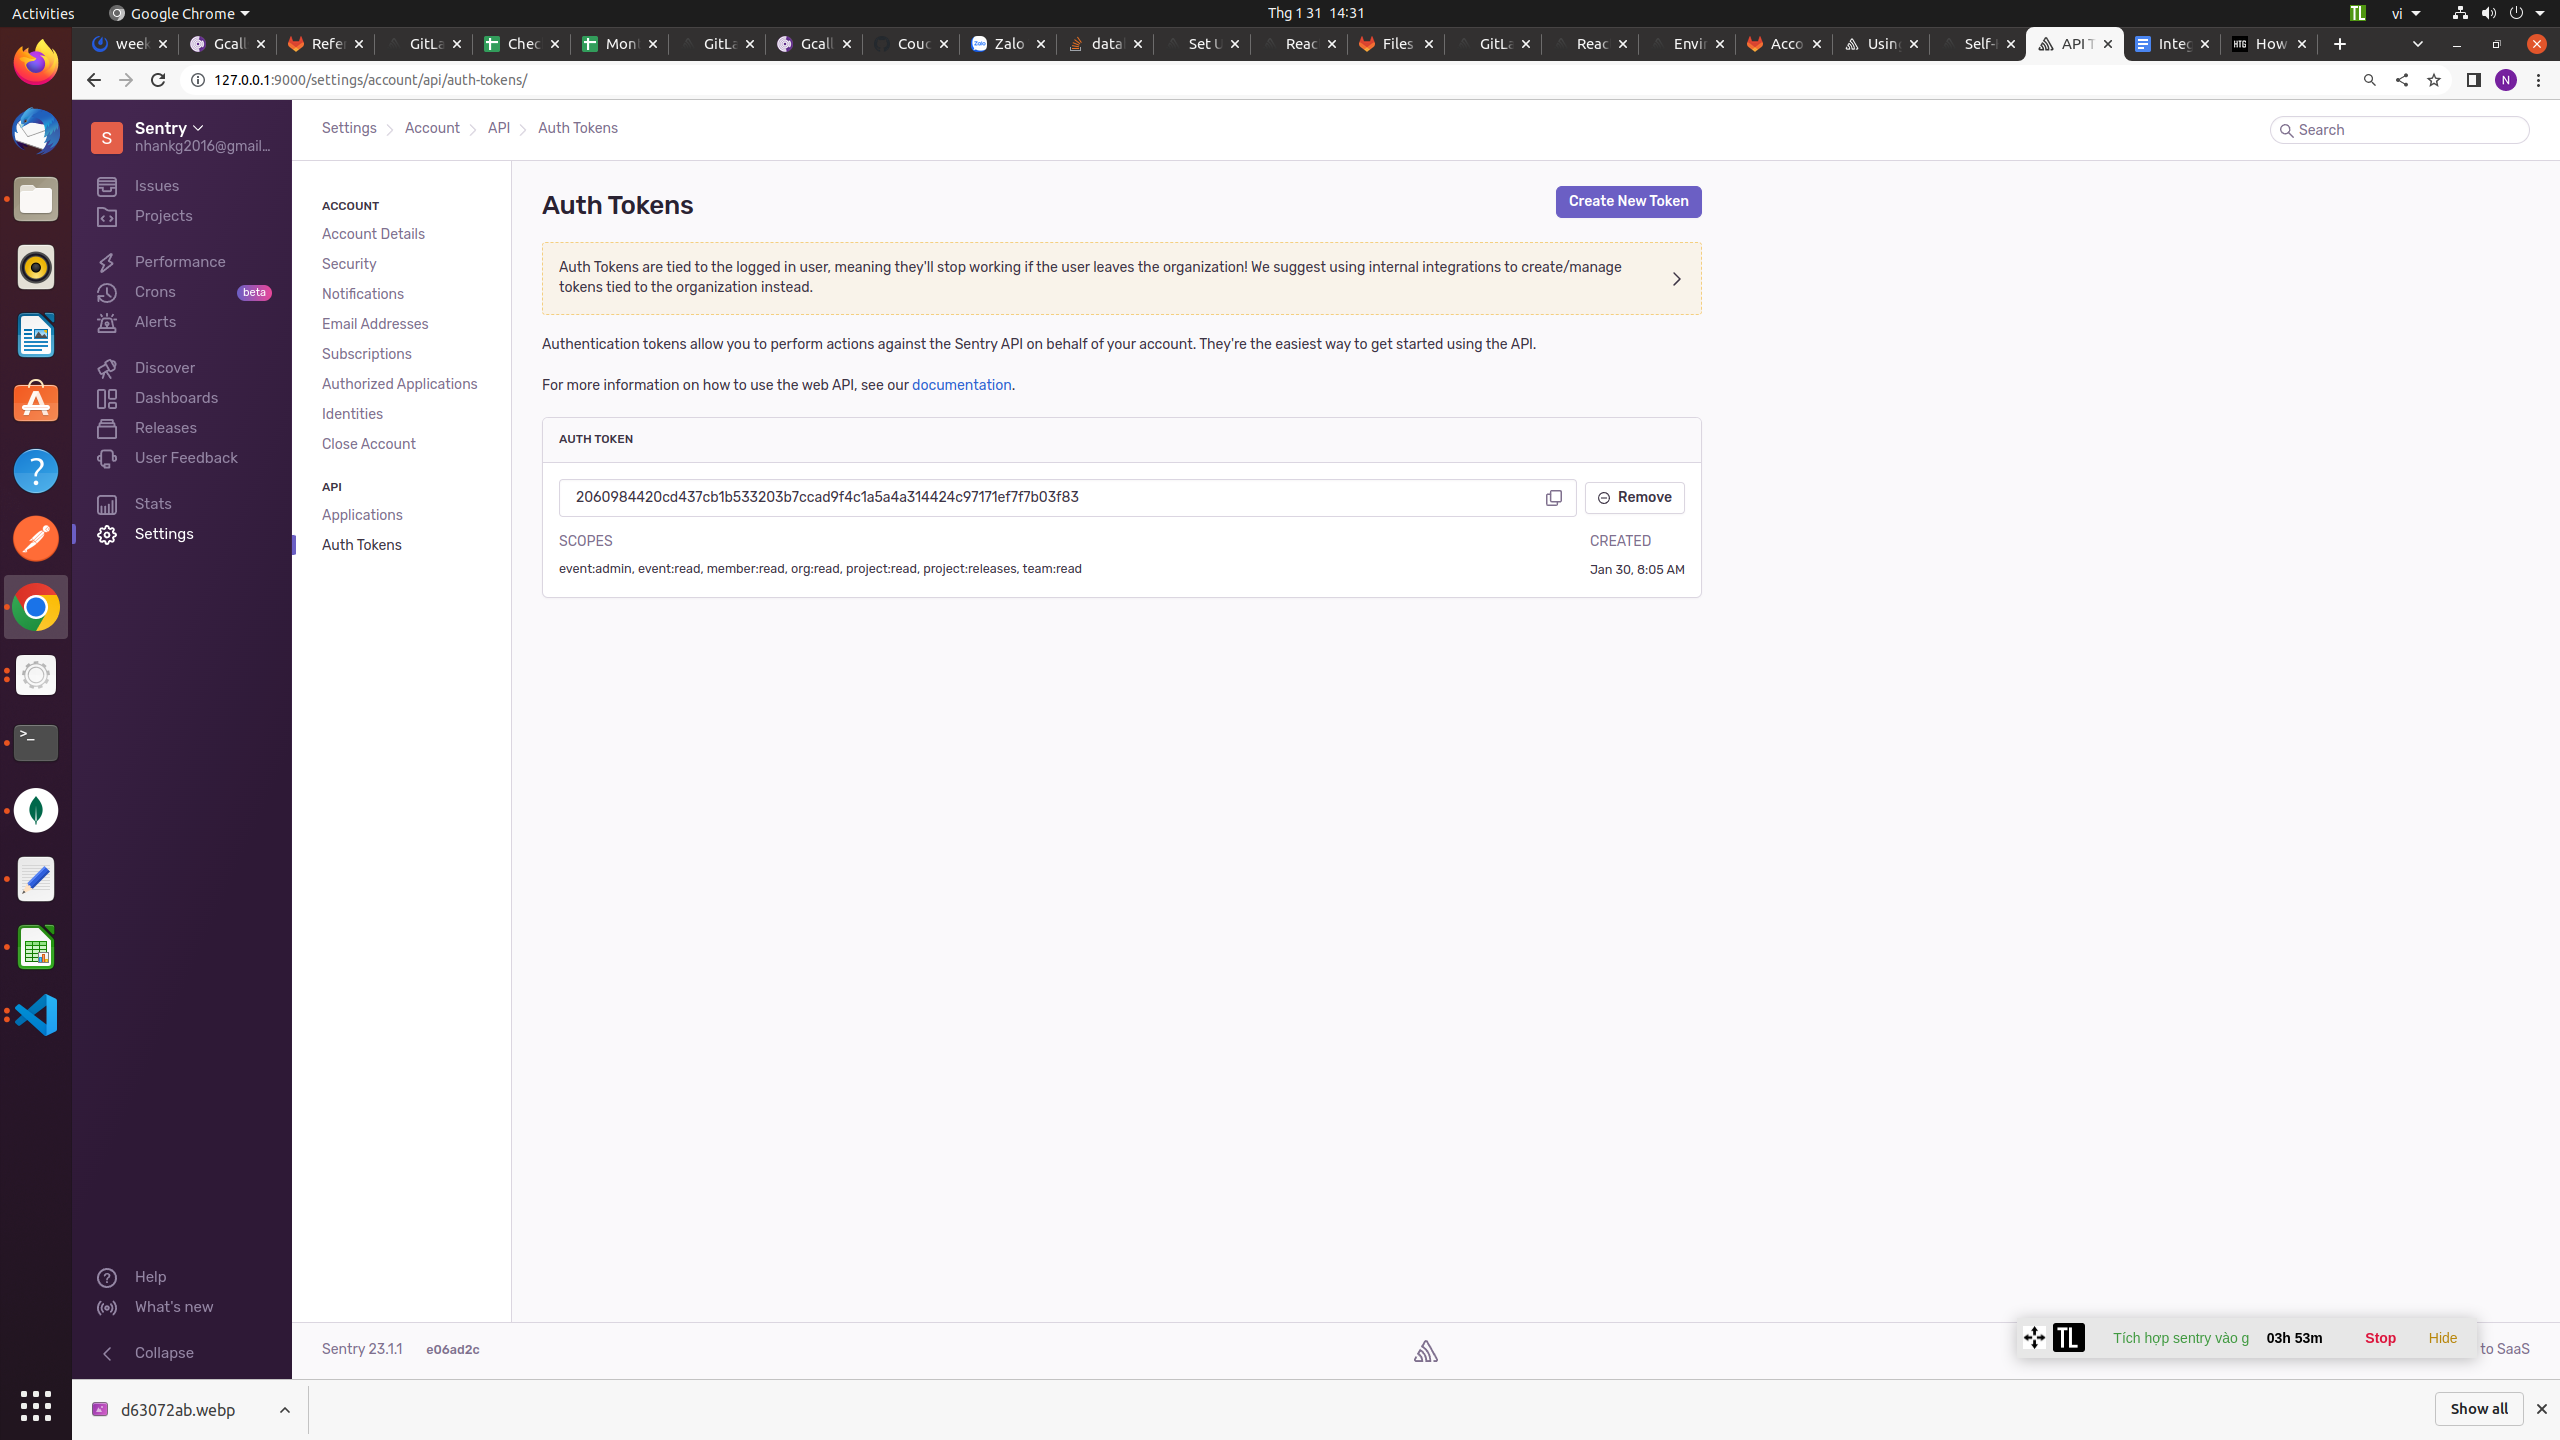
- Let’s look at GitLab’s Error Tracking screen first. You’ll need to create a Sentry API key. Click your username in the top left of your Sentry UI, and then the API Keys in the menu. Click “Create New Token” in the top-right corner.
Add the following token scopes:
+ alerts:read
+ alerts:write
+ event:admin
+ event:read
+ event:write
+ project:read
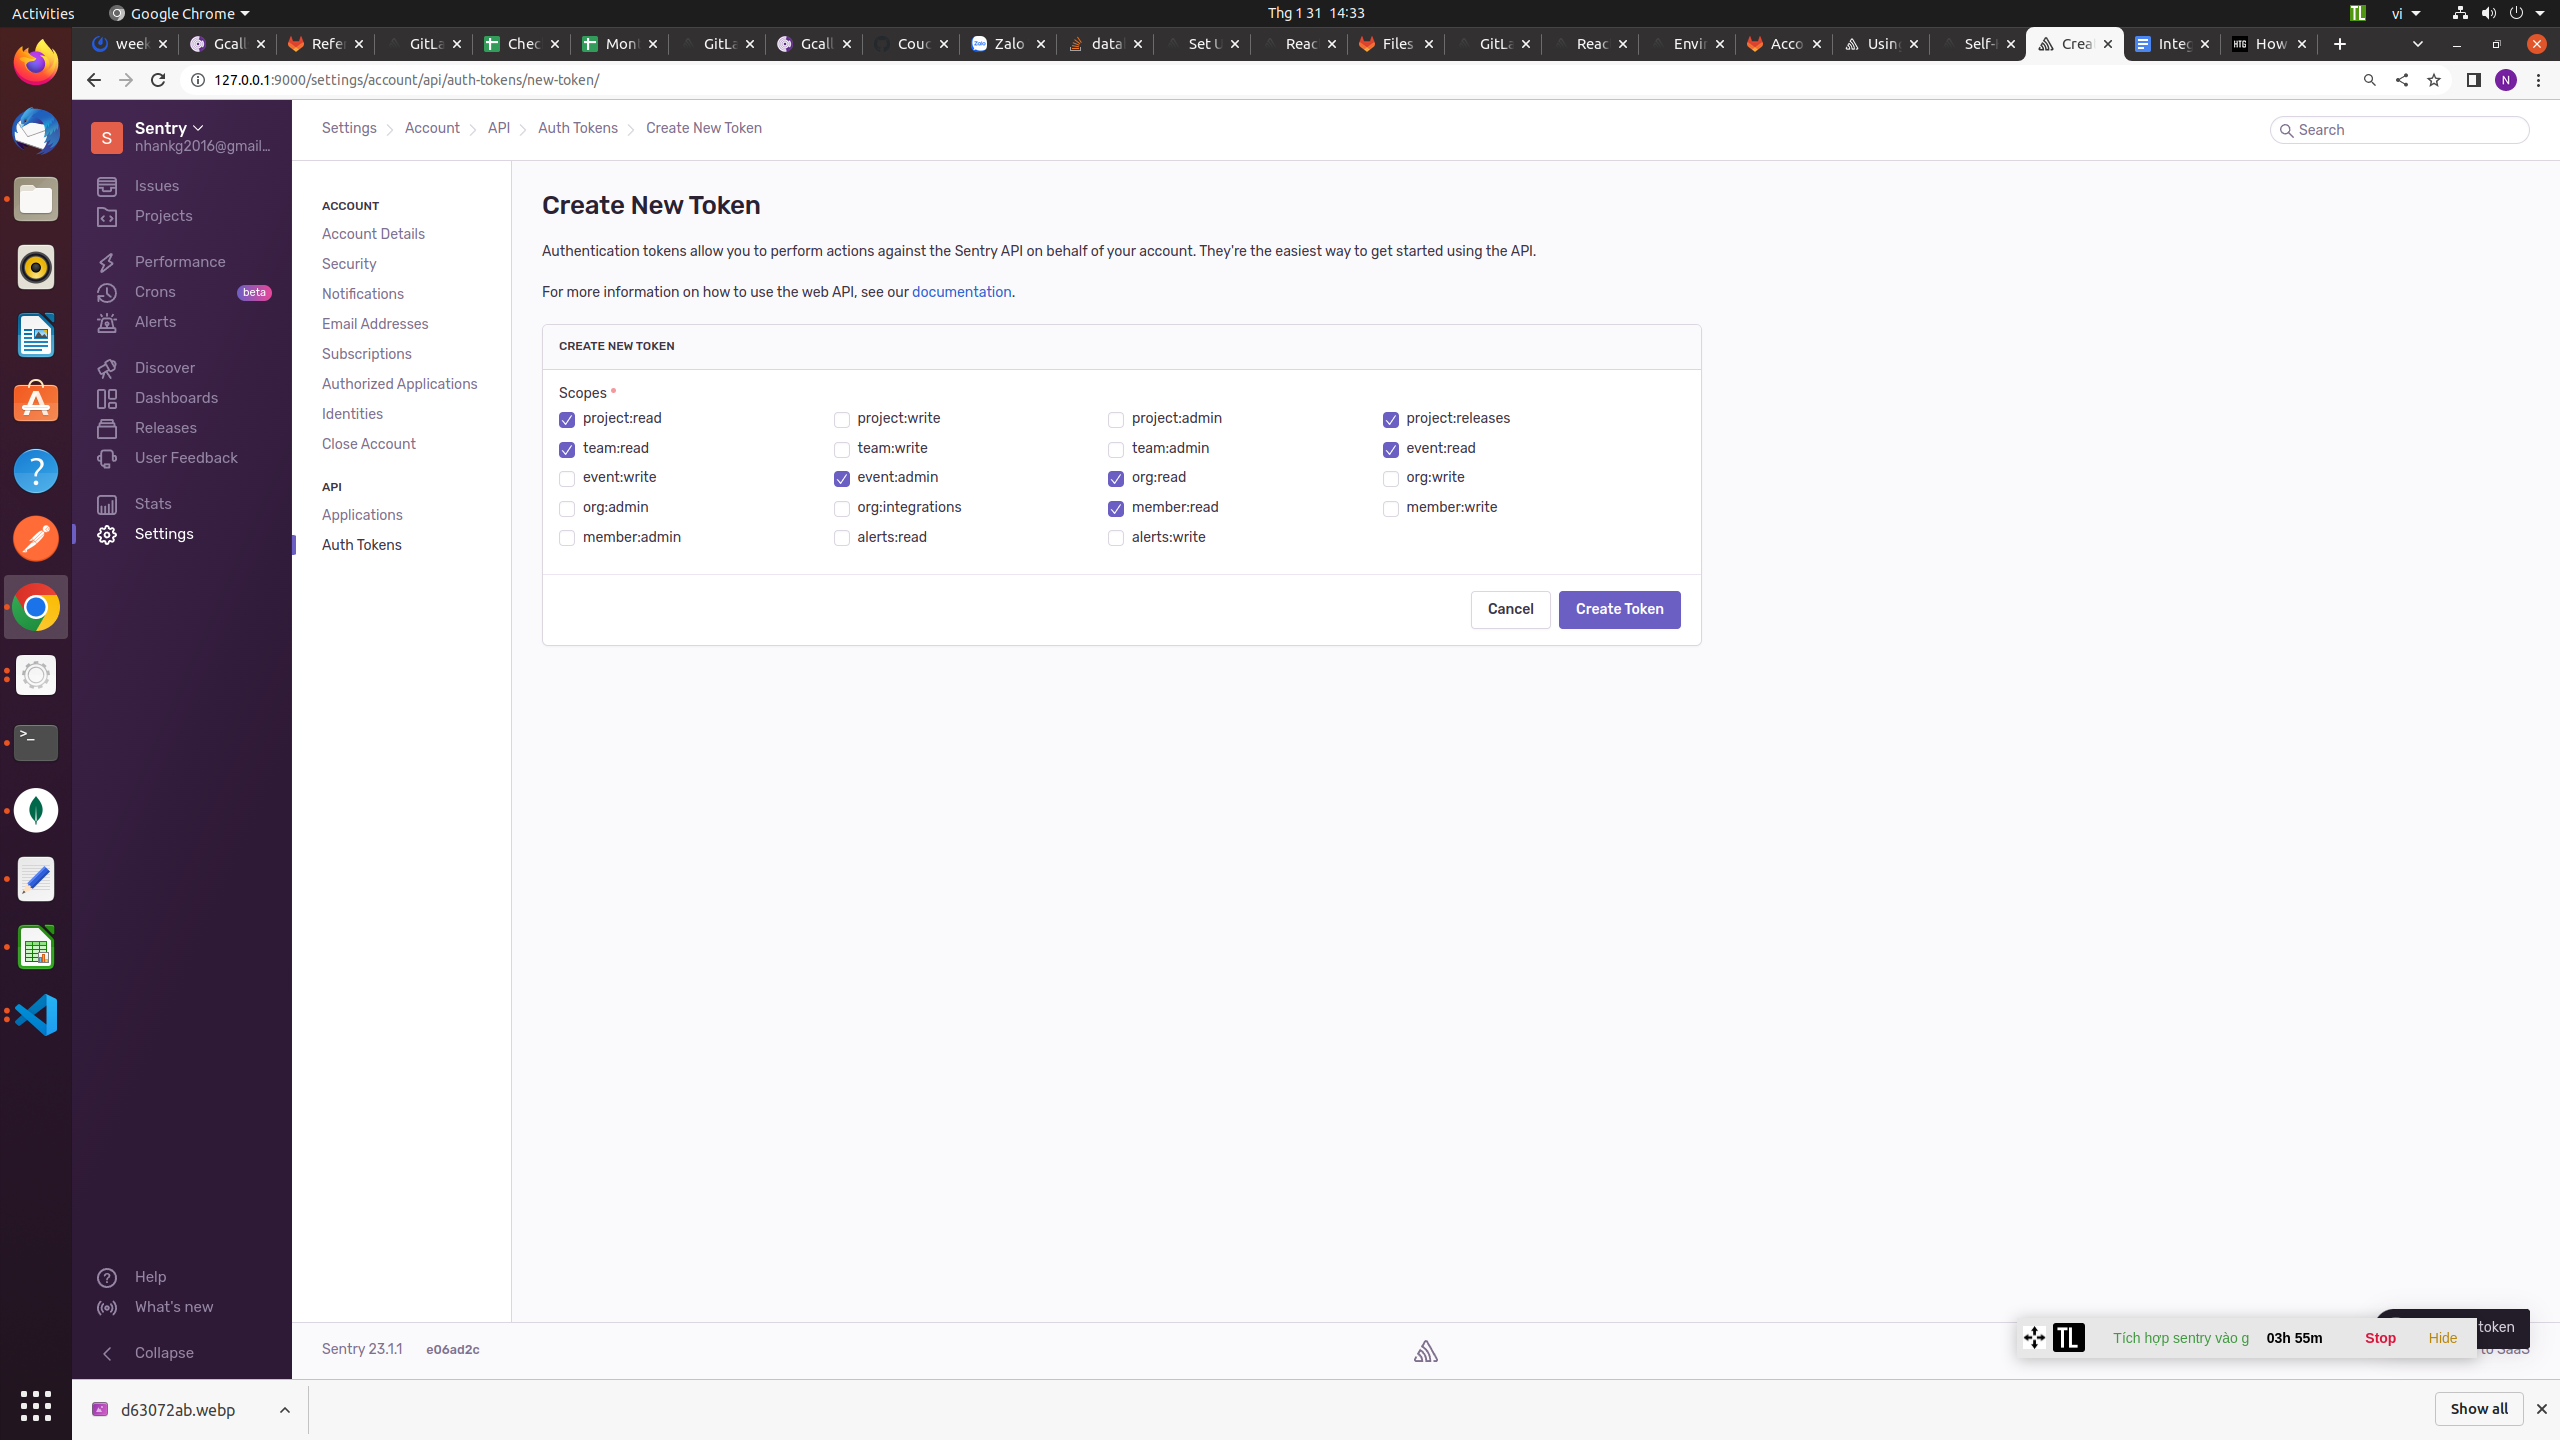
- This allows GitLab to read and update your Sentry errors.
- Next, head to your GitLab project. Click Settings in the side menu, and then Monitor. Expand the “Error tracking” section. Paste your Sentry authentication token into the “Auth Token” field and press “Connect.” If you’re using a self-hosted Sentry instance, you’ll also need to adjust the “Sentry API URI” field to match your server’s URI.
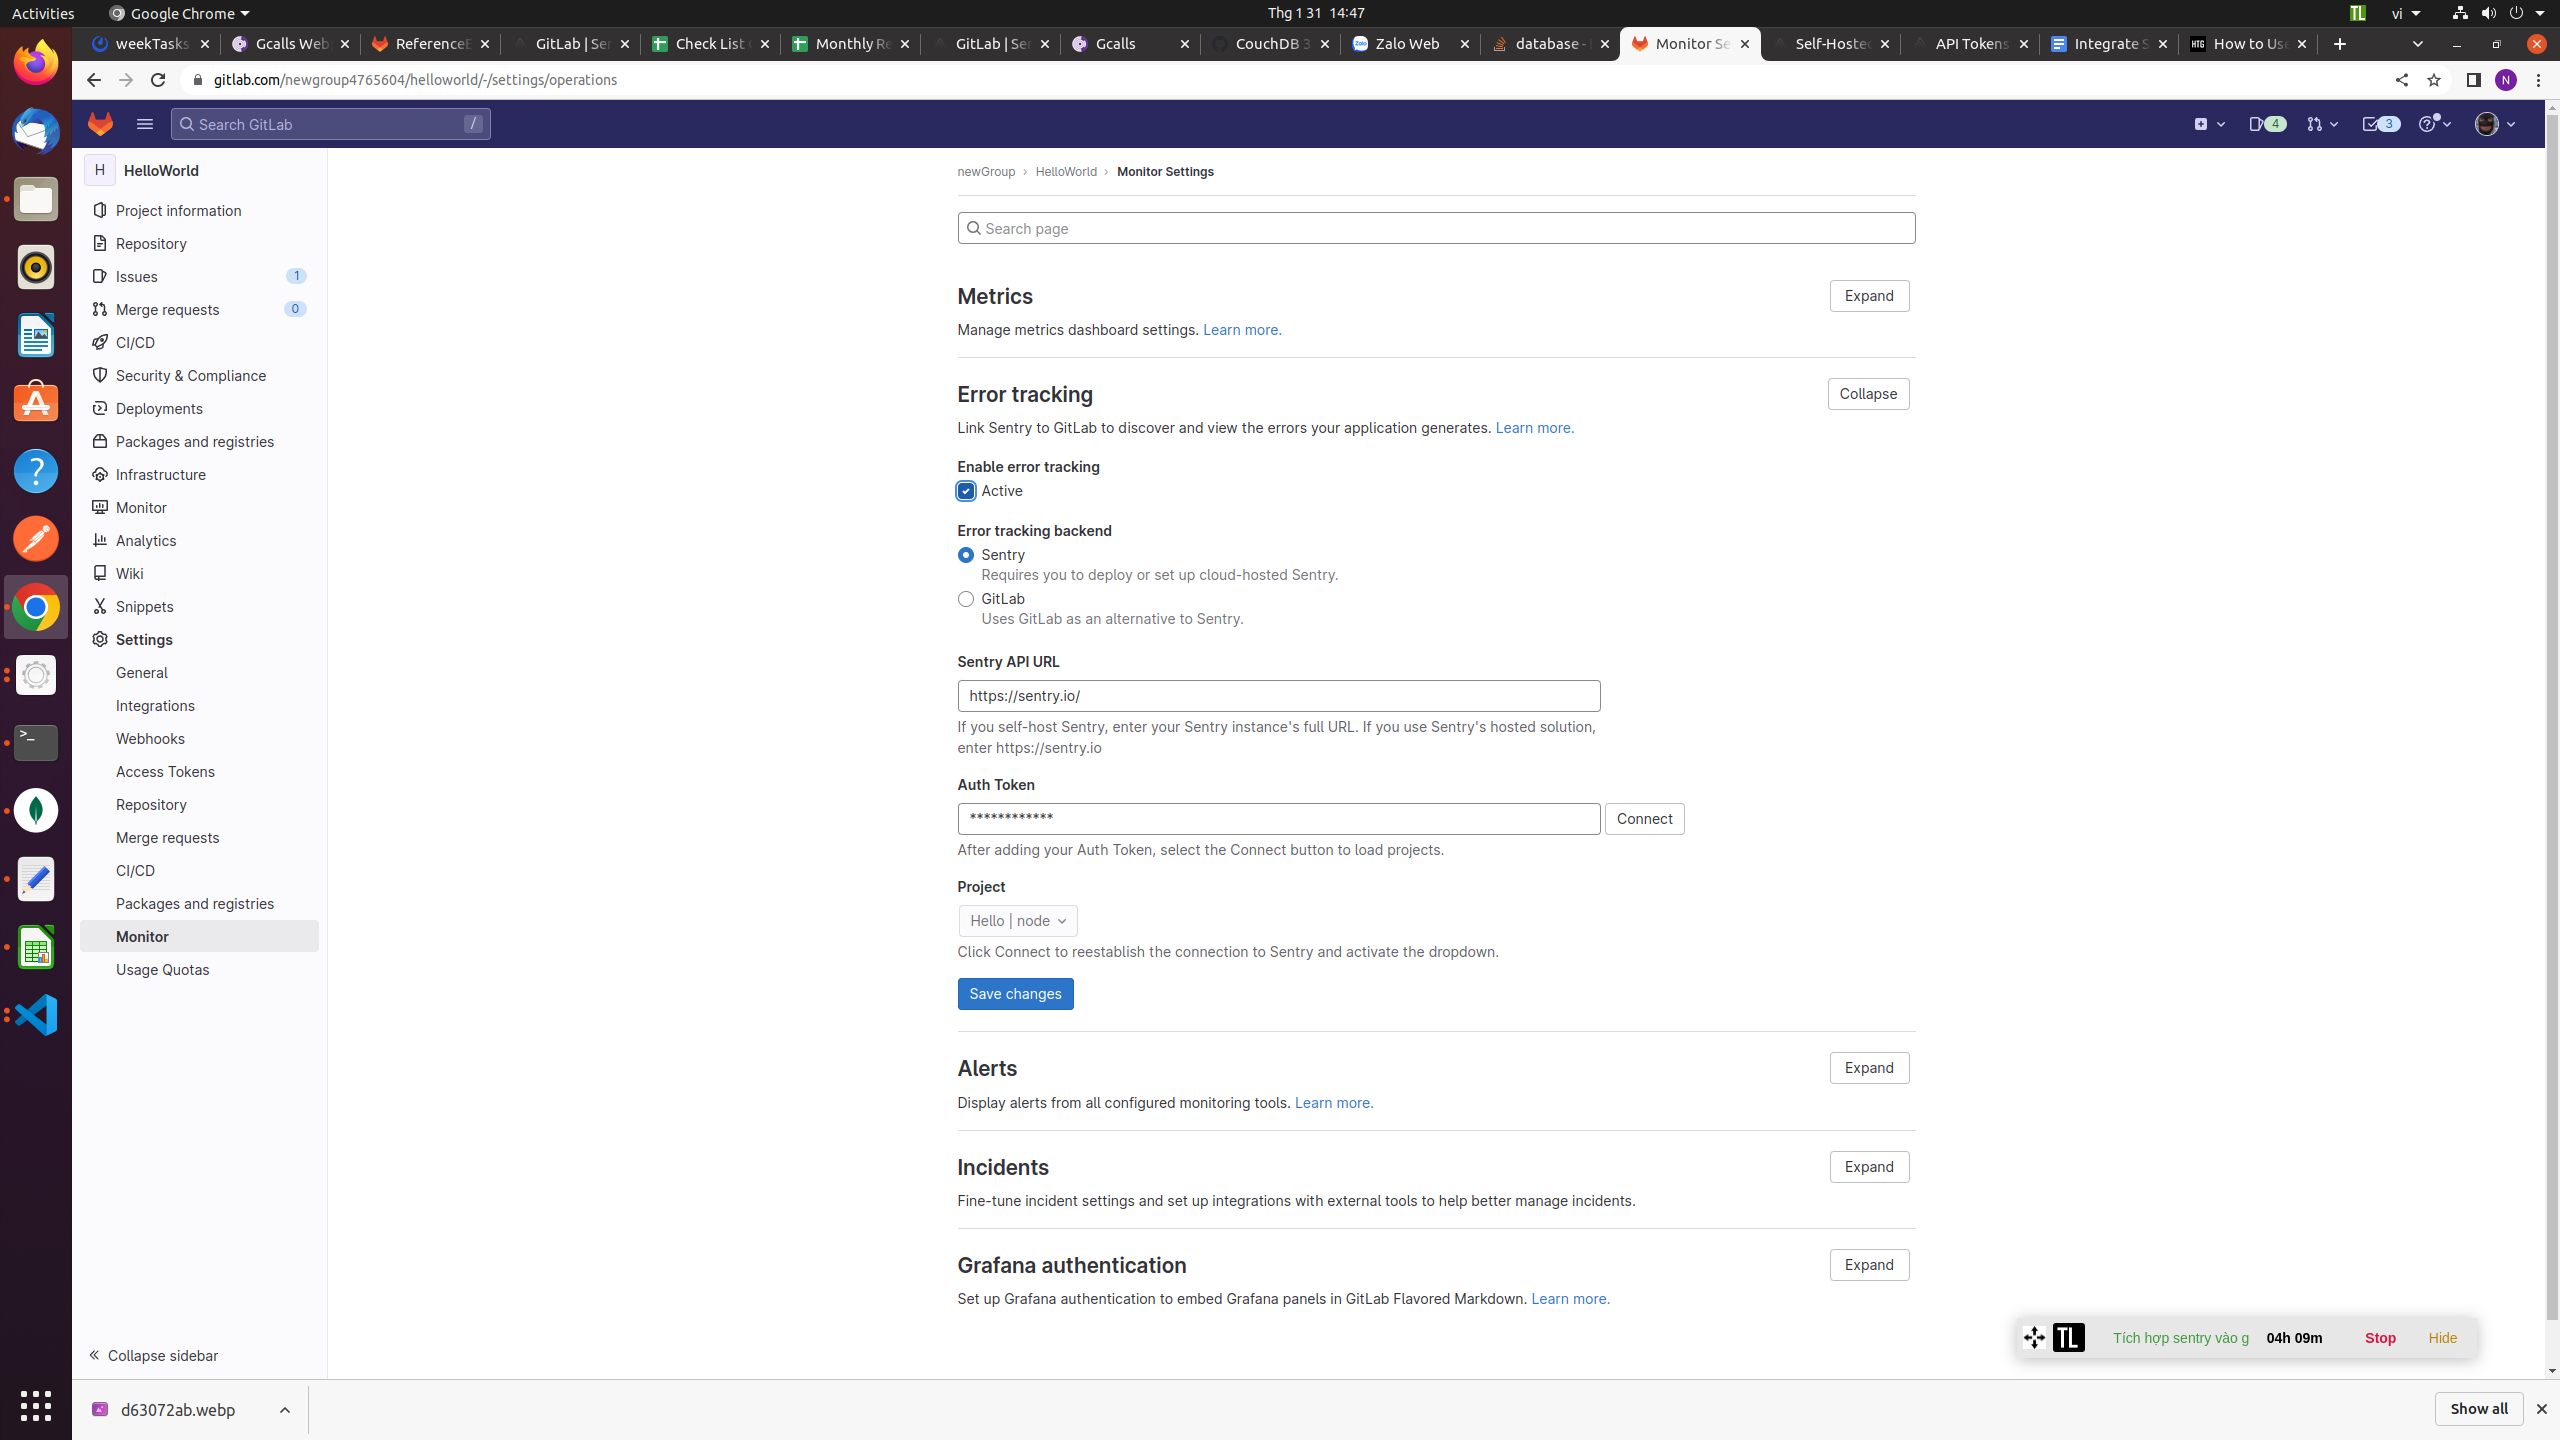
The “Project” dropdown will populate with a list of your Sentry projects. Select the correct project and press “Save changes.” You’re now ready to use Error Tracking in GitLab.
Click Monitor > Error Tracking in the left sidebar. You’ll see your Sentry error list. It’s filtered to Unresolved issues by default. This can be changed using the dropdowns in the top-right corner. Click an error to see its detailed stack trace without leaving GitLab.
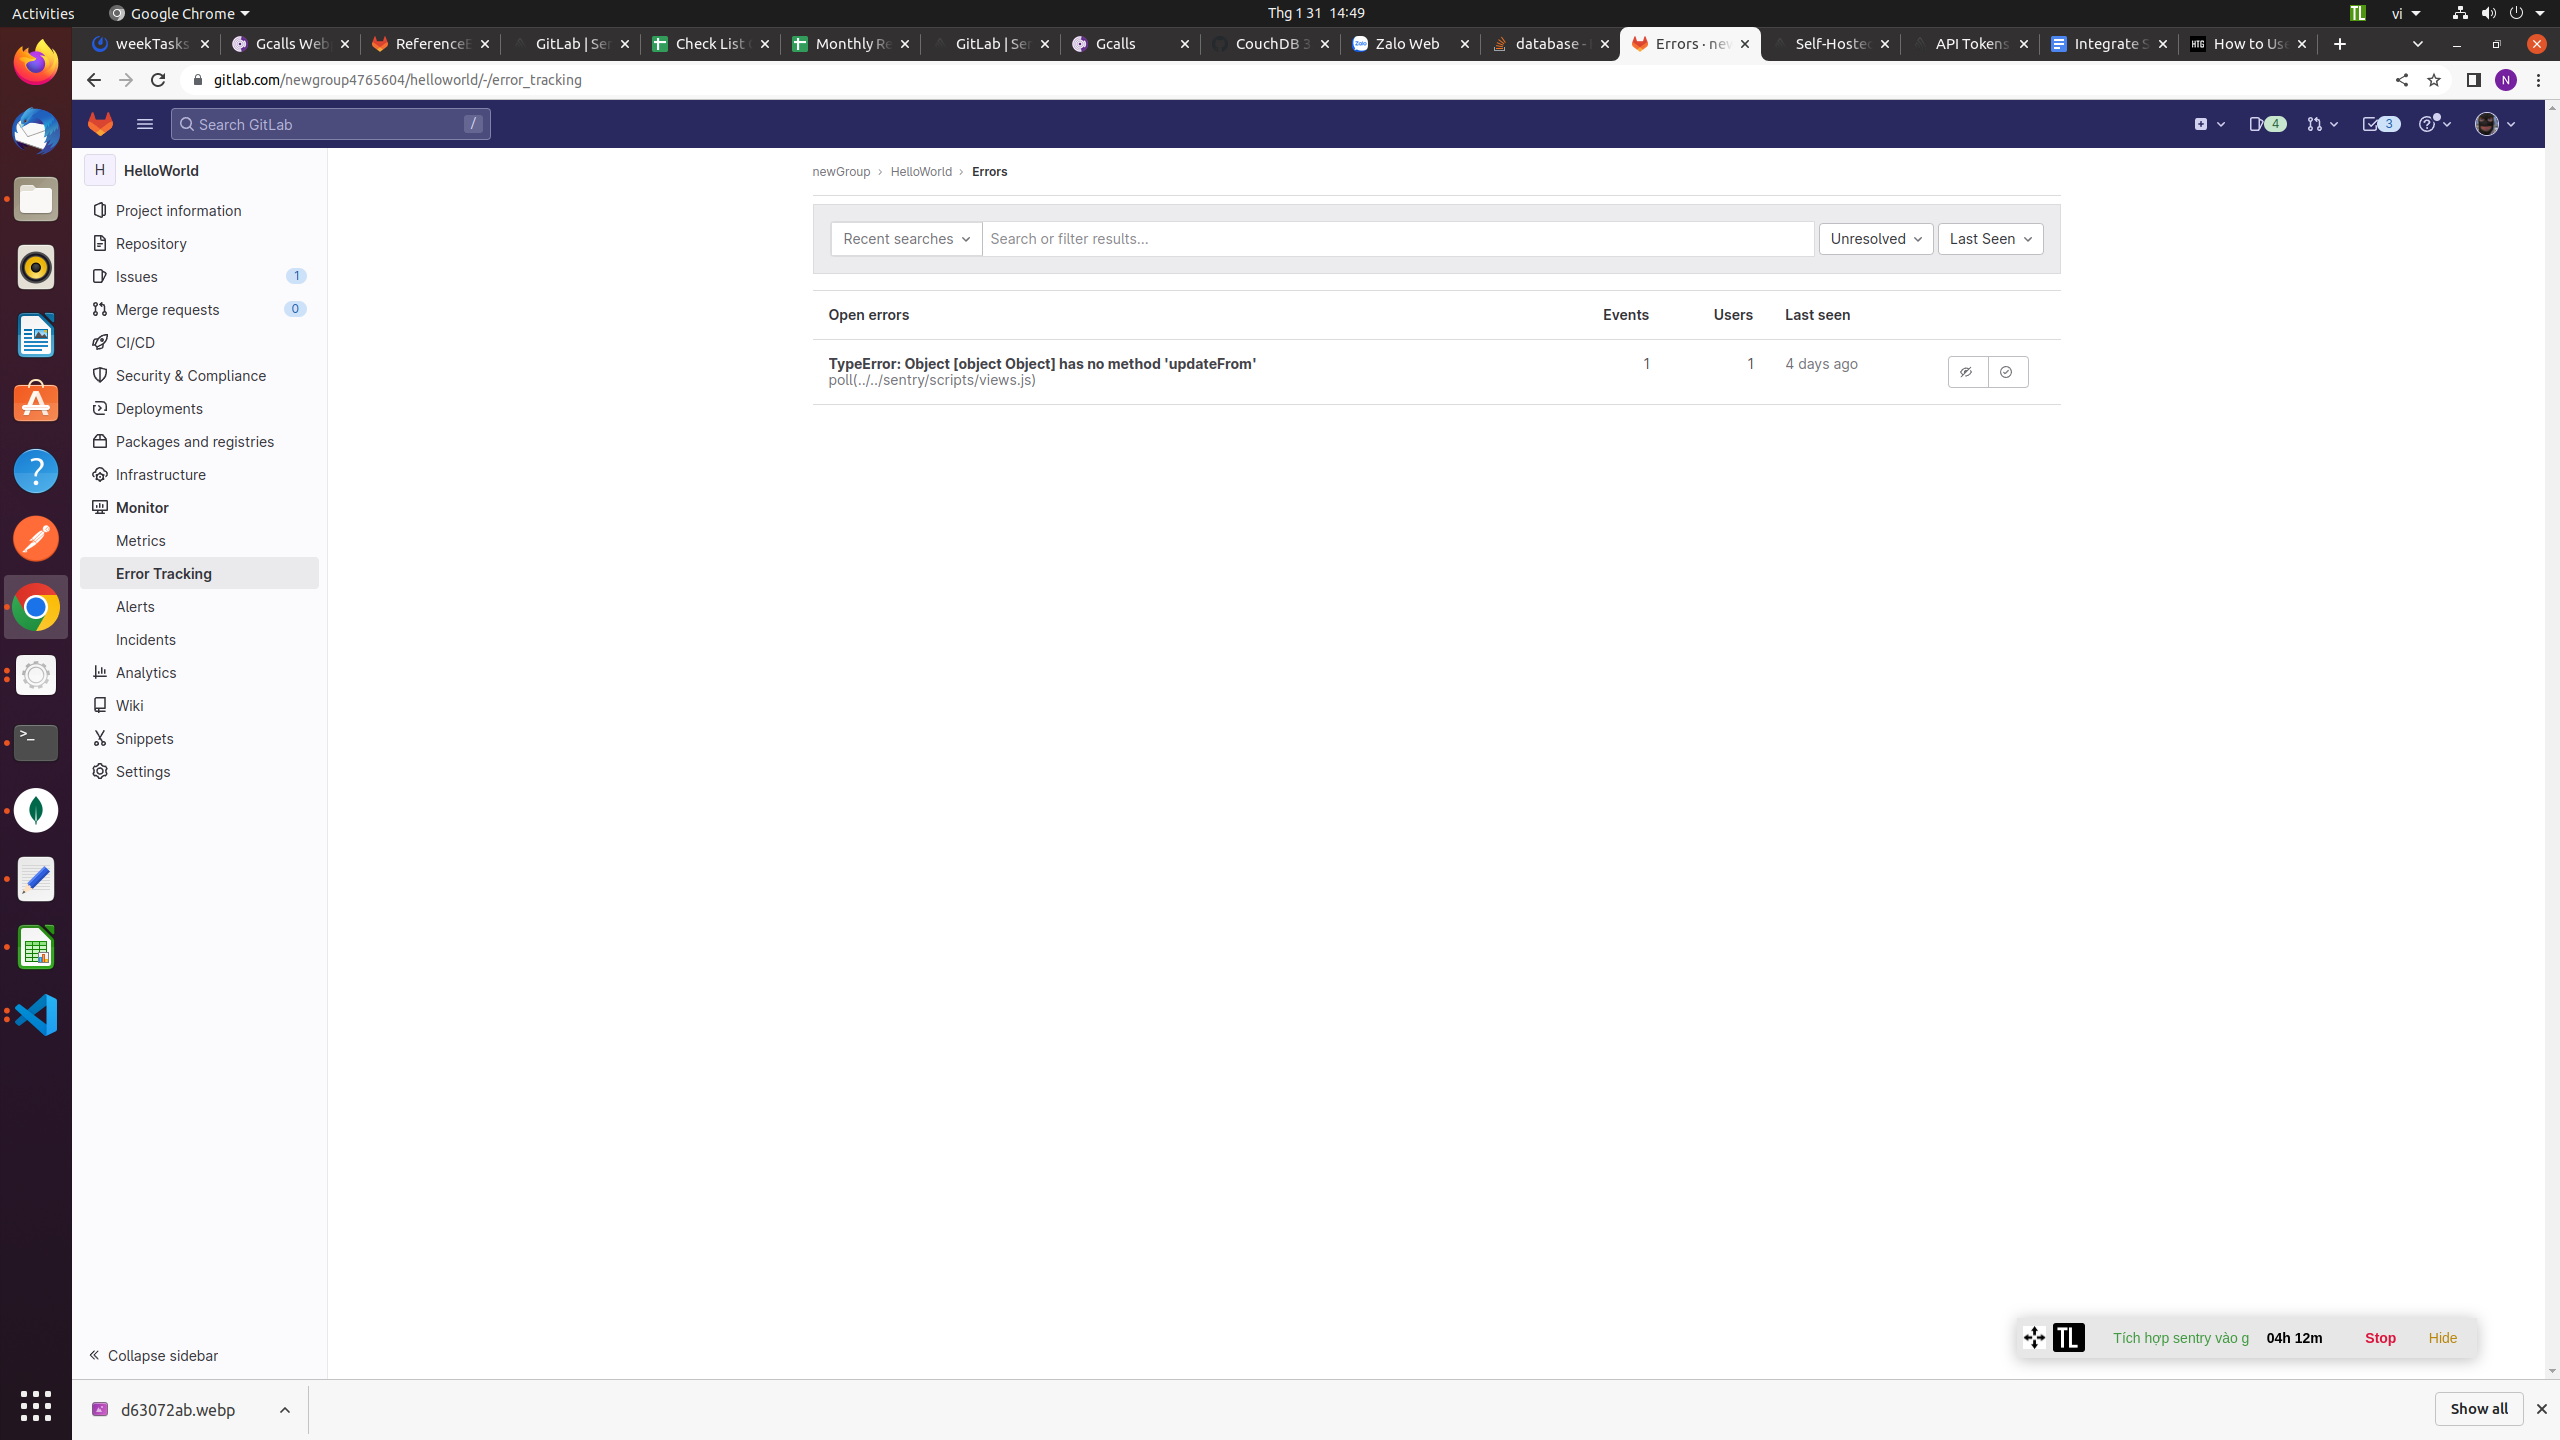
There are buttons to ignore, resolve, and convert to a GitLab issue. Once you’ve opened a GitLab issue, you can assign that item to a team member so that the bug gets resolved.
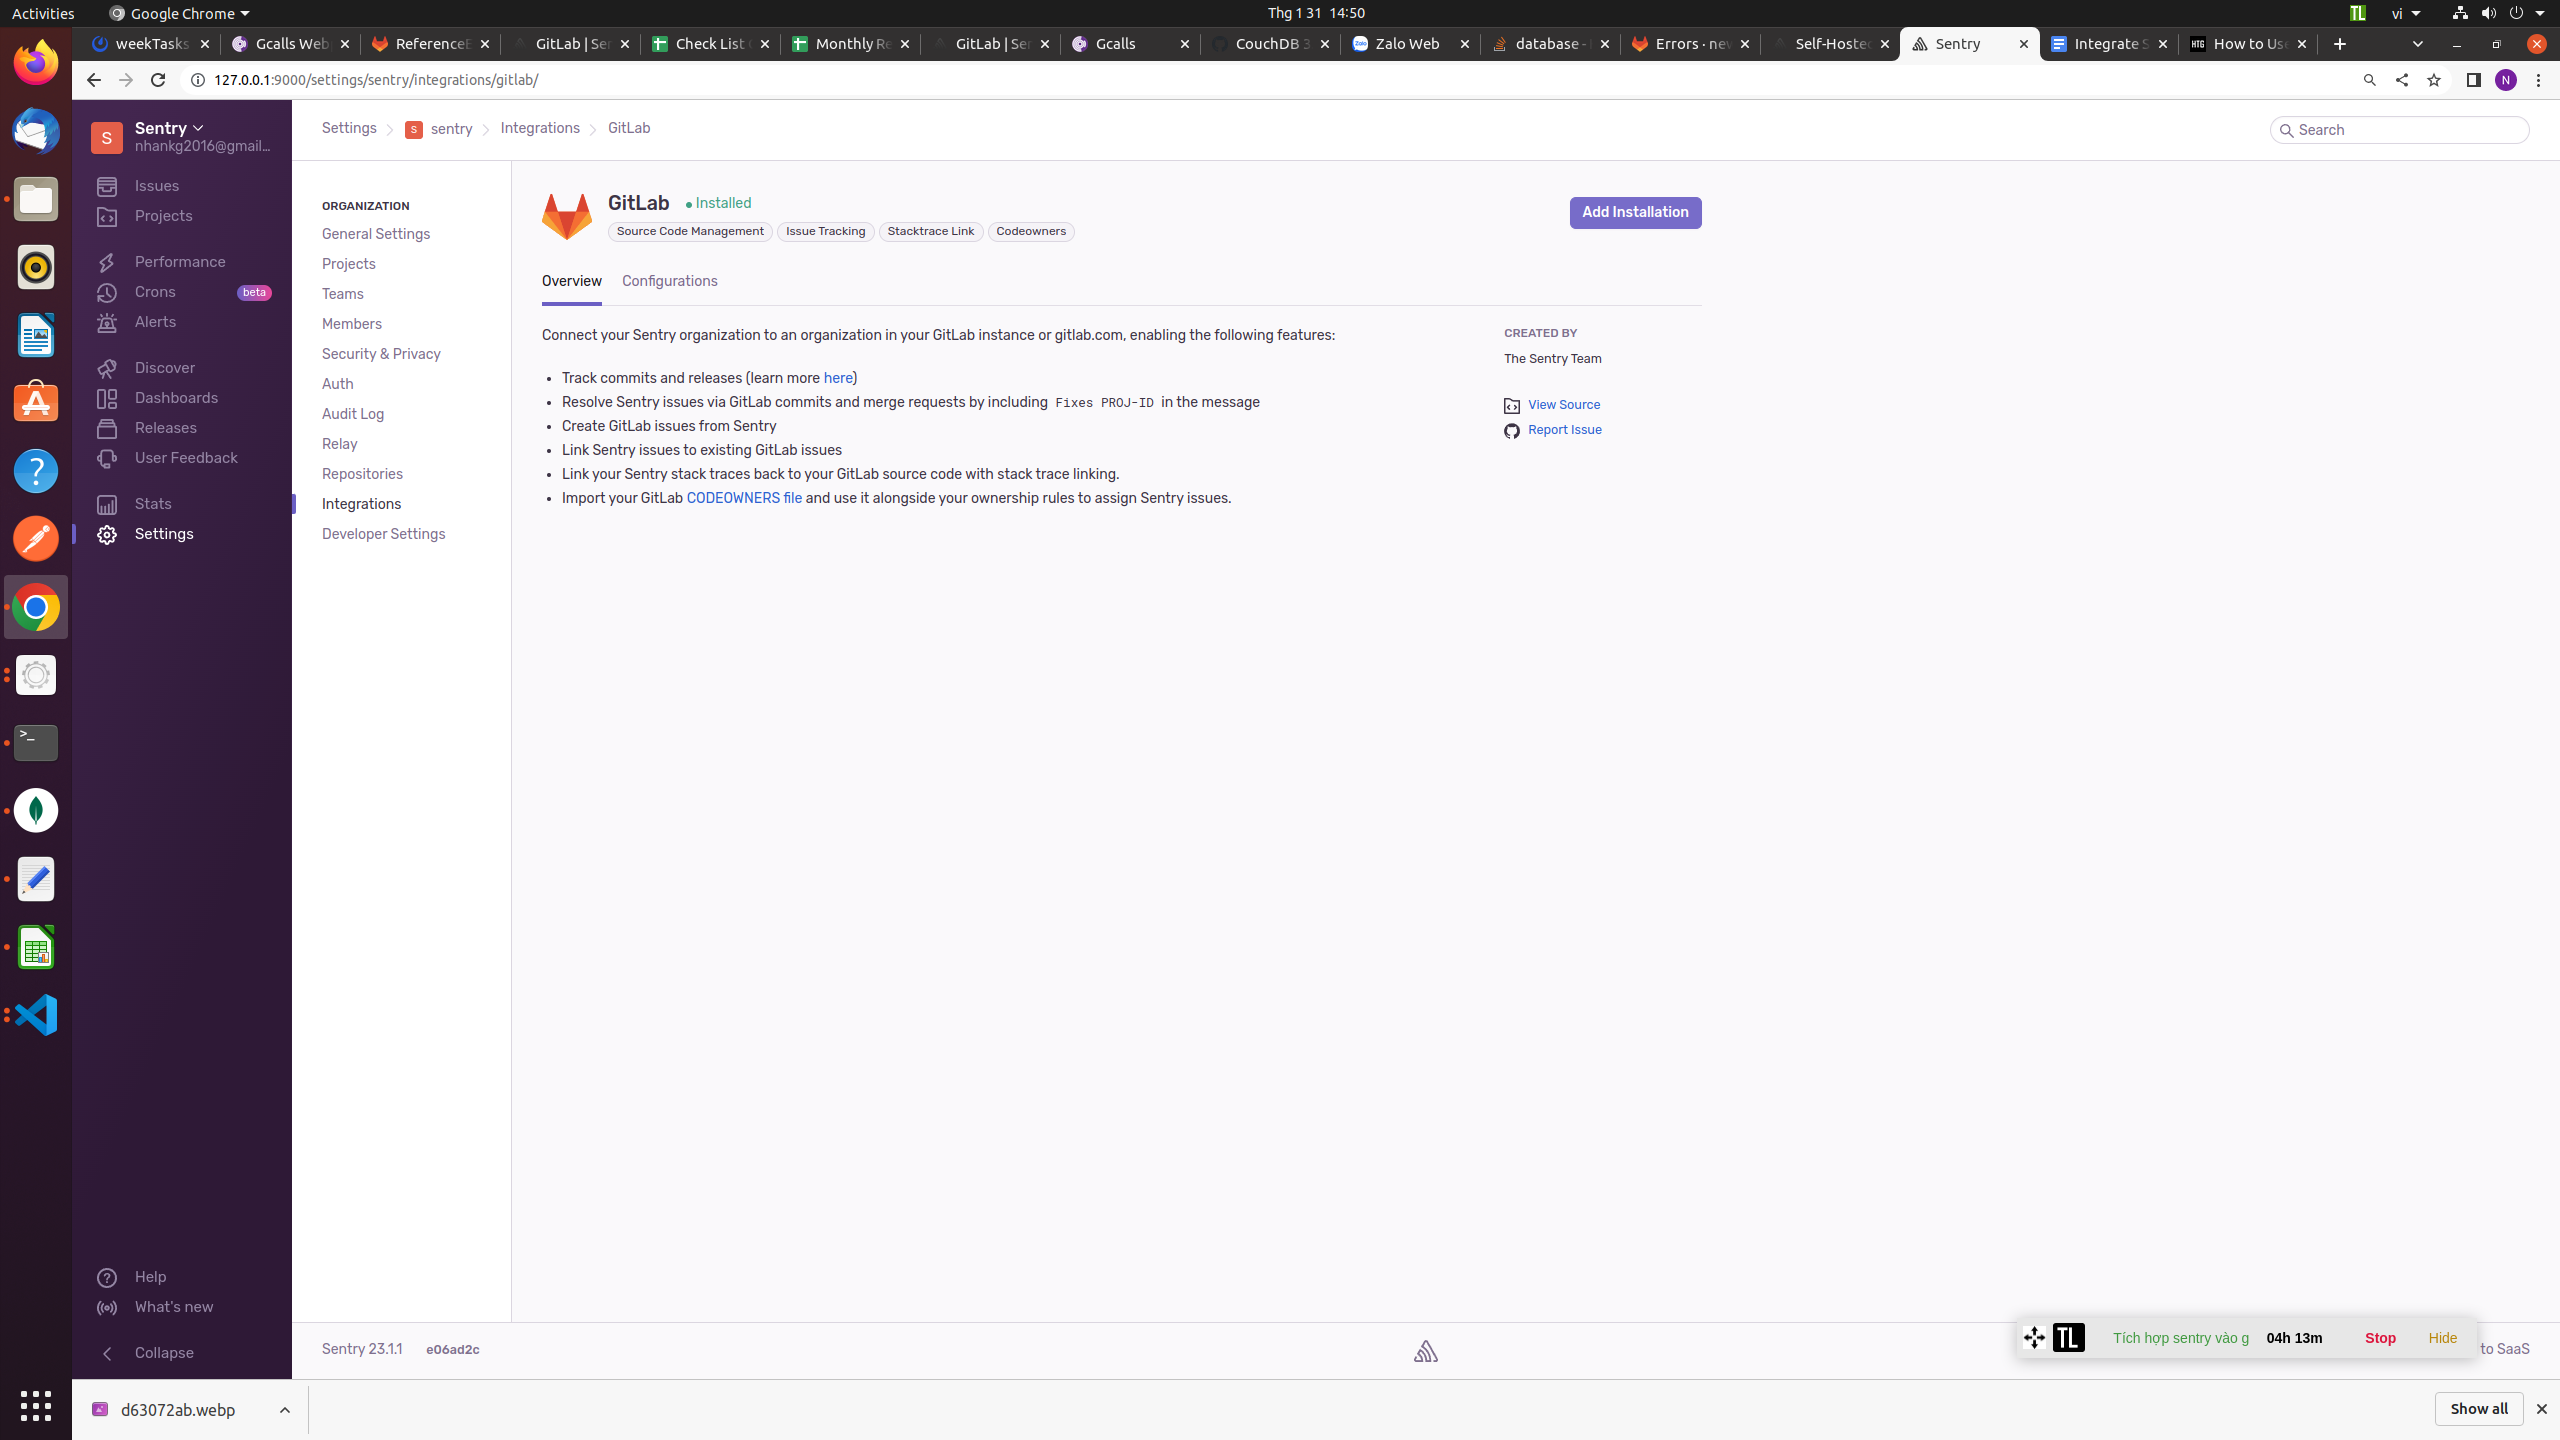
Now, you can add the second integration component a link from Sentry back to GitLab. Click Settings in your Sentry sidebar, and then Integrations. Find GitLab in the list and click the purple “Add Installation” button in the top-right corner. Click “Next” to see the setup information.
- Back on GitLab, click your user icon in the top-right corner, followed by “Preferences.” Click “Applications” in the left side menu and add a new application. Use the details shown by Sentry in the installation setup pop-up.
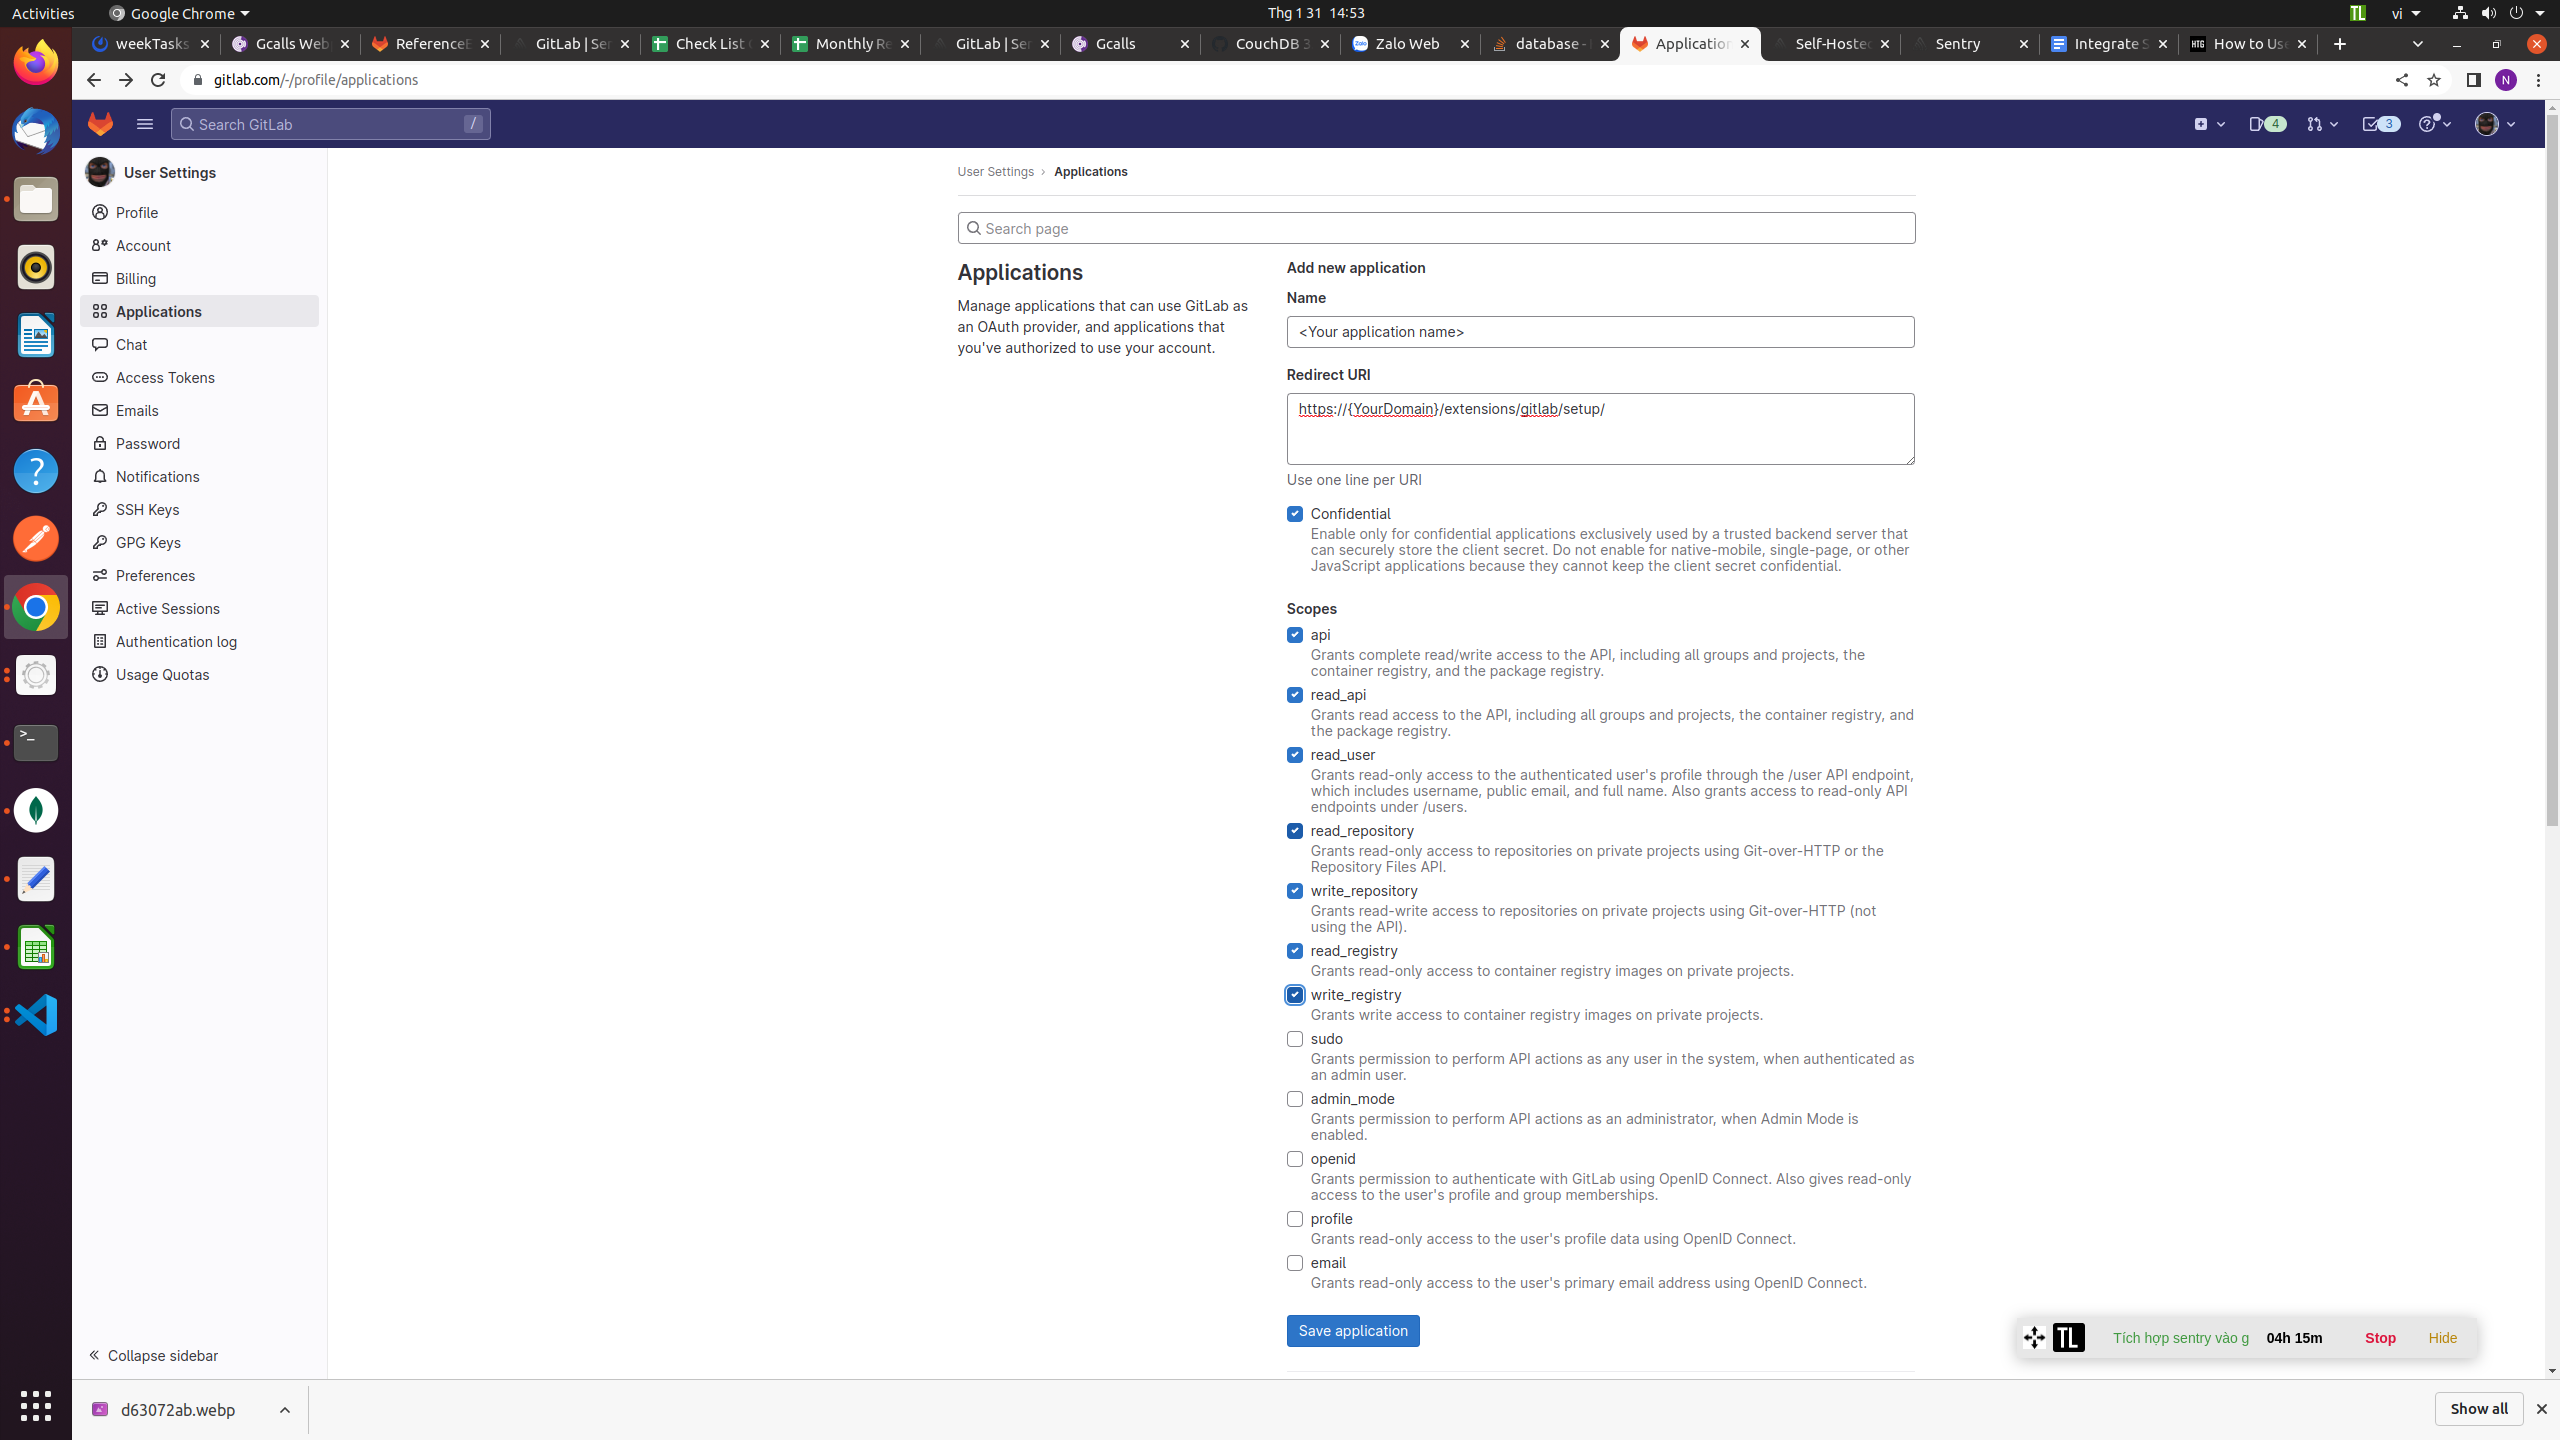
- GitLab will display an Application ID and Secret Key. Return to the Sentry pop-up and enter these values. Add your GitLab server URL (gitlab.com for GitLab SaaS) and enter the relative URL path to your GitLab group (e.g. my-group). The integration doesn’t work with personal projects.
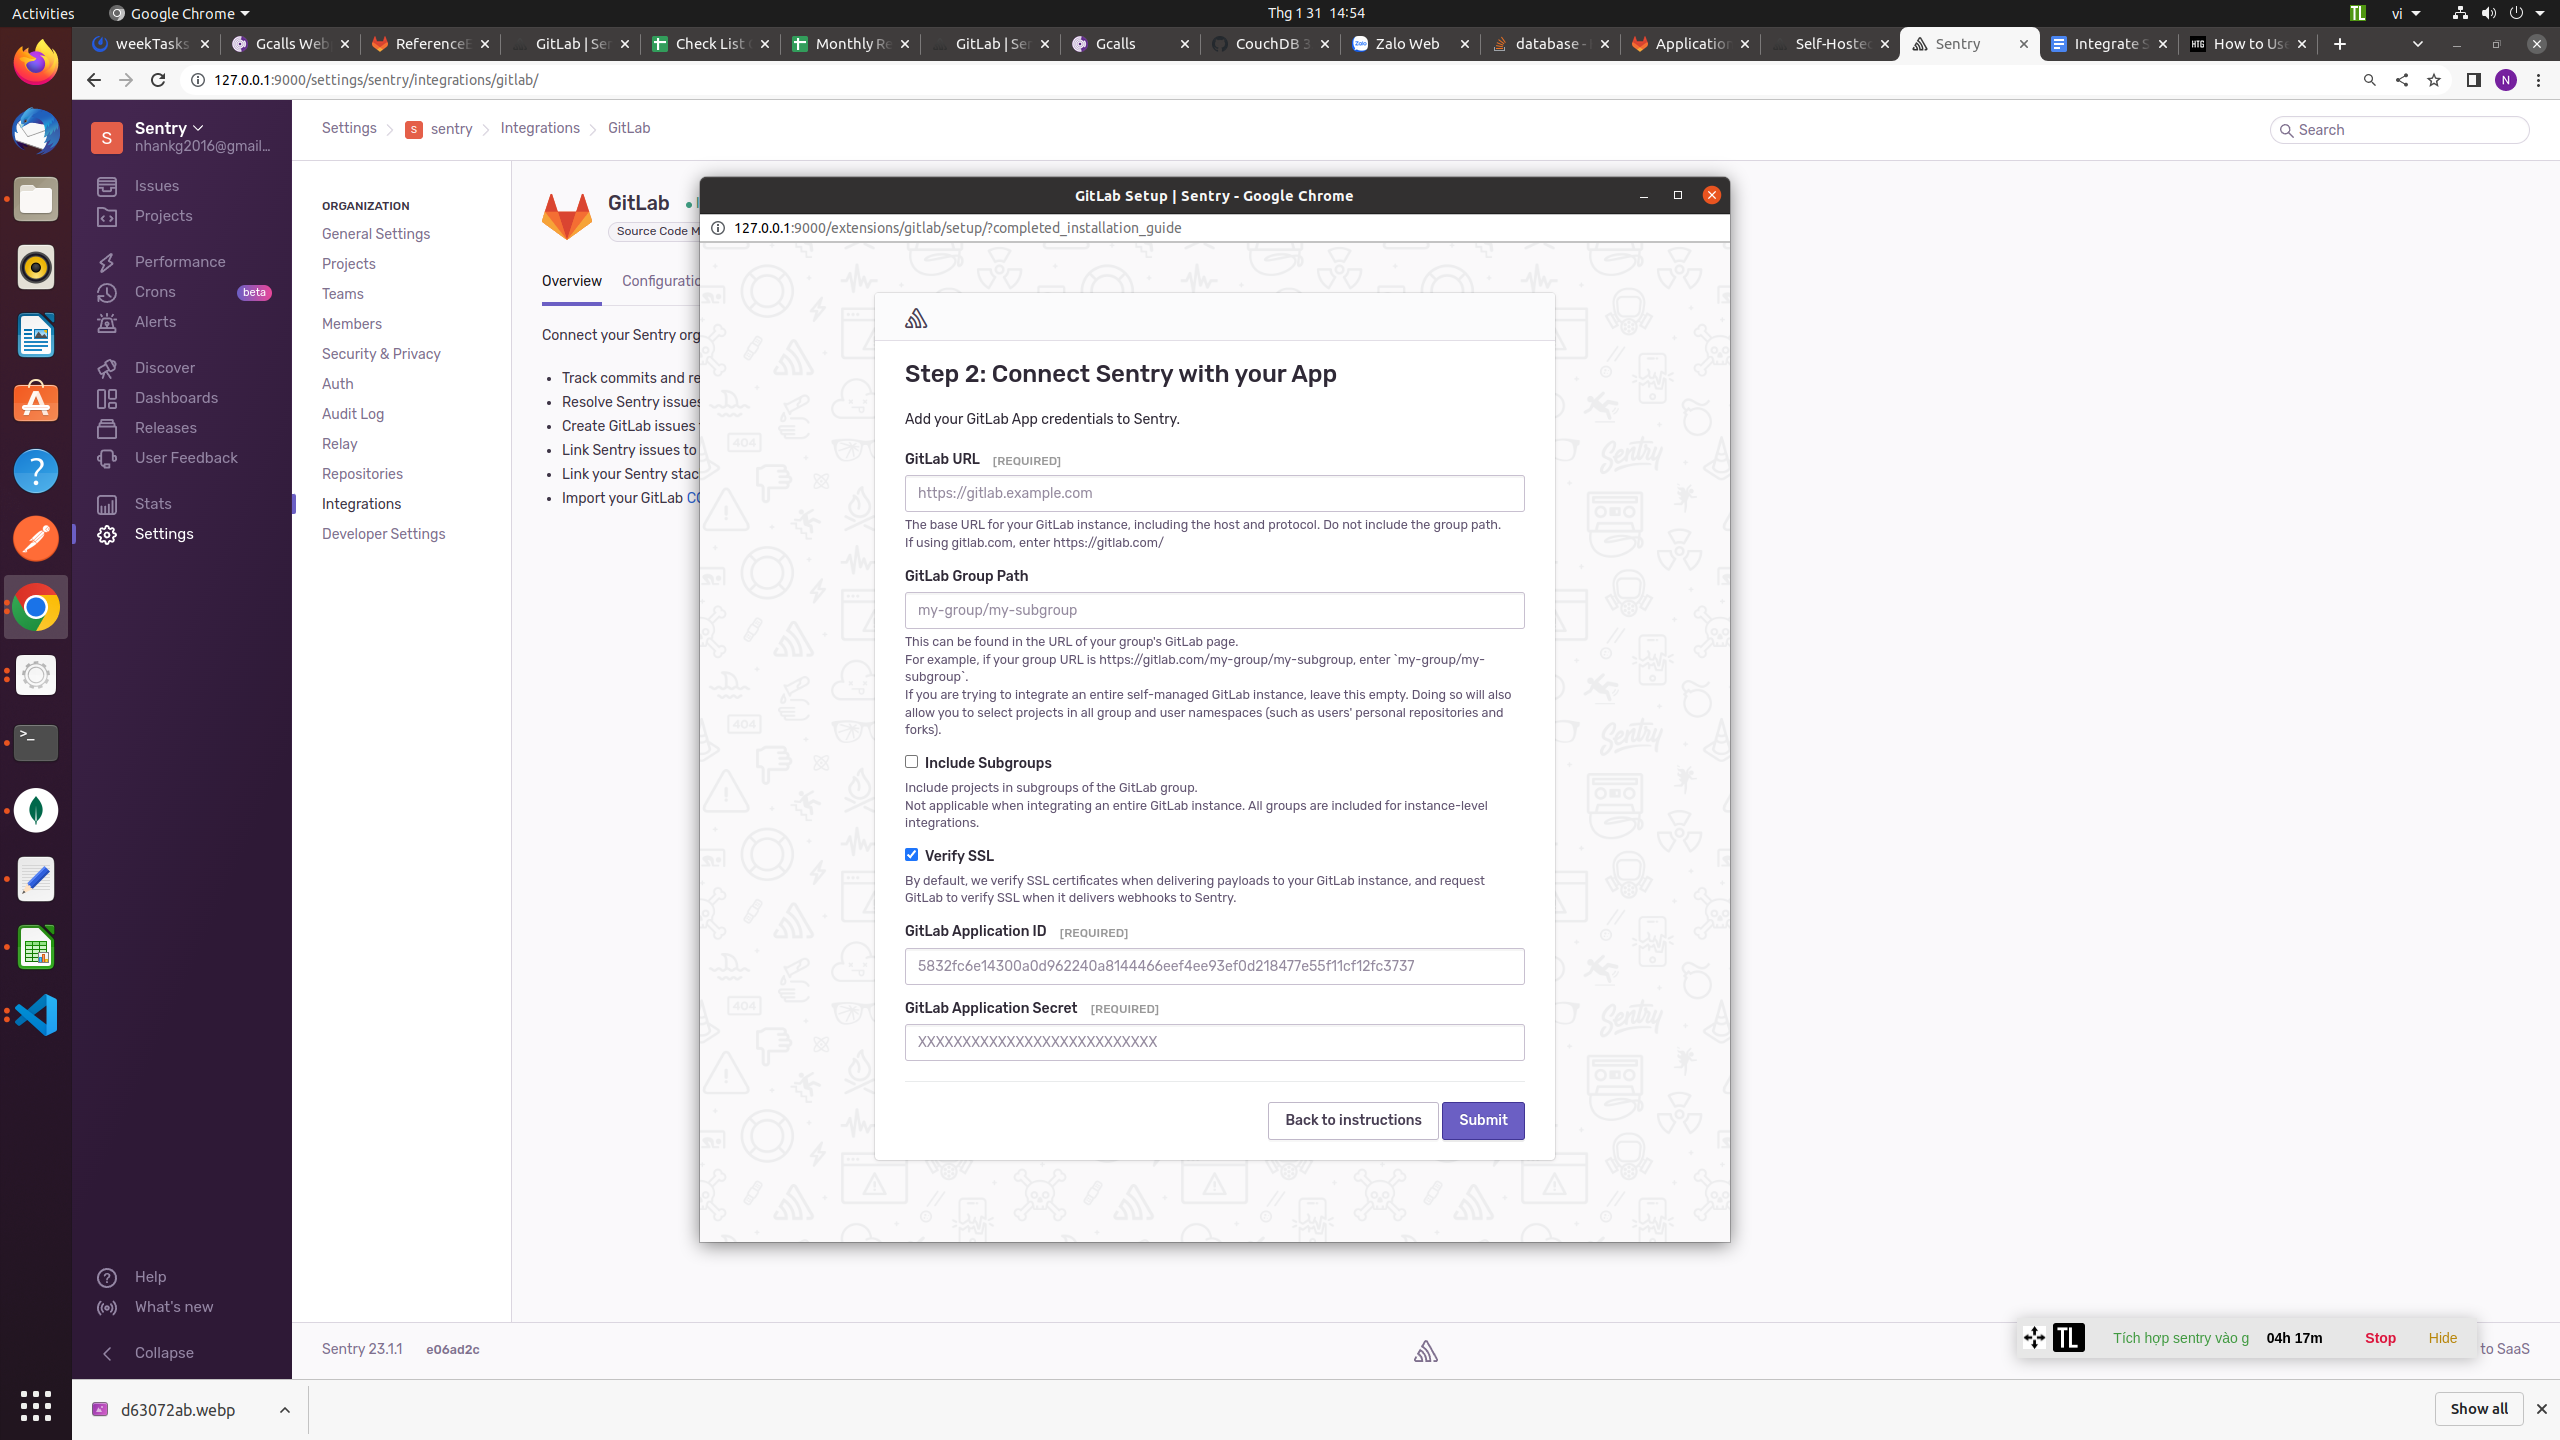
- Click the purple Submit button to create the integration. Sentry will now be able to display GitLab information next to your errors. This includes the commit that introduced the error, and stack traces that link back to GitLab files. Sentry users on paid plans can associate GitLab and Sentry issues with each other.

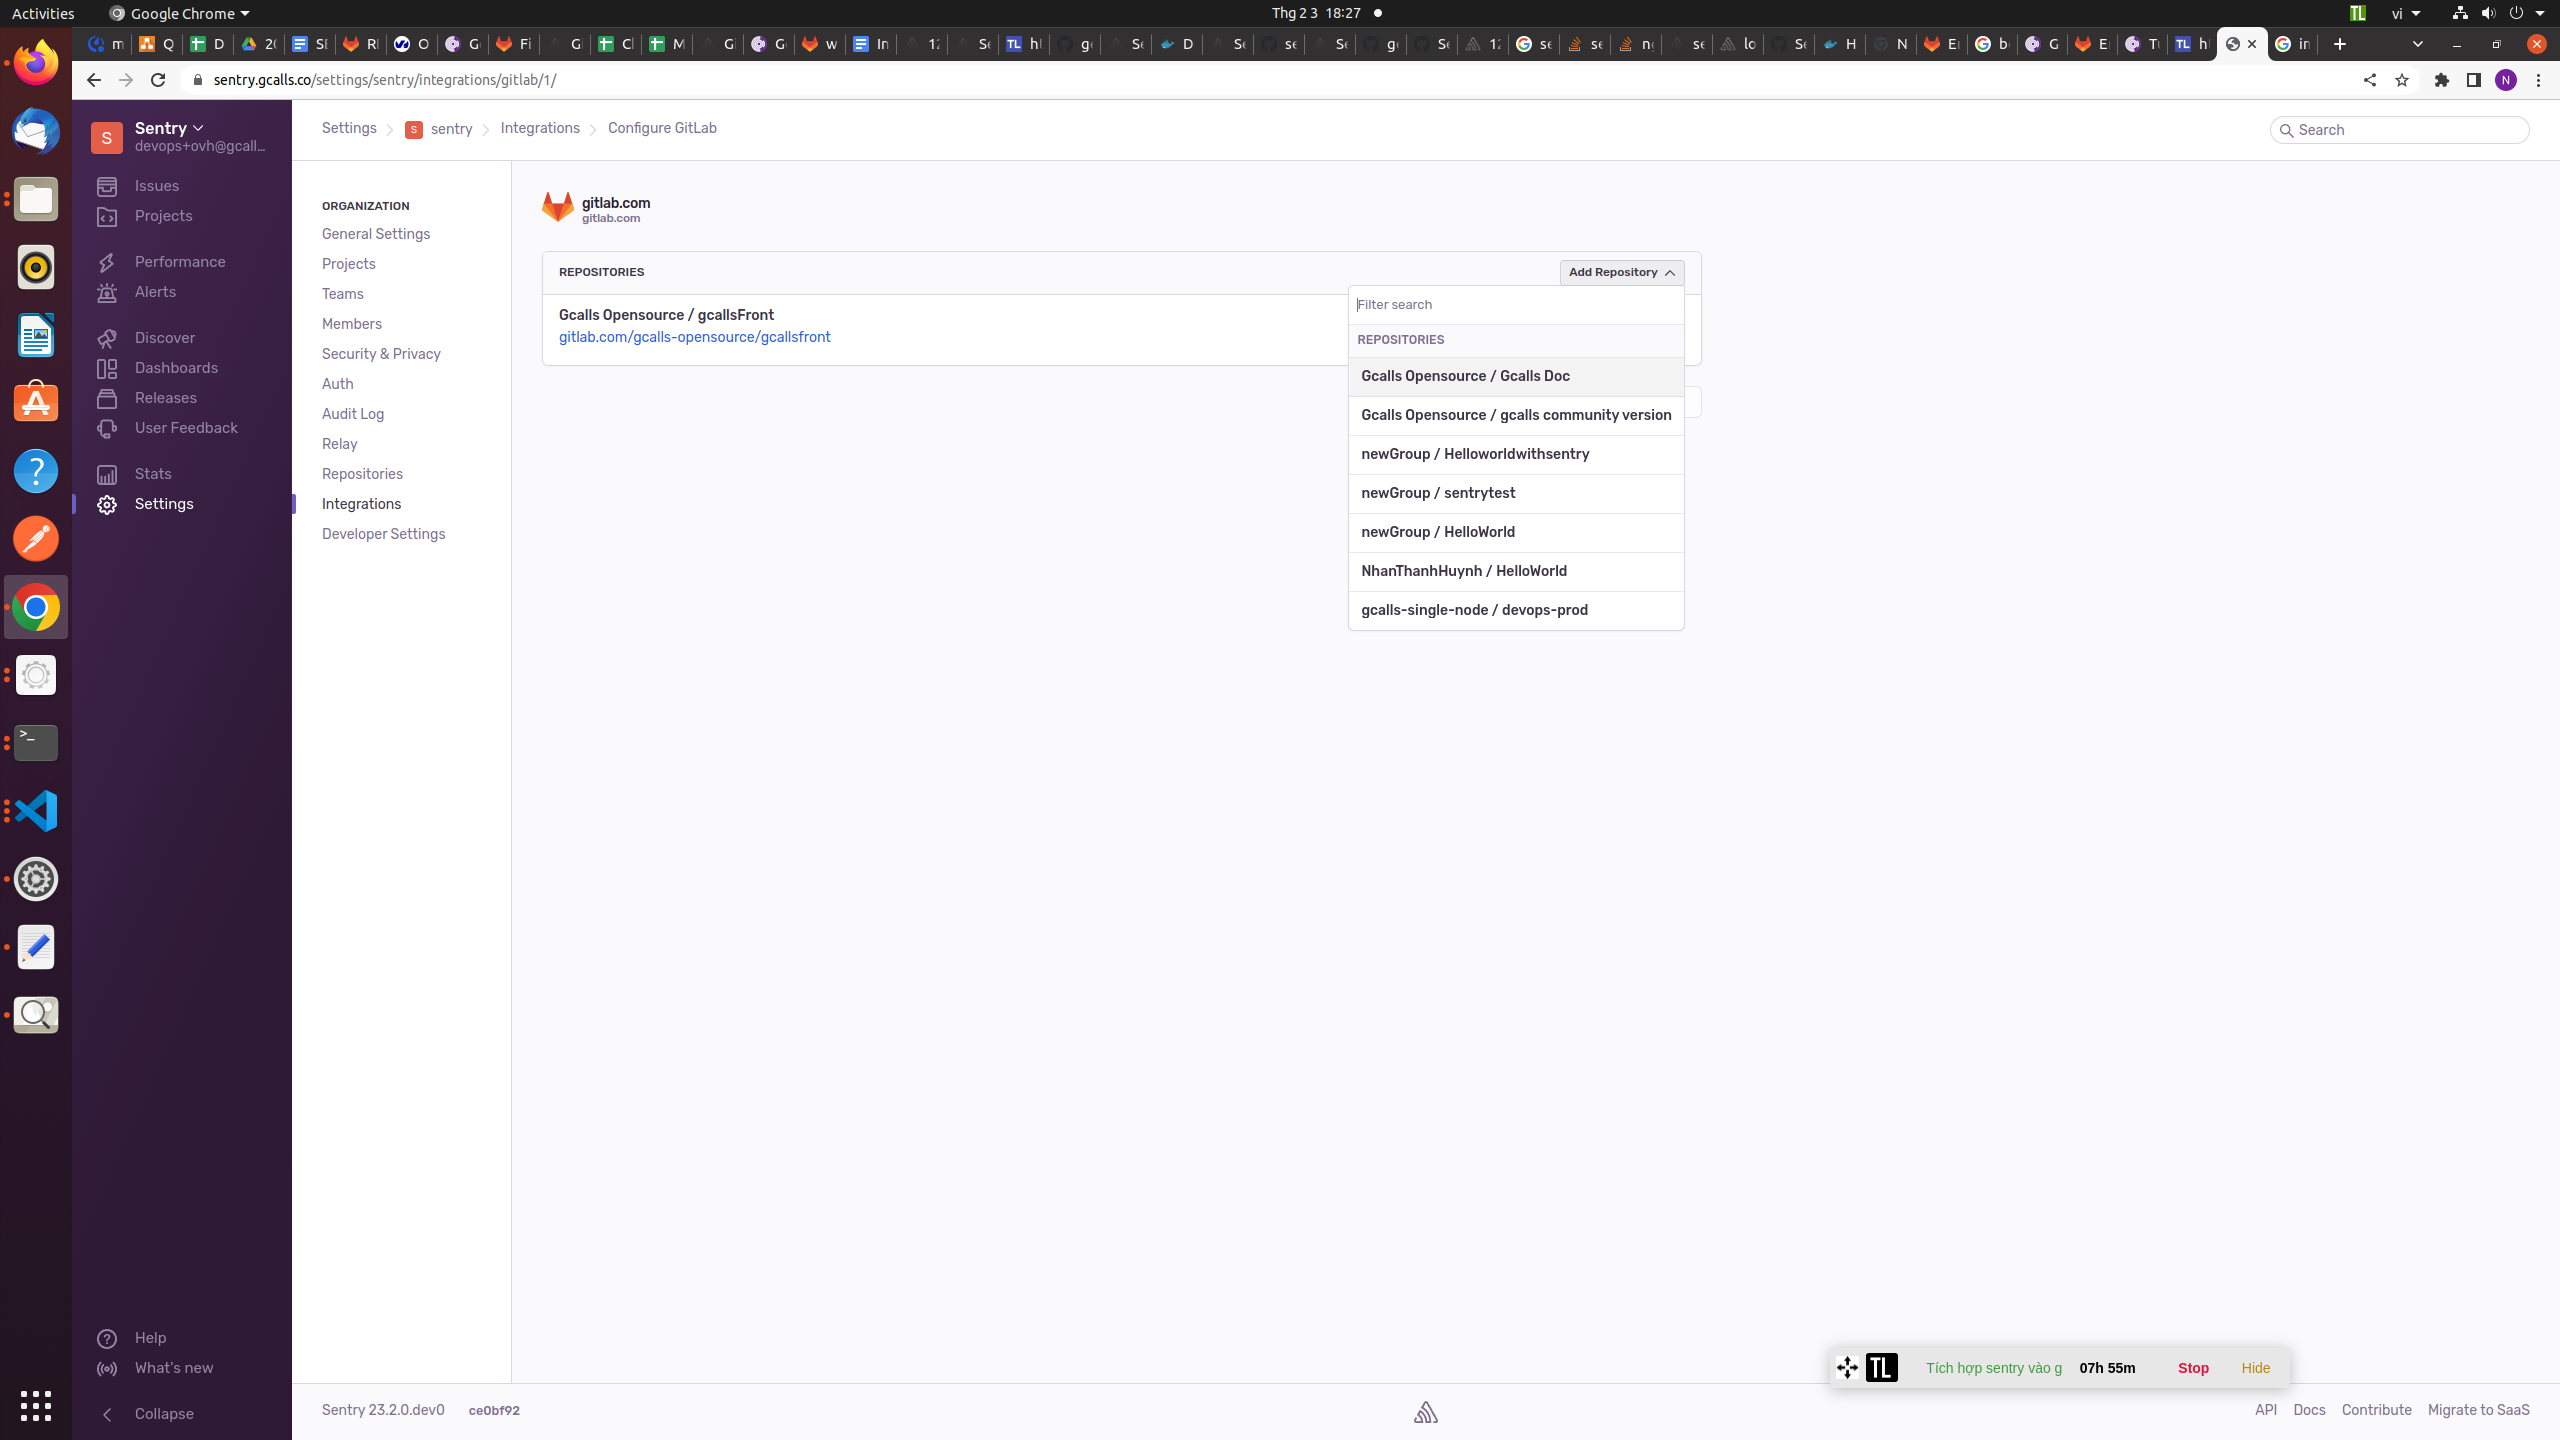
- Next, In Sentry, return to Organization Settings > Integrations. You’ll see a new instance of GitLab underneath the list of integrations. Next to your GitLab Instance, click "Configure". It’s important to configure to receive the full benefits of commOn the resulting page, click "Add Repository" to select which repositories in which you’d like to begin tracking commits.