1. Prerequisites:
- Browser (e.g: Google Chrome)
- Access to Gcalls-docs repository
- Visual Studio Code
- git
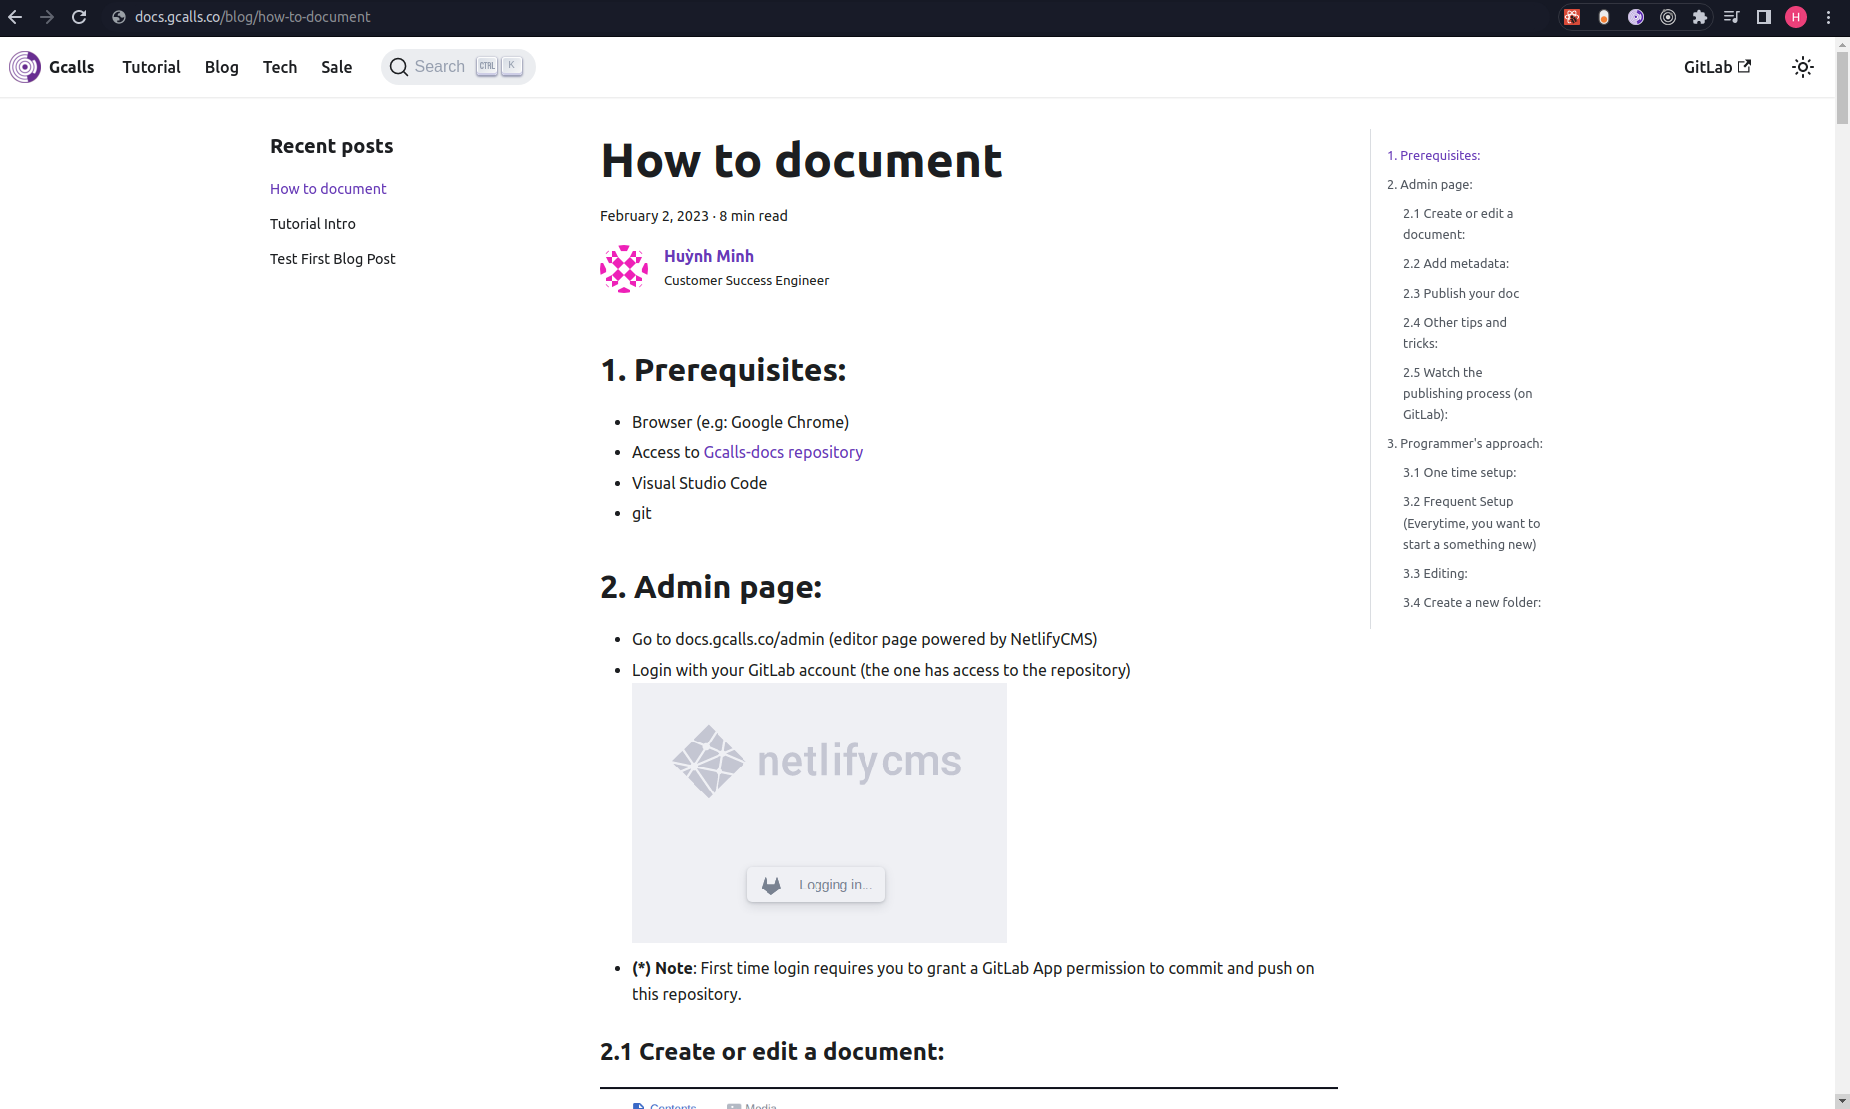
2. Admin page:
- (*) Note: Admin page will only commit to 1 branch:
previewbranch. It's not recommended to edit 1 document using both Admin page and Programmer's approach - Go to docs.gcalls.co/admin (editor page powered by NetlifyCMS)
- Login with your GitLab account (the one has access to the repository)

- (*) Note: First time login requires you to grant a GitLab App permission to commit and push on this repository.
2.1 Create or edit a document:
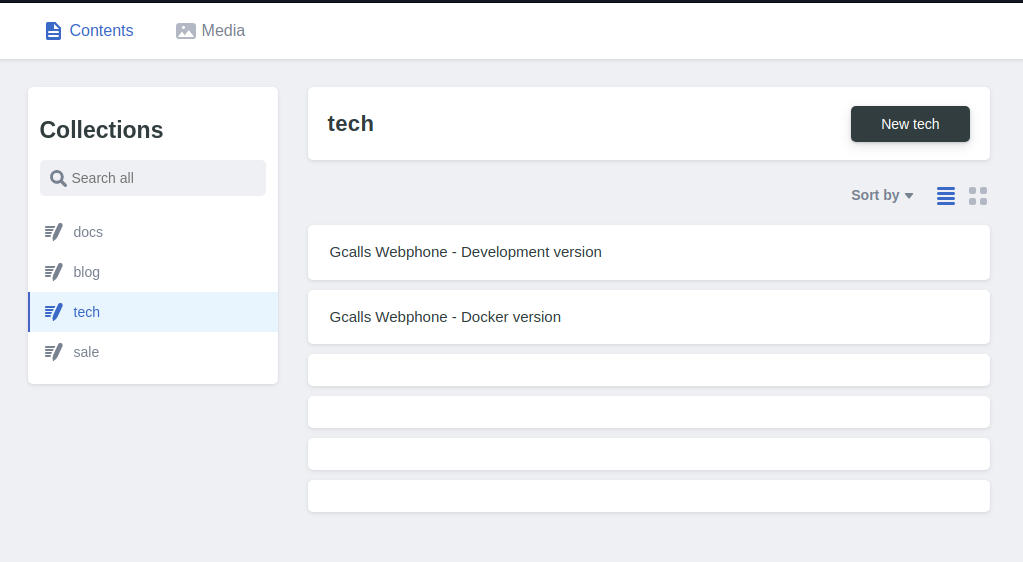
- Click on a collection you'd like to add or edit a doc
- Click New to add a new doc or click on a doc to edit it.
- Fill out your doc using the admin page or alternatively, use third-party online markdown editor (e.g: https://stackedit.io/app#)
2.2 Add metadata:
Note: NetlifyCMS can only offer to create documents, not folders.
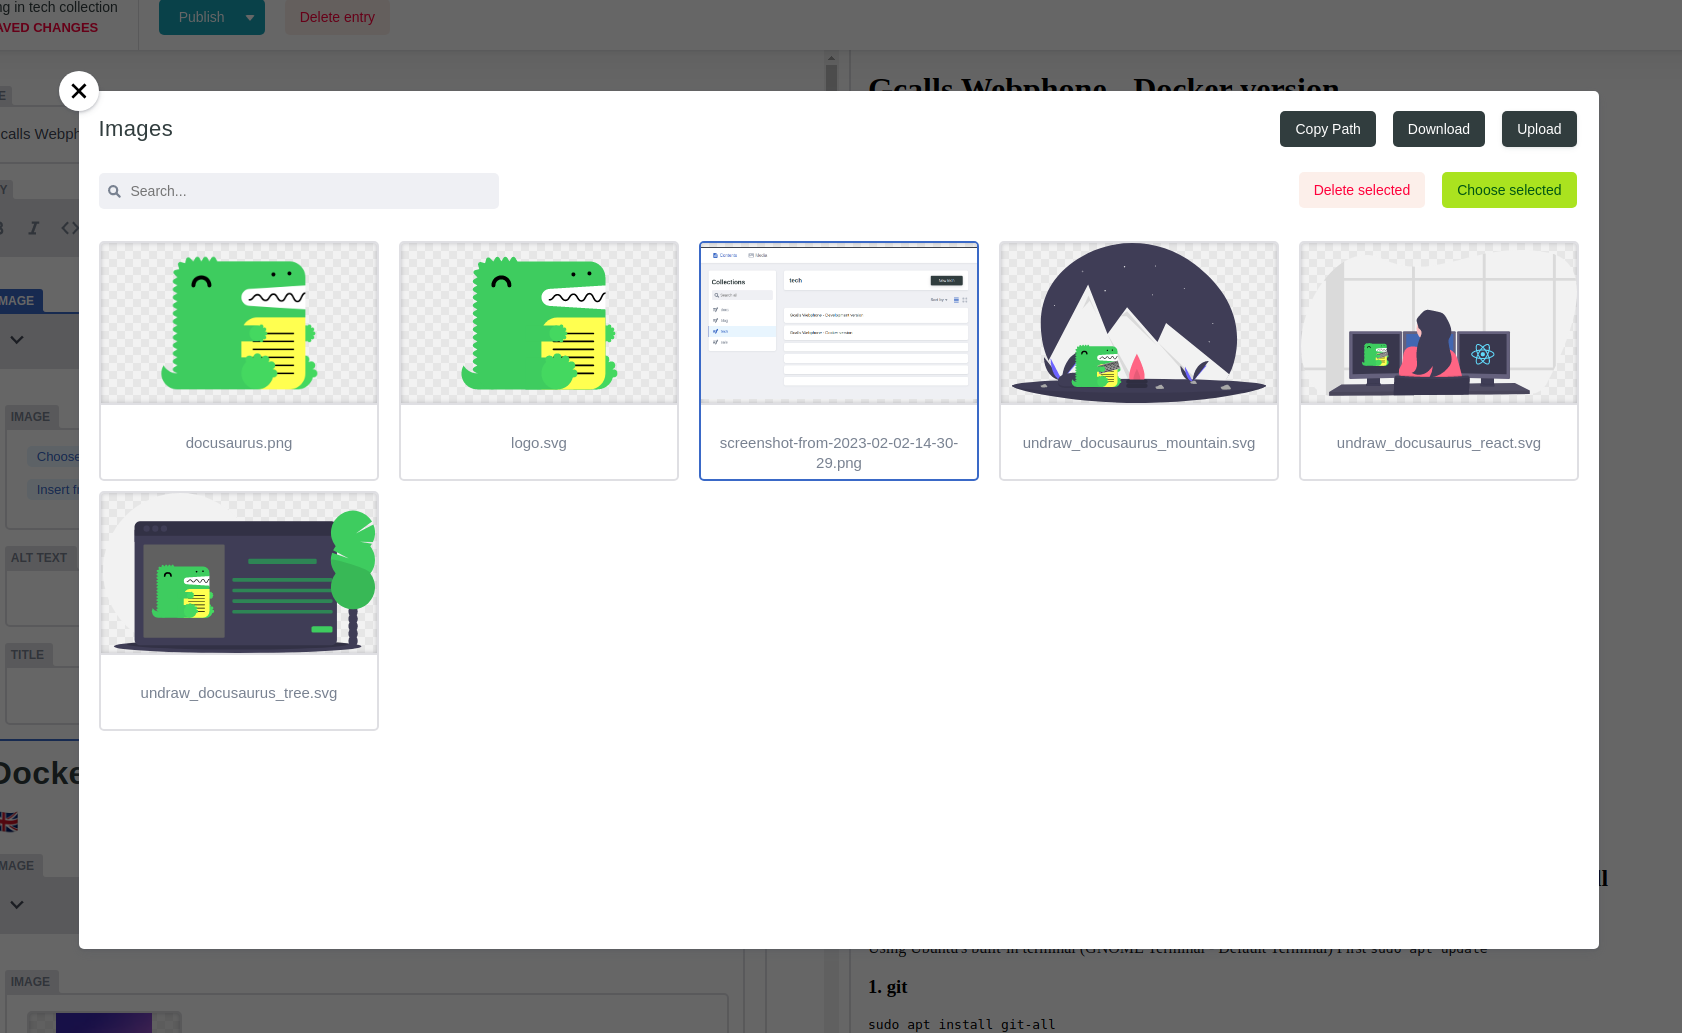
Image: Click the plus sign (
+) on the top right of menu bar and chose Image to open the Image board.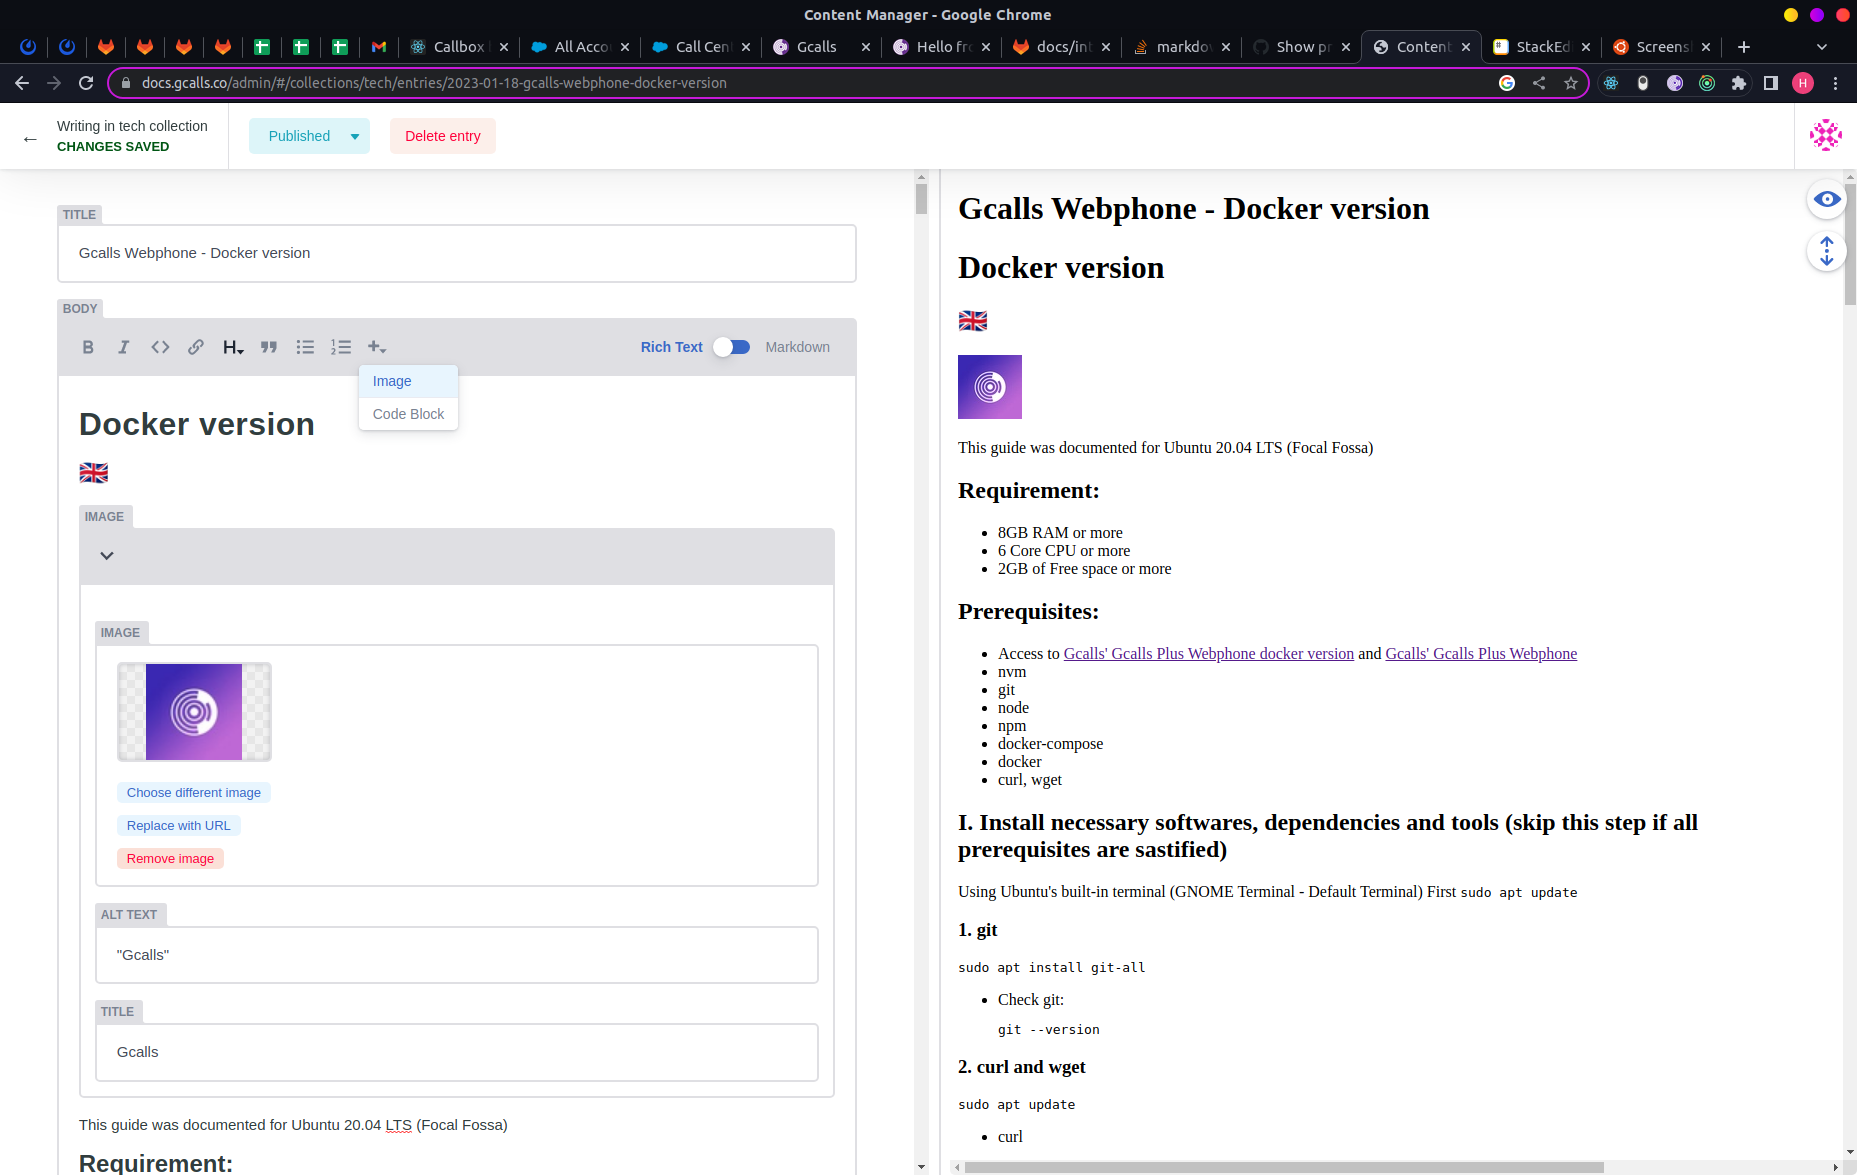 From there, you can either pick an image on the system or upload a new one.
Slugs: index name of your doc (e.g: if you name slug
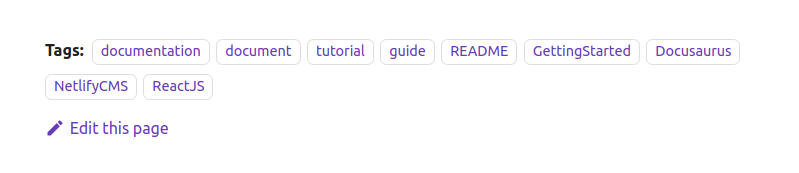
"example", your doc would be available to be accessed at https://docs.gcalls.co/your-folder/example)Tags: tags for your docs. Each separated by a comma ("
,"). The more tags you add, the more likely your document get discovered.(Optional) Author's name, profile picture, title, ... are optional, though encouraged to be used for blogs. Anything other than blogs won't display author's information
2.3 Publish your doc
- When you're ready, publish the doc

2.4 Other tips and tricks:
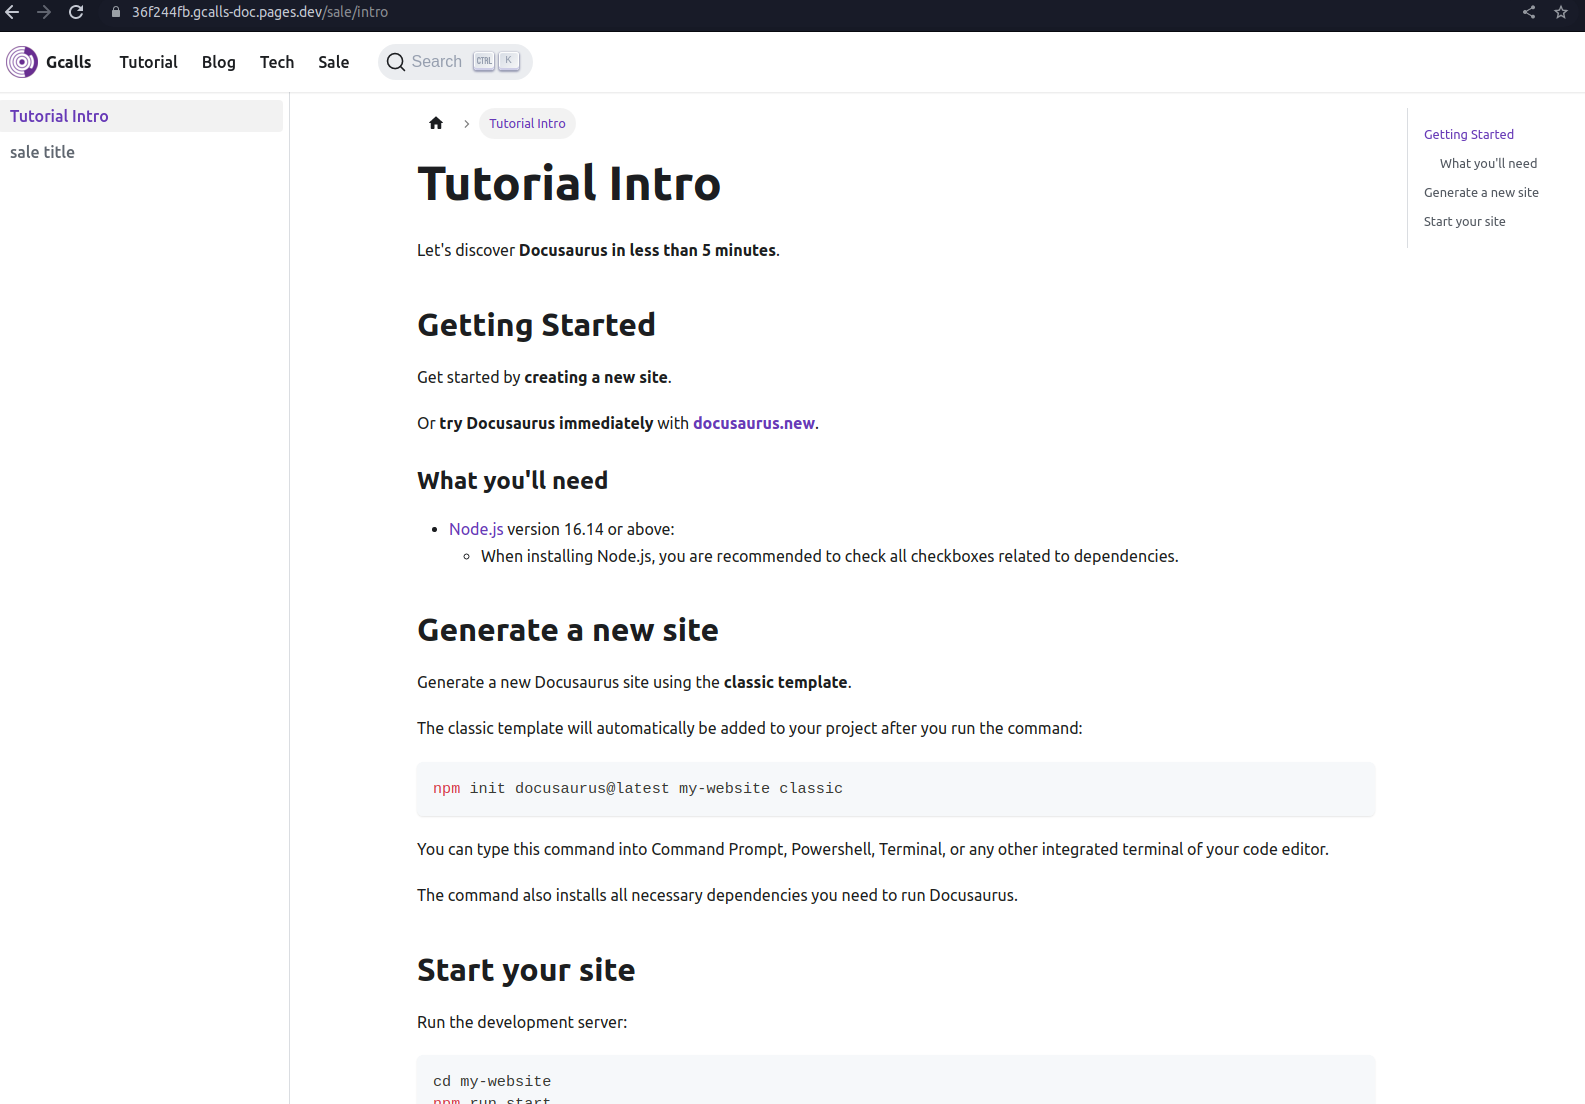
- You can directly edit a document on the client UI by clicking
Edit this page(Not recommended for end-user who has no experience with markdown)
3. Programmer's approach:
This process can be achieved with just the operating system's default terminal. However, this guide will show you a more inclusive approach (for both tech and non-tech personnels).
3.1 One time setup:
Create a folder to store the source code.
Open Visual Studio Code, click
File>Open folder, select the folder you've just created.Click
Terminal>New Terminalon the top menu bar. A new terminal will appear on the bottom of the window: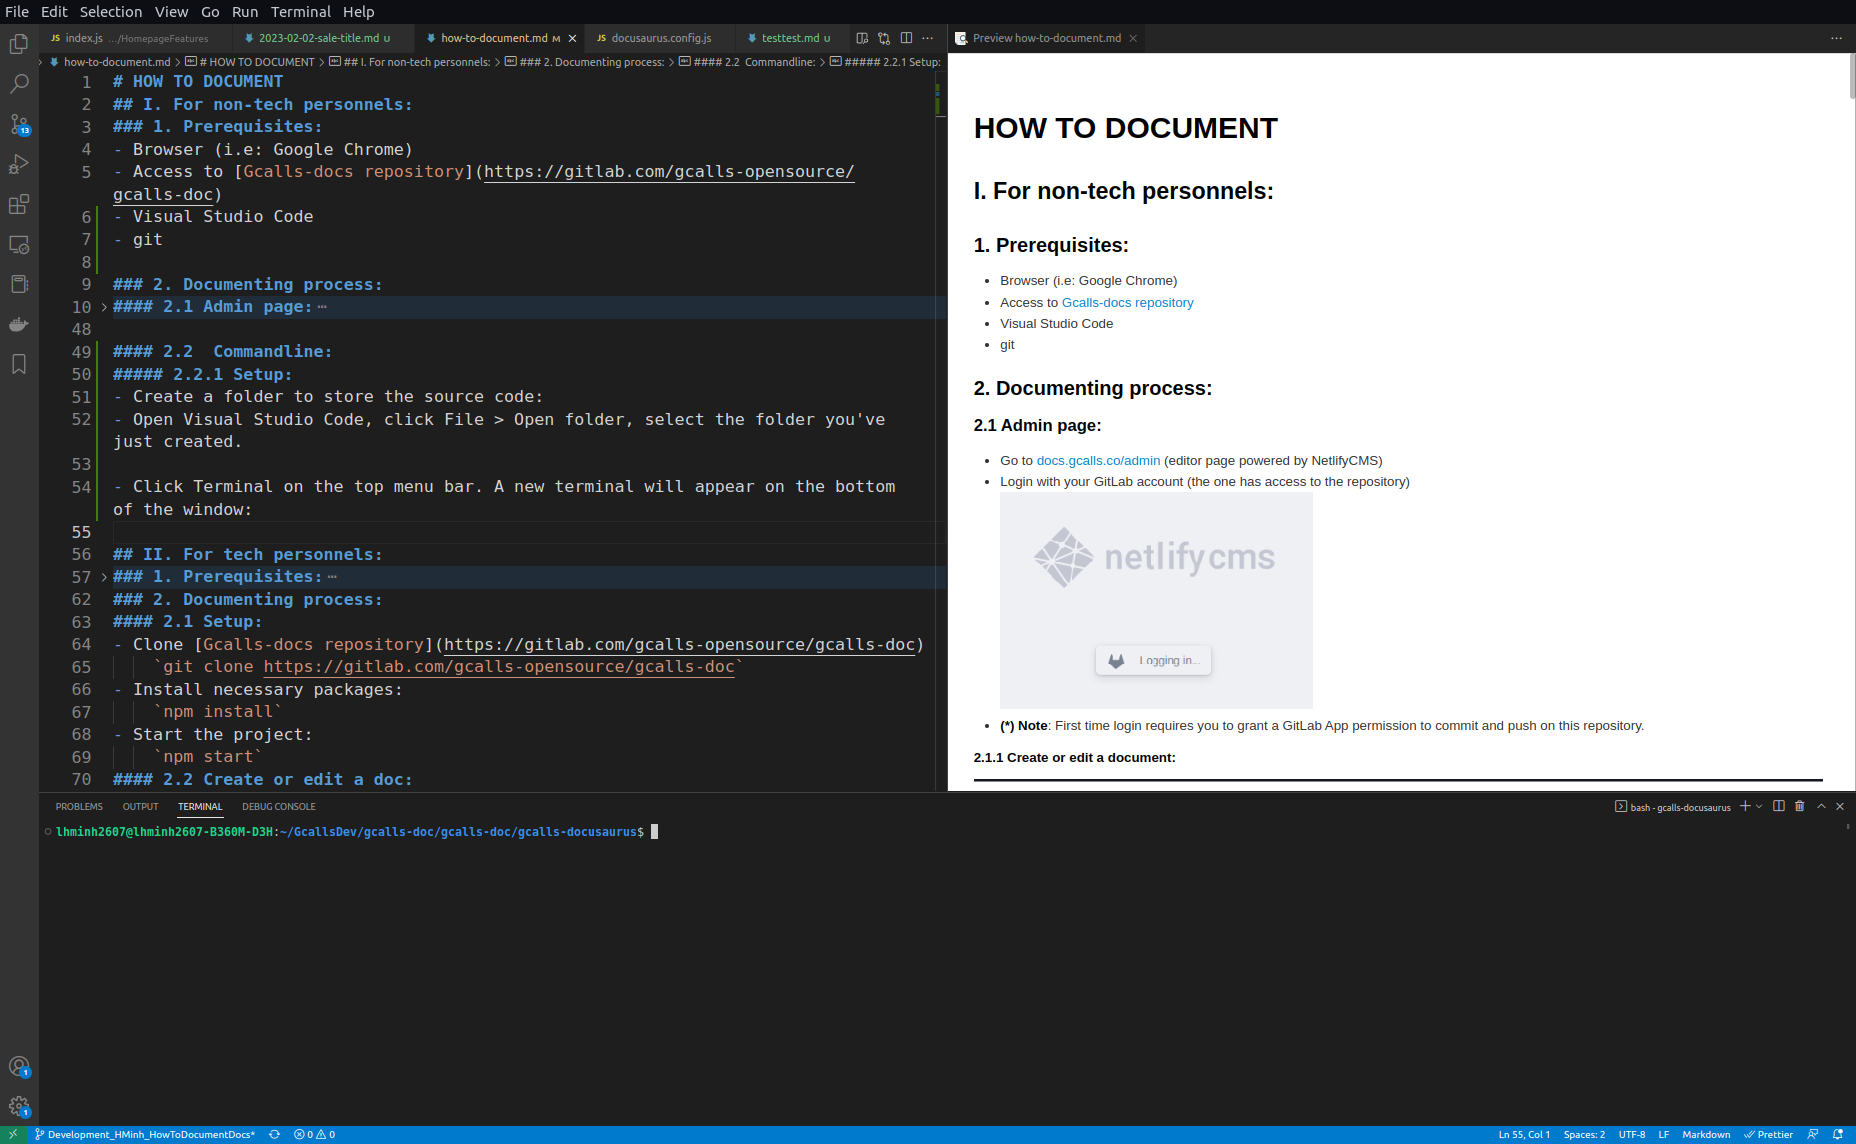
Type in the terminal:
- Initialize git:
git init - Establish connection to Gcalls-Doc source code:
git remote add origin https://gitlab.com/gcalls-opensource/gcalls-doc
- Initialize git:
3.2 Frequent Setup (Everytime, you want to start a something new)
- Type in the terminal:
- Get the latest update of the source code:
git fetch - Check the curernt branch, it should return
master:git branch - Download the latest update of the current branch (i.e:
master):git pull - Create a new branch of your own:
git checkout -b <branch_name> - At this point, you can start creating/editing/deleting documents.
- Get the latest update of the source code:
3.3 Editing:
- On the left side menu, select the document icon on top:

- It'll show a directory tree like this:
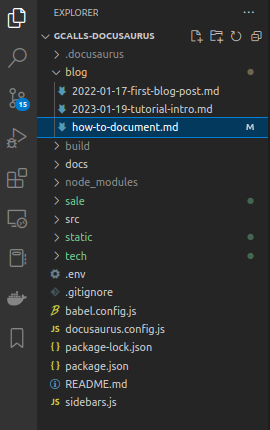 .
. - From there, you can:
- Click on a folder to open it, click on documents to open them.
- Right click on a document >
Rename...to rename or Right click on a document >Deleteto delete it. - Right click on a folder >
Rename...to rename or Right click on a folder >Deleteto delete it. - Right click on a folder >
New file...to create a new file. Name it with extension.md(e.g:my-document.md)
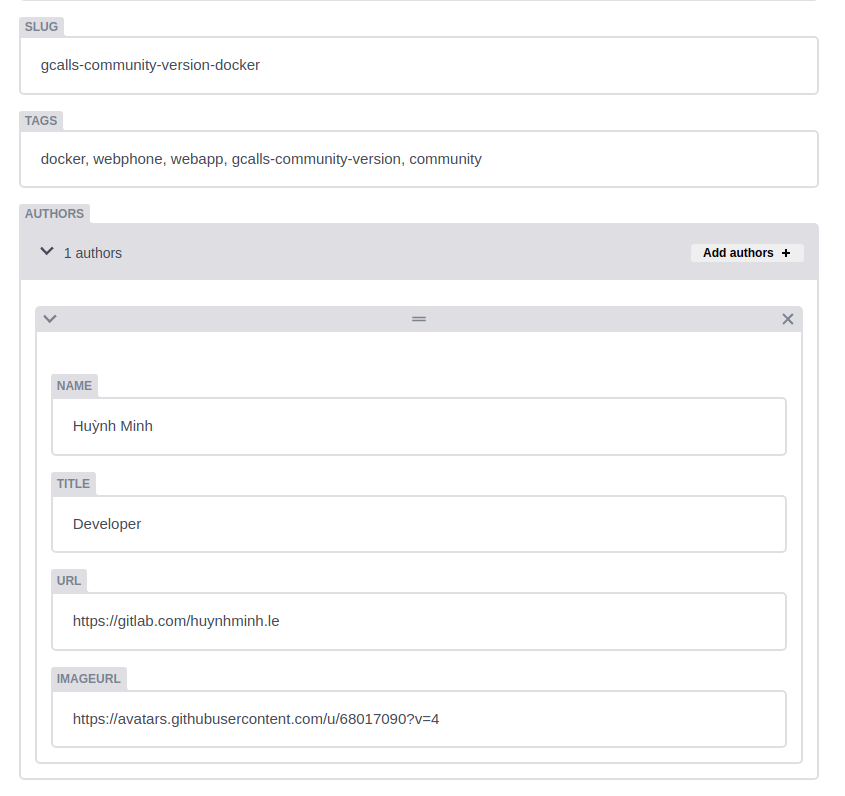
- Document's metadata:
- Metadata is used to identify document's core value.
- Add the following configuration to the top of your document:
---
title: <title of your document>
slug: <index-name-of-your-document>
tags:
  - <tag, keyword for the document>
  - <tag, keyword for the document>
  - <tag, keyword for the document>
authors:
  - name: <Author's name>
    url: <Author's GitLab profile page>
    image_url: <Any>
    title: <Job title>
---
- (*) Note: Slugs: index name of your doc (i.e: if you name slug "example", your doc would be available to be accessed at https://docs.gcalls.co/your-folder/example) Tags: tags for your docs. The more tags you add, the more likely your document get discovered.
- For example:
---
title: How to contribute
slug: how-to-contribute
tags:
  - documentation
  - document
  - contribute
  - tutorial
  - guide
  - README
  - GettingStarted
  - Docusaurus
  - NetlifyCMS
  - ReactJS
authors:
  - name: Huỳnh Minh
    url: https://gitlab.com/huynhminh.le
    image_url: https://secure.gravatar.com/avatar/27c9cd7cb2e2645b12ae4281b9fb1231?s=192&d=identicon
    title: Customer Success Engineer
---
3.4 Create a new folder:
- To create or edit a folder, simply create a folder in root
/of project. Add at least 1 document to that folder (e.g:intro.md).
a. Configure a folder for client page:
- A folder can only be used as a collection when it's properly configured in
docusaurus.config.js. - By default, Docusaurus has only 2 folders:
blogsanddocs(display name is Tutorial). Withblogsbeing blog by type,docsbeing docs by type. The big difference between type blog and type doc is that blog displays author's information while doc doesn't. - This project uses a plugin called
@docusaurus/plugin-content-docs, which enables user to add more folders/collections under the type of doc. Docusaurus also has another plugin called@docusaurus/plugin-content-blogsfor type blog.
a1. Add configuration for docusaurus.config.js
- In
docusaurus.config.js, you can find this configuration:
plugins: [
    [
      '@docusaurus/plugin-content-docs',
      {
        id: 'tech',
        path: 'tech',
        routeBasePath: 'tech',
        sidebarPath: require.resolve('./sidebars.js'),
      },
    ],
    [
      '@docusaurus/plugin-content-docs',
      {
        id: 'sale',
        path: 'sale',
        routeBasePath: 'sale',
        sidebarPath: require.resolve('./sidebars.js'),
      },
    ],
  ],
- This configuration was configured to add 2 additional folders (tech and sales). To add more folder, add another item as seen in this configuration and replace
id,path,routeBasePathwith the name of the folder (no CAP). - Then scroll down and you'll see this configuration:
themeConfig:
    /** @type {import('@docusaurus/preset-classic').ThemeConfig} */
    ({
      navbar: {
        title: 'Gcalls',
        logo: {
          alt: 'Gcalls Logo',
          src: 'https://app.gcalls.co/assets/img/favicon.png',
        },
        items: [
          {
            type: 'doc',
            docId: 'intro',
            position: 'left',
            label: 'Tutorial',
          },
          {to: '/blog', label: 'Blog', position: 'left', activeBaseRegex: `/docs/`,},
          {to: '/tech/intro', label: 'Tech', position: 'left', activeBaseRegex: `/docs/`,},
          {to: '/sale/intro', label: 'Sale', position: 'left', activeBaseRegex: `/docs/`,},
          {
            href: 'https://gitlab.com/gcalls-opensource/gcalls-doc',
            label: 'GitLab',
            position: 'right',
          },
          {
            type: 'custom-myDocSearch',
            position: "left",
            itemProp: 44,
            anotherProp: "xyz"
          },
          {
            type: 'search',
            position: 'right',
          },
        ],
      },
      footer: {
        style: 'dark',
        links: [
          {
            title: 'Docs',
            items: [
              {
                label: 'Tutorial',
                to: '/docs/handbook-structure-and-style-guide',
              },
            ],
          },
          {
            title: 'Community',
            items: [
              {
                label: 'Stack Overflow',
                href: 'https://stackoverflow.com/questions/tagged/docusaurus',
              },
              {
                label: 'Discord',
                href: 'https://discordapp.com/invite/docusaurus',
              },
              {
                label: 'Twitter',
                href: 'https://twitter.com/docusaurus',
              },
            ],
          },
          {
            title: 'More',
            items: [
              {
                label: 'Blog',
                to: '/blog',
              },
              {
                label: 'GitHub',
                href: 'https://github.com/facebook/docusaurus',
              },
            ],
          },
        ],
        copyright: `Copyright © ${new Date().getFullYear()} My Project, Inc. Built with Docusaurus.`,
      },
      prism: {
        theme: lightCodeTheme,
        darkTheme: darkCodeTheme,
      },
    }),
- Add this line to the configuration above to add link to navigation bar and footer.
{to: '/<folder_name>/<document_index_name>', label: '<Folder Name>', position: 'left', activeBaseRegex: `/docs/`,},
- If the folder is empty, add 1 document with its attribute
slug - (*) Note:
<document_index_name>is the index name akaslugof the first document in this folder. With typedocs, The Url must link to an existing fixed document. If this document is deleted, the url wouldn't work properly and it must be replaced by an existing document's index name.
a2. Configure a nested folder for client page:
- To add a folder within a folder, simply create another folder inside a folder in root
/of the project (e.g: docs, blogs, tech, sale, ...) - Add a json file (e.g:
_category_.json) to the folder that contains the nested folder. The content includes:
{
  "label": "Docusaurus Tutorial",
  "position": 2,
  "link": {
    "type": "generated-index",
    "description": "5 minutes to learn the most important Docusaurus concepts."
  }
}
- Parameters:
label: Display name of the current directory/folder, the doc resides in.position: position of the current directory.link.type: type of linklink.description: description of current directory
- You can add another
_category_.jsonfile to the nested folder to configure its display name, index, etc, ...
b. Configure a folder for admin page:
- The admin page is powered by NetlifyCMS or Netlify Content Management System.
- In order for the admin page to edit a document, it needs to access the document's folder/directory/collection.
- Open
static/admin/config.ymland add your folder configuration:
- name: sale
  label: "sale"
  folder: sale
  identifier_field: title
  extension: md
  widget: "list"
  create: true
  slug: "{{year}}-{{month}}-{{day}}-{{slug}}" # Filename template, e.g., YYYY-MM-DD-title.md
  fields:
    - { name: title, label: Title, widget: string }
    - { name: body, label: Body, widget: markdown }
    - { name: slug, label: Slug, widget: string }
    - label: "Tags"
      name: "tags"
      widget: "list"
    - label: "Authors"
      name: "authors"
      widget: "list"
      fields:
        - { name: name, label: Name, widget: string }
        - { name: title, label: Title, widget: string }
        - { name: url, label: URL, widget: string }
        - { name: imageUrl, label: ImageURL, widget: string }
- The configuration above adds a collection named
salewhich is also thesalefolder in root/of this project.
3.5 Images:
- Images can be placed anywhere in the designated folders in root / (except src,node_modules,build, and .docusaurus). Though it's recommended to put images in a folder which isn't displayed on navigation bar (e.g:
static/img/). - To add image to
static/img, simple move an image into that folder. - Images uploaded via admin page will be in
static/img/. - Images can be referenced by relative path.

For example: 
will display an image called how-to-document-thumb15.png with alternative title "how-to-document-thumb15"
3.6 Publishing:
- When you're done with the documentation process, add your changes to git:Tip: You can also right click on your document >
git add <path to document> <path to document2> <path to document3>Copy Pathto get its path - Commit your changes and add a message for your commit:
git commit -m "<your message>" - Push your changes to the source code to generate a temporary preview page of docs.gcalls.co. If this is your first time pushing on a new branch:else:
git push -u origin <your_branch_name>git push -u origin
4. View the publishing process (on GitLab):
- Go back to Gcalls-docs repository

- On the left side menu bar, click on CI/CD > Pipelines. You can see a list of available jobs triggered by Cloudflare Pages. On the top row, click on the running/passed button to view the latest job.
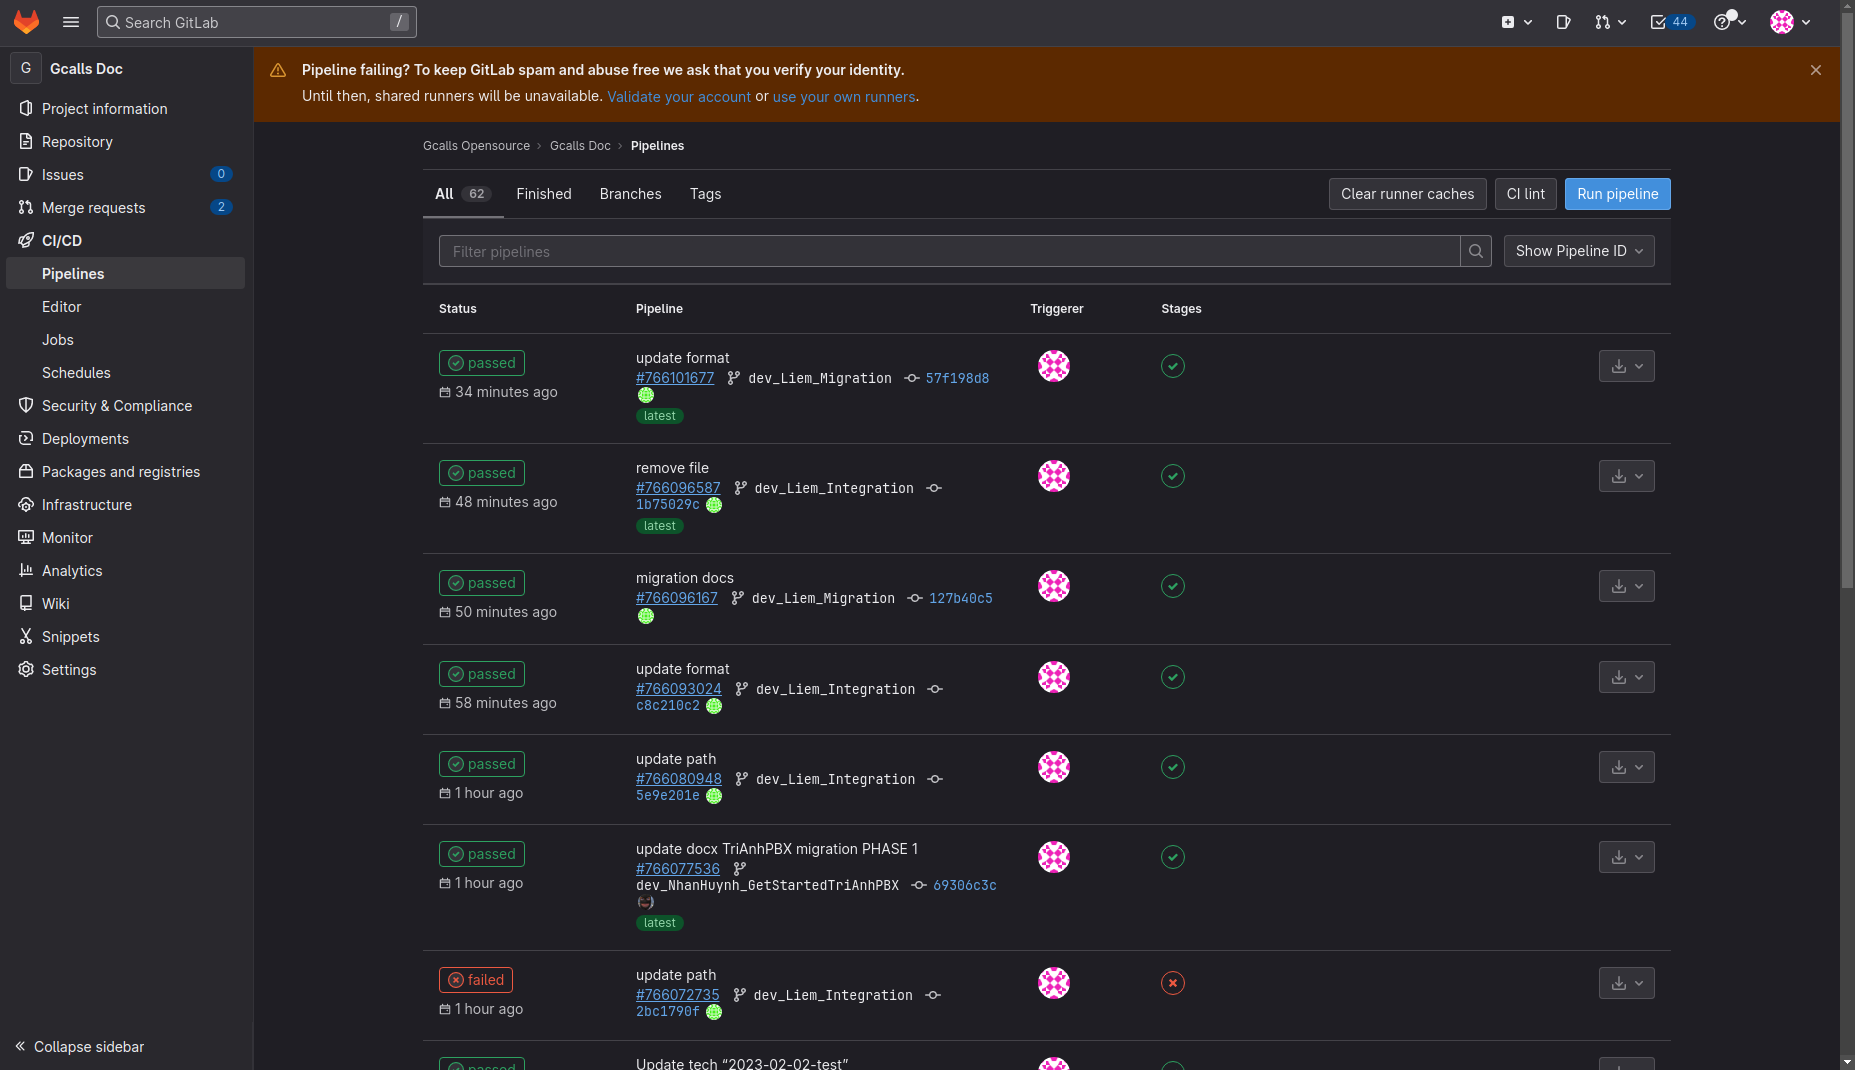
- Click Cloudflare Pages when it turns green to view the preview version of docs.gcalls.co with your changes.
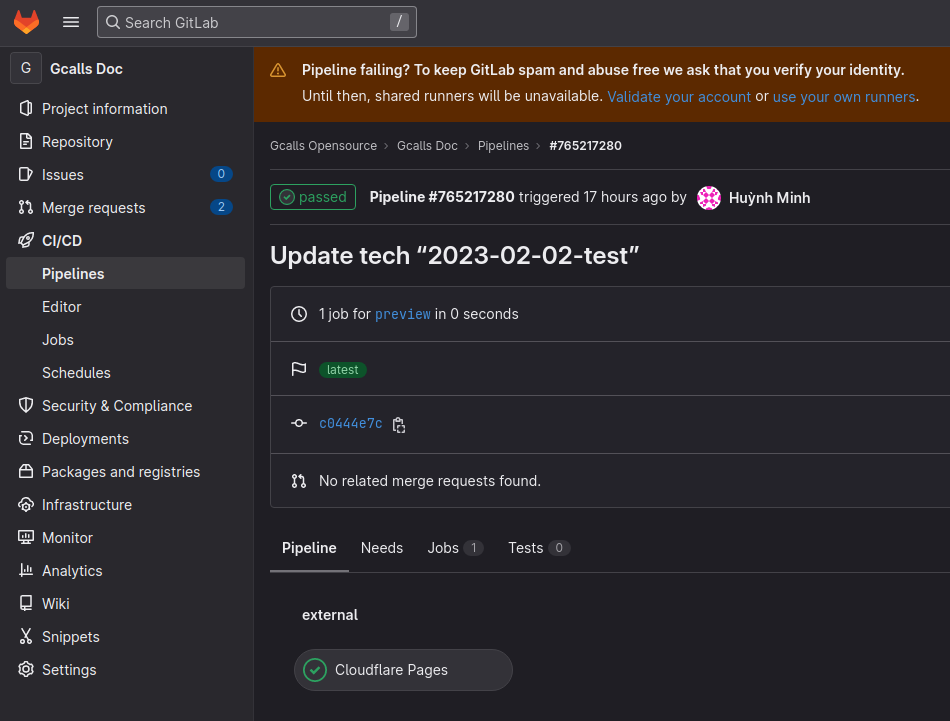
- It will open a preview link with your changes